Section 4: Connecting And Configuring Your
Computer – Print Driver Installation
38
a) Follow the instructions above for installing the Legend EX print driver to
the parallel port.
2. Connect the USB to Parallel cable to your computer and the Legend EX.
3. Configure USB Port.
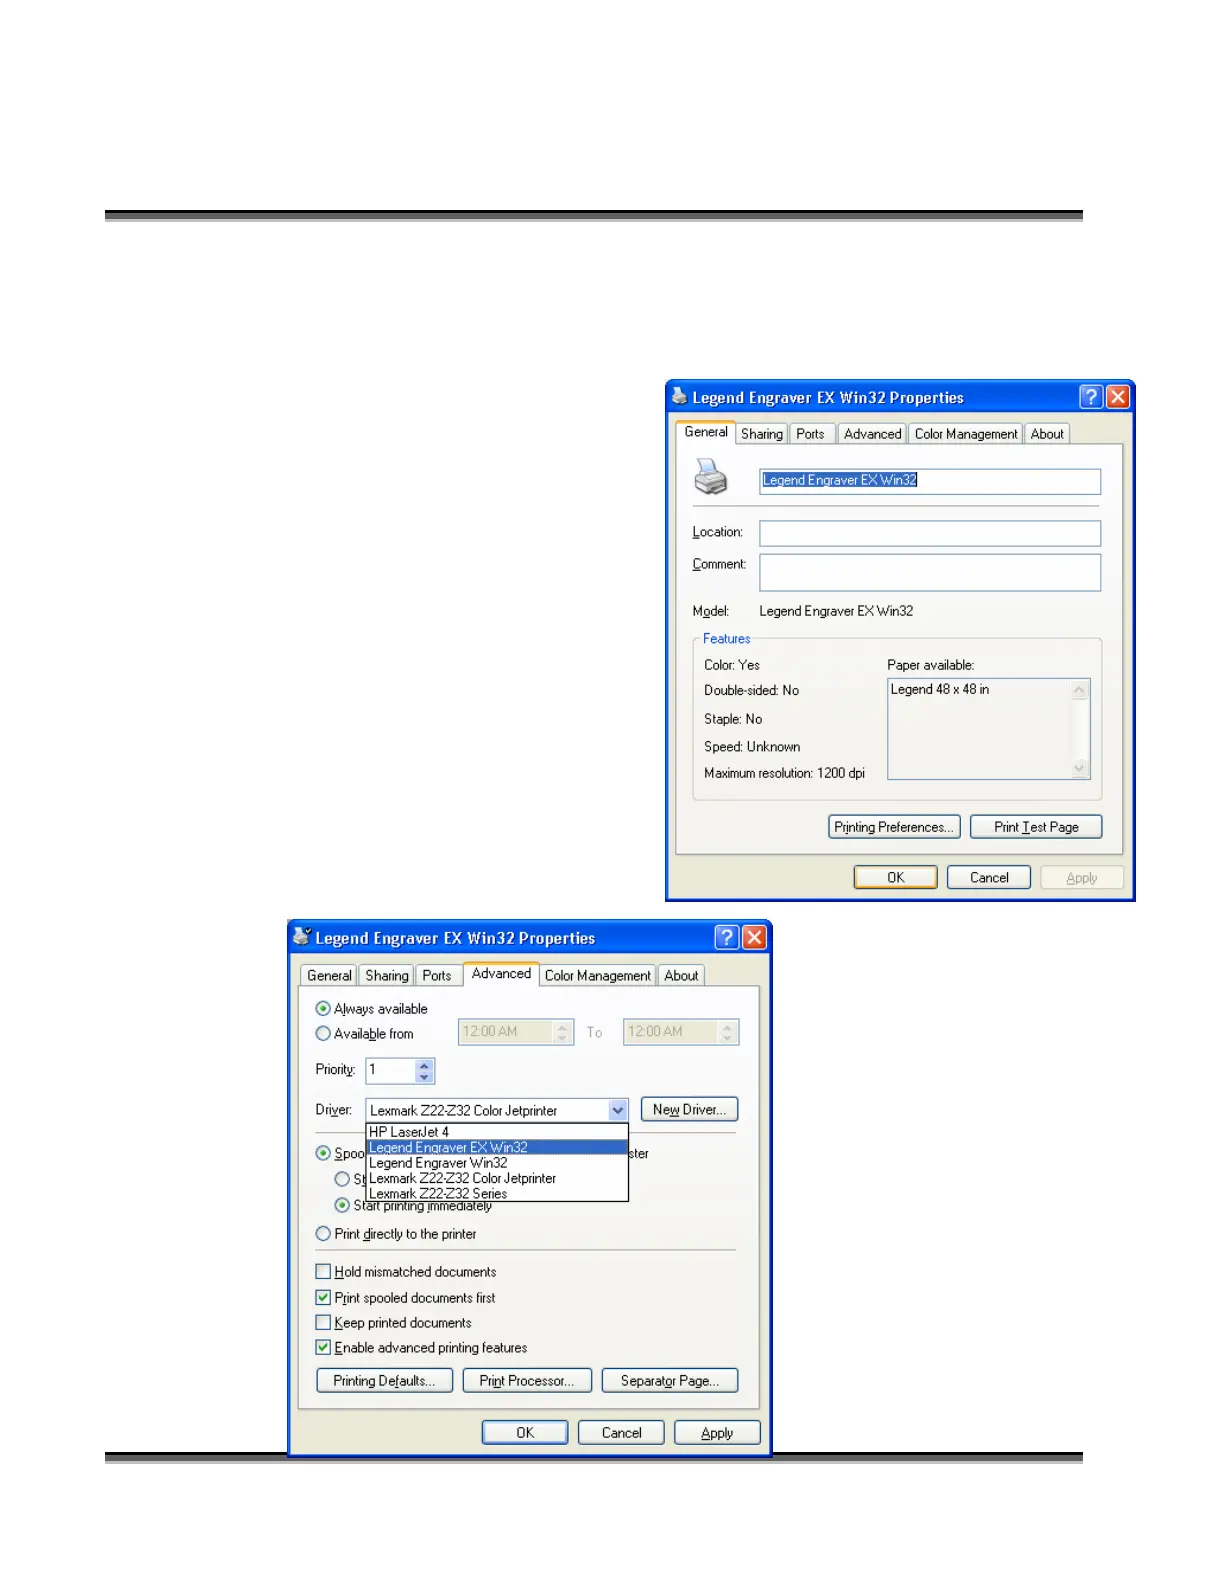
a) After the driver is installed to
the parallel port and the cable
is installed, click the START
button in the lower left hand
corner of your computer
screen.
b) Click on CONTROL
PANEL.
c) Click on the PRINTERS
AND FAXES ICON.
d) Highlight (single click) the
Legend Engraver EX Win32
driver icon.
e) Right click the highlighted
icon.
f) Scroll down to Properties and
click once. The following
screen appears:
1)
Click on the ADVANCED
tab.
Go to the DRIVERS box and
select the Legend Engraver
EX WIN32 driver.
Click APPLY.
 Loading...


