Epson Artisan 700/Epson Stylus Photo PX700W/TX700W Revision C
DISASSEMBLY/ASSEMBLY Disassembly Procedures 171
Confidential
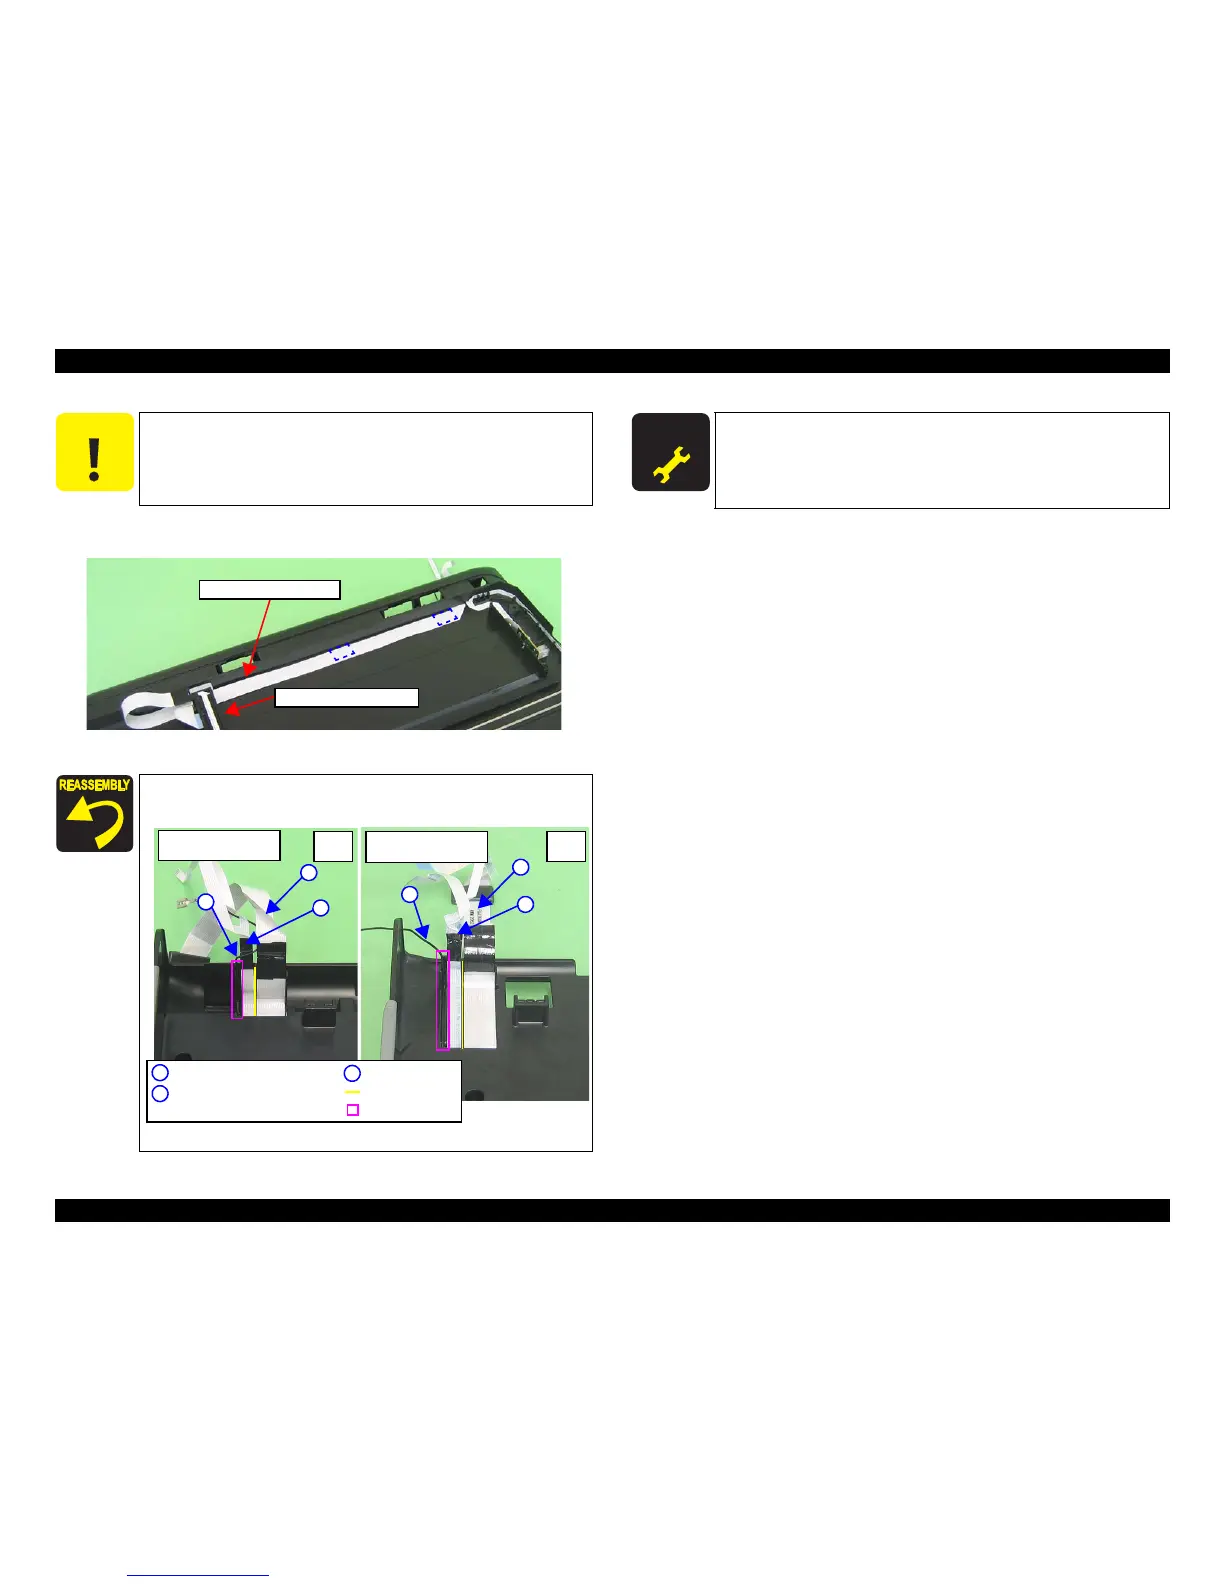
5. Peel off the Scanner Carriage FFC from the Scanner Lower Housing, and
remove the Scanner Carriage Unit.
Figure 4-170. Removing the Carriage Unit (3)
C A U T I O N
Be careful not to damage the Scanner Carriage FFC since they are
secured with double-sided tape (x2).
When attaching the Scanner Cable Cover, route the FFC and
Grounding Wire as shown below.
Figure 4-171. Attaching the Scanner Cable Cover
Scanner Carriage Unit
Scanner Carriage FFC
Scanner CR Encoder FFC,
Cover Open Sensor FFC
Scanner Carriage FFC
Grounding Wire
A
B
C
C
A
C
A
B
B
Rib
Groove
Rear
side
Artisan 800/PX800FW/
TX800FW
Artisan 700/PX700W/
TX700W
Rear
side
A D J U S T M E N T
R E Q U I R E D
After replacing or removing the Scanner Carriage, be sure to
perform the required lubrication. (See
Chapter 6
"MAINTENANCE"
.)