Epson Artisan 700/Epson Stylus Photo PX700W/TX700W Revision C
ADJUSTMENT Adjustment Using Adjustment Program 221
Confidential
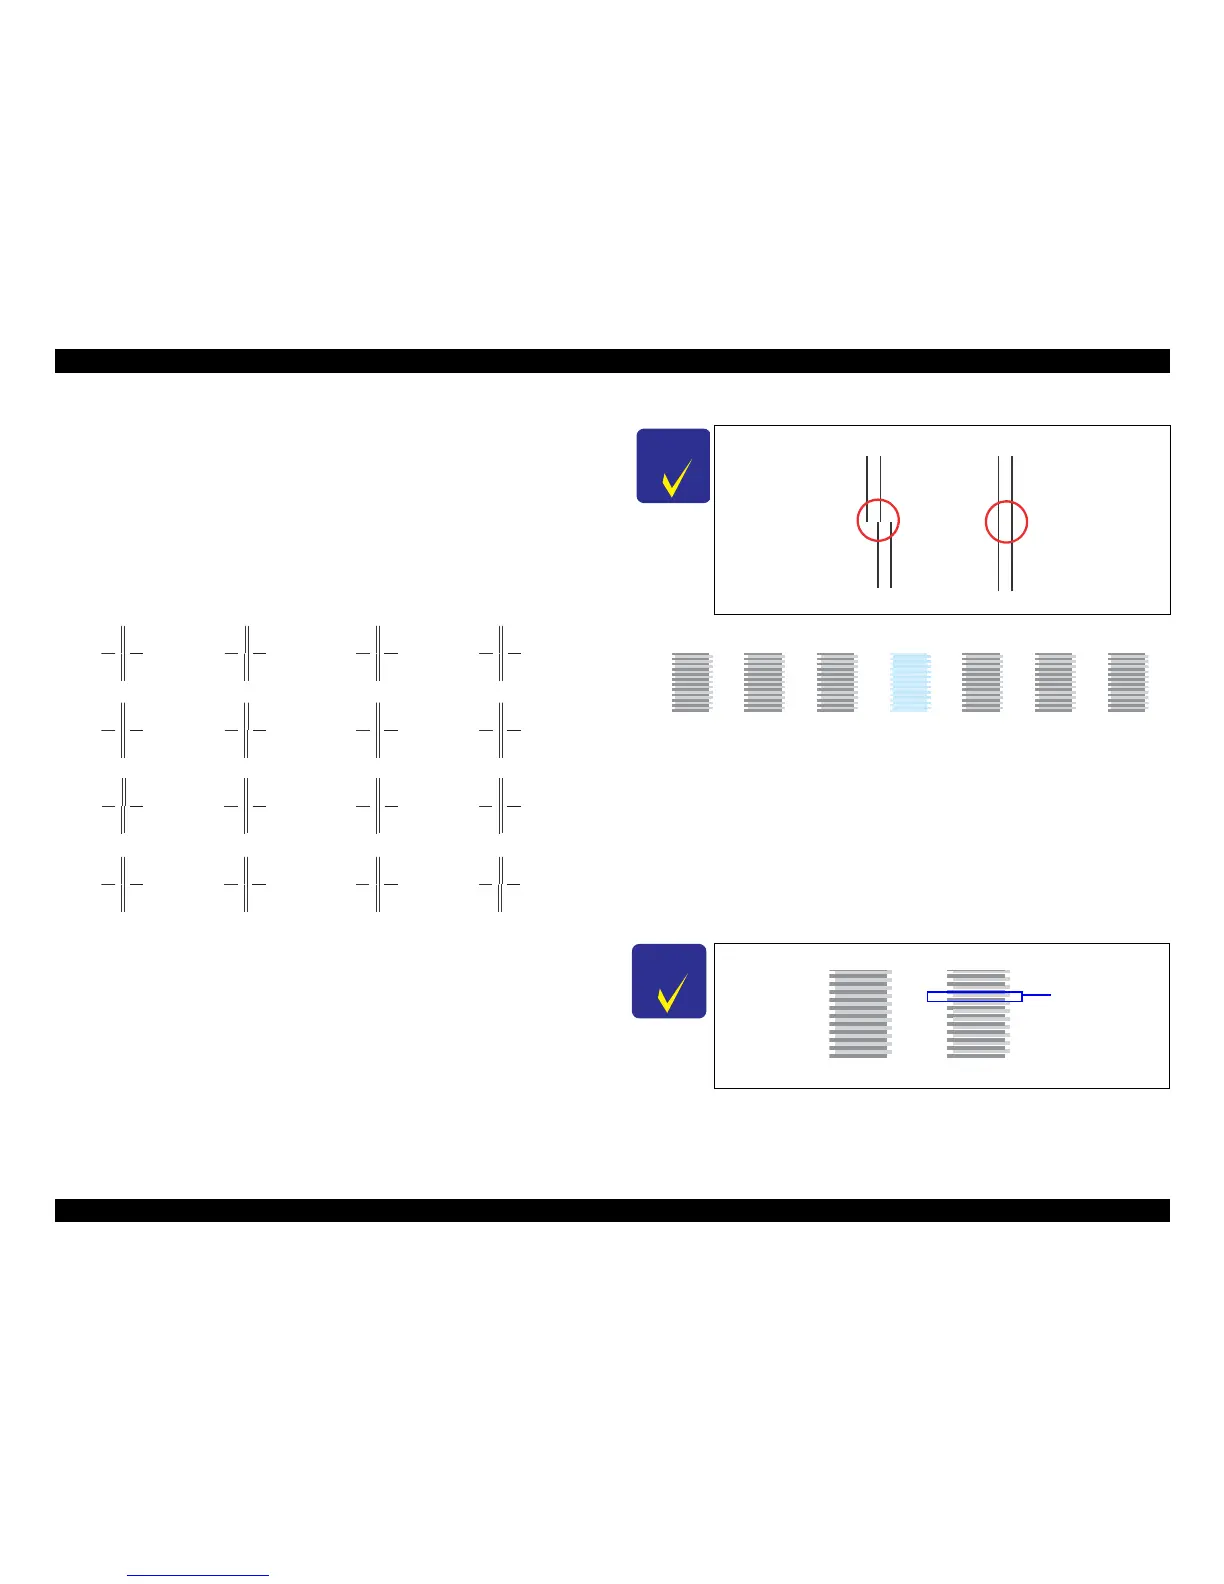
5.2.4 Head Angular Adjustment
Two patterns are printed as shown below.
Band pattern
The following pattern is printed. The lines below “1 to 80” are printed while the
carriage moves from the home to the
other side, and lines below “80 to 1” are printed
while the carriage returns to the home.
Figure 5-4. Head Angular Adjust
ment Printout Patt
ern (1)
How to Judge
Examine the printout patterns for both “0>>80”
and “0<<80", and e
nter the values of
the most straight lines.
Additional information
If the most straight lines are found on the pattern of either end, reassemble the
Printhead and carry out this adjust
ment again.
Microweave Pattern
Figure 5-5. Head angular adjustm
ent Pa
ttern Printing (2)
How to Judge
Examine the printout patterns (+2 to -2) and select the value for the group of which the
gaps
between the 2 color bars are the smallest.
Additional informatio
n
If the least gap pattern is found on either end, reas
semble/replace the Printhead.
䎓䎃䎡䎡䎃䎛䎓
0
2
4
8
6
0-column => 80 column case
䎓䎃䎟䎟䎃䎛䎓
0
2
4
8
6
80-column => 0 column case
C H E C K
P O I N T
Example for judgement
C H E C K
P O I N T
Example for judgement
NG OK
+3 +2 +1 0 -1 -2 -3
NGOK
Gap