Epson Artisan 700/Epson Stylus Photo PX700W/TX700W Revision C
DISASSEMBLY/ASSEMBLY Disassembly Procedures 172
Confidential
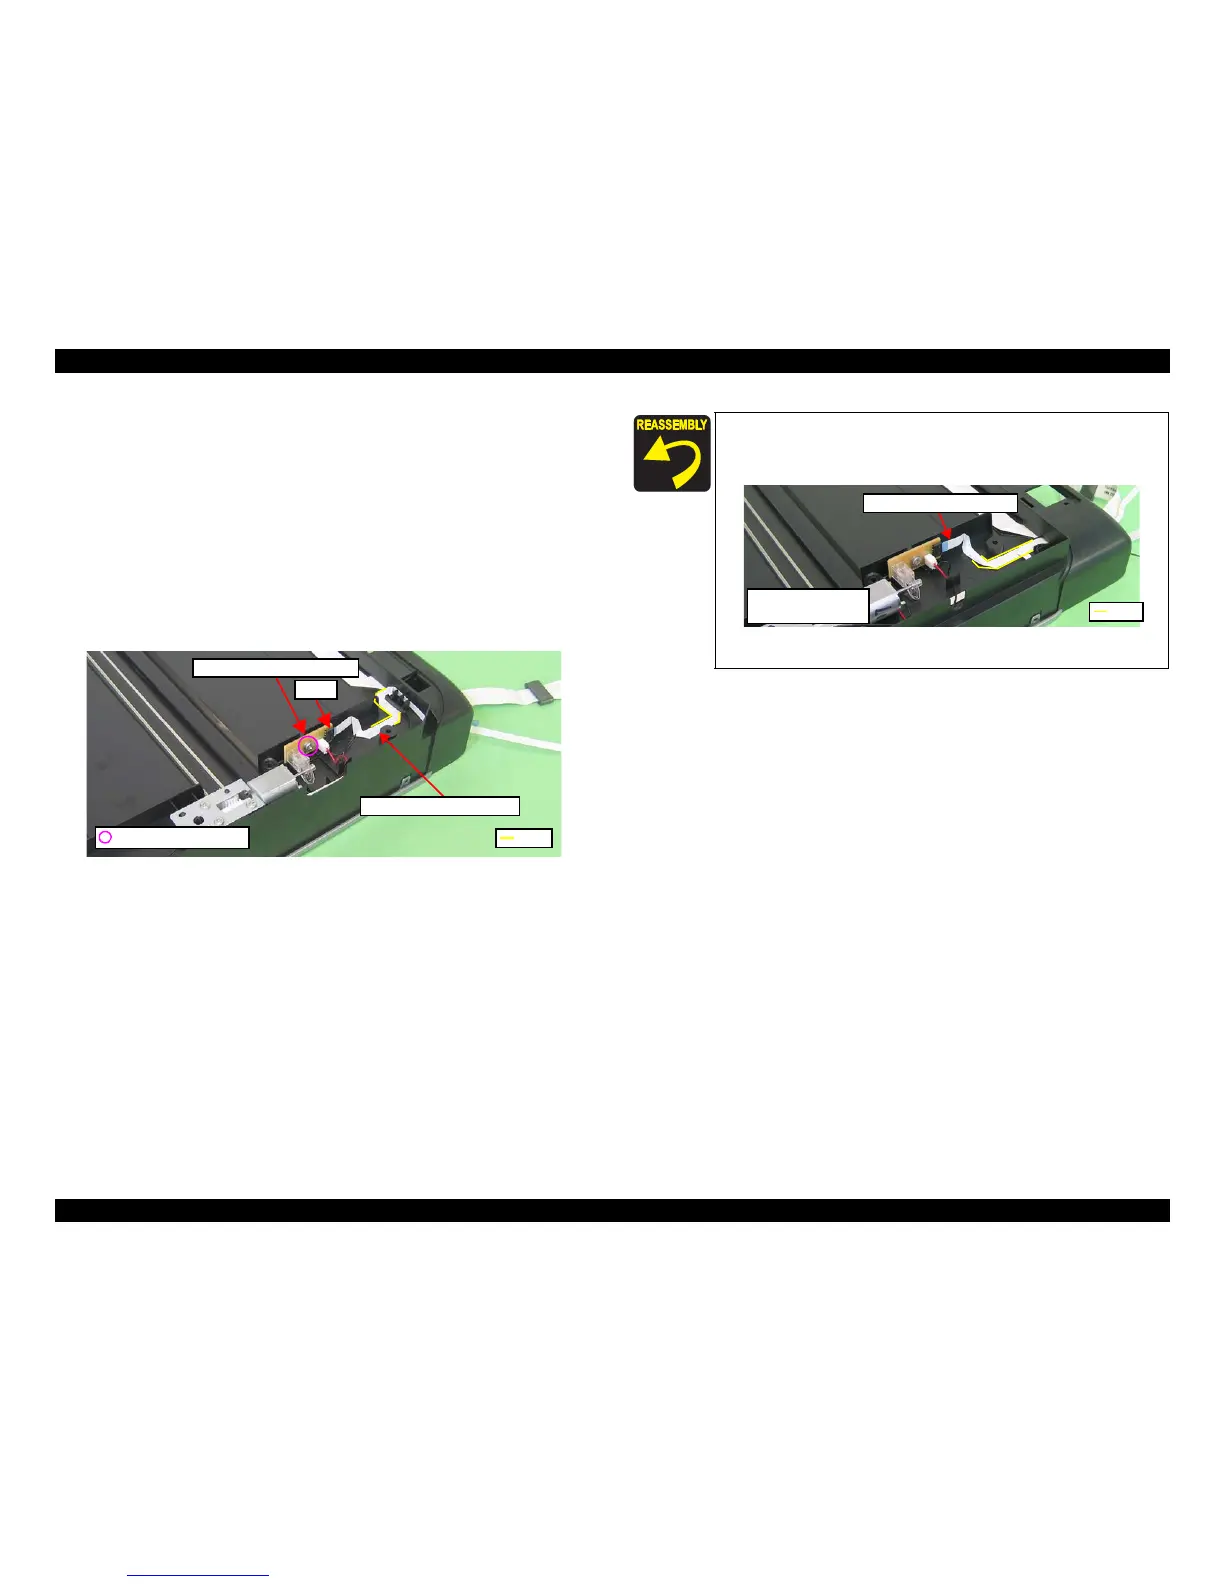
4.2.5.4 Scanner CR Encoder Board
Parts/Components need to be removed in advance:
Scanner Unit/ADF Unit/Scanner Upper Housing
Removal procedure
1. Disconnect the Scanner Motor cable from the connector on the Scanner
CR
Encoder Board. (See 4.2.5.2 Scanner Motor Unit Step1 (p168).)
2. Disconnect the Scanner CR Encoder FFC from the connector (CN1)
on the
Scanner CR Encoder Board.
3. Loosen the screw that secures the Scanner CR Encoder Board to the Scanner
Low
er Housing, and remove Scanner CR Encoder Board from the Scanner
Lower Housing.
Figure 4-172. Removing the Scanner CR Encoder Board
Scanner CR Encoder Board
CN1
Scanner CR Encoder FFC
Rib
C.B.S. 3x8 (5±1kgfcm)
When routing the Scanner CR Encoder FFC of Artisan 800/
PX800FW/TX800FW, route it as shown in
Fig. 4-168 and Fig. 4-172.
See Fig. 4-171 and below for Artisan 700/PX700W/TX700W.
Figure 4-173. Routing the FFC
(Artisan 700/PX700W
/TX700W)
Scanner CR Encoder FFC
Rib
Artisan 700/PX700W/
TX700W