4-10 Troubleshooting Rev. A
Confidential
Troubleshooting Tables
The tables contain the following columns:
❏ Problem
This is a symptom that can be verified.
❏ Probable cause
This is a listing of one or several possible causes that should be examined.
❏ Level
Level A The problem can be corrected by persons familiar with the printer who have
general knowledge, but special technical skills are not required.
Level B The problem requires thorough knowledge and familiarity with the printer as
well as technical skills and experience.
❏ Checkpoint
These are one or more areas in the printer that should be checked.
❏ Action
These are the steps to correct the problem. If the problem persists after taking these steps,
check the other possible causes listed.
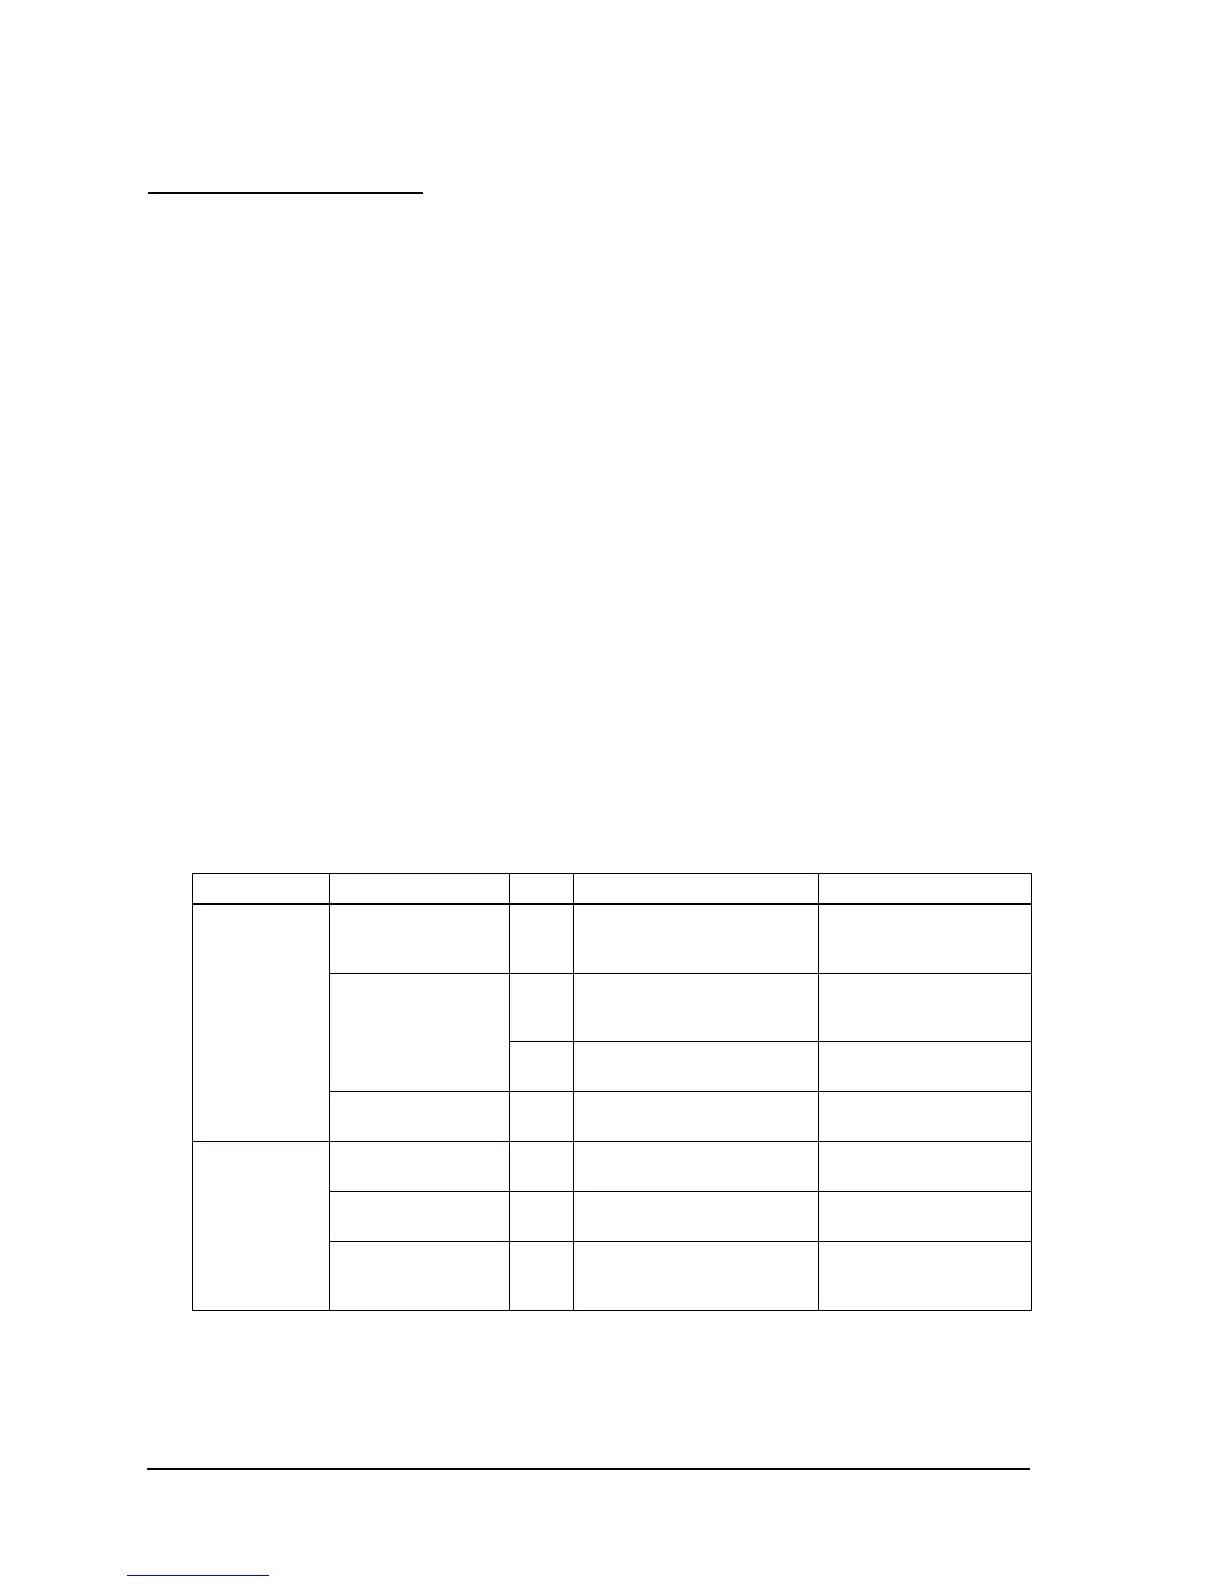
Table 4-1 Troubleshooting table for printer operation failure
Problem Probable cause Level Checkpoint Action
The POWER LED
does n
nn
no
oo
ot
t t
t l
ll
li
ii
ig
gg
gh
hh
ht
tt
t
when the power
is on.
The AC adapter may
be bad.
B Check output voltage of the
AC adapter (approximately
+40 VDC with no load).
Replace the AC adapter.
The fuse may be
blown.
B Check if fuse F1 on the main
circuit board assembly is blown.
Replace fuse F1. (See
“Replacing the Fuse” in
Chapter 5.)
B Check if fuse (R42) on the main
circuit board assembly is blown
Replace the main circuit
board.
The main PCB may be
bad.
B The cause is none of the
above.
Replace the main PCB.
The printer does
not print the self
test.
The main PCB may be
bad.
B Check the self test using
another main circuit board unit.
Replace the main PCB.
The FEED button may
be bad.
B Check the continuity of the
FEED button (SW2).
Replace SW2.
The printer
mechanism assembly
may be bad.
B The cause is none of the
above.
Replace the mechanism
assembly.

 Loading...


