Rev. A Disassembly, Assembly, and Adjustment 5-5
TM-U200 Series (Type A/AM) Technical Manual
Confidential
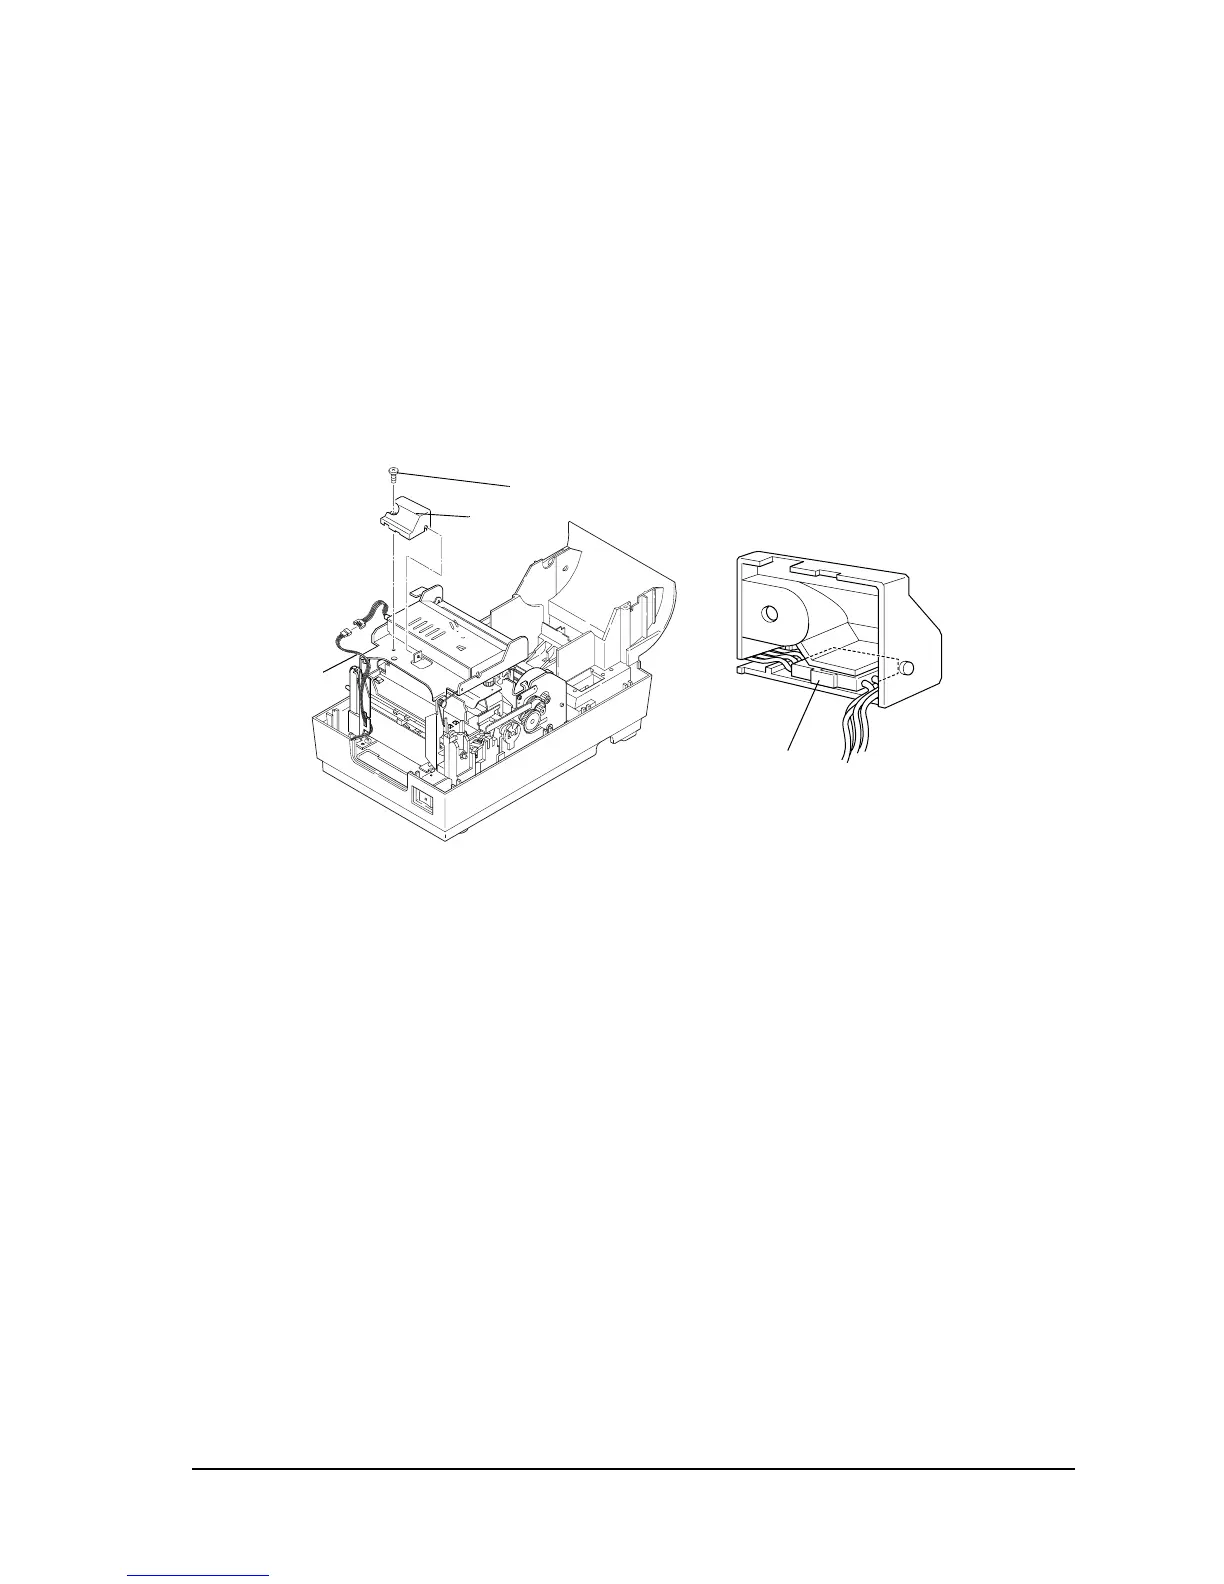
Removing the auto-cutter
1. Open the main cover assembly.
2. Remove 1 screw, and remove the auto-cutter cover. Remove the cable connector from the
auto-cutter cover (See the second part of the illustration below). Then disconnect the auto-
cutter cable from the cable connector for the auto-cutter.
(The illustration does not have the main cover assembly. However, it’s not necessary to
remove it.)
3. Remove 2 REs.
Auto-cutter
cable
Auto-cutter
cover
screw
Connector

 Loading...


