Page 9 of 66 0455-0323 Rev A
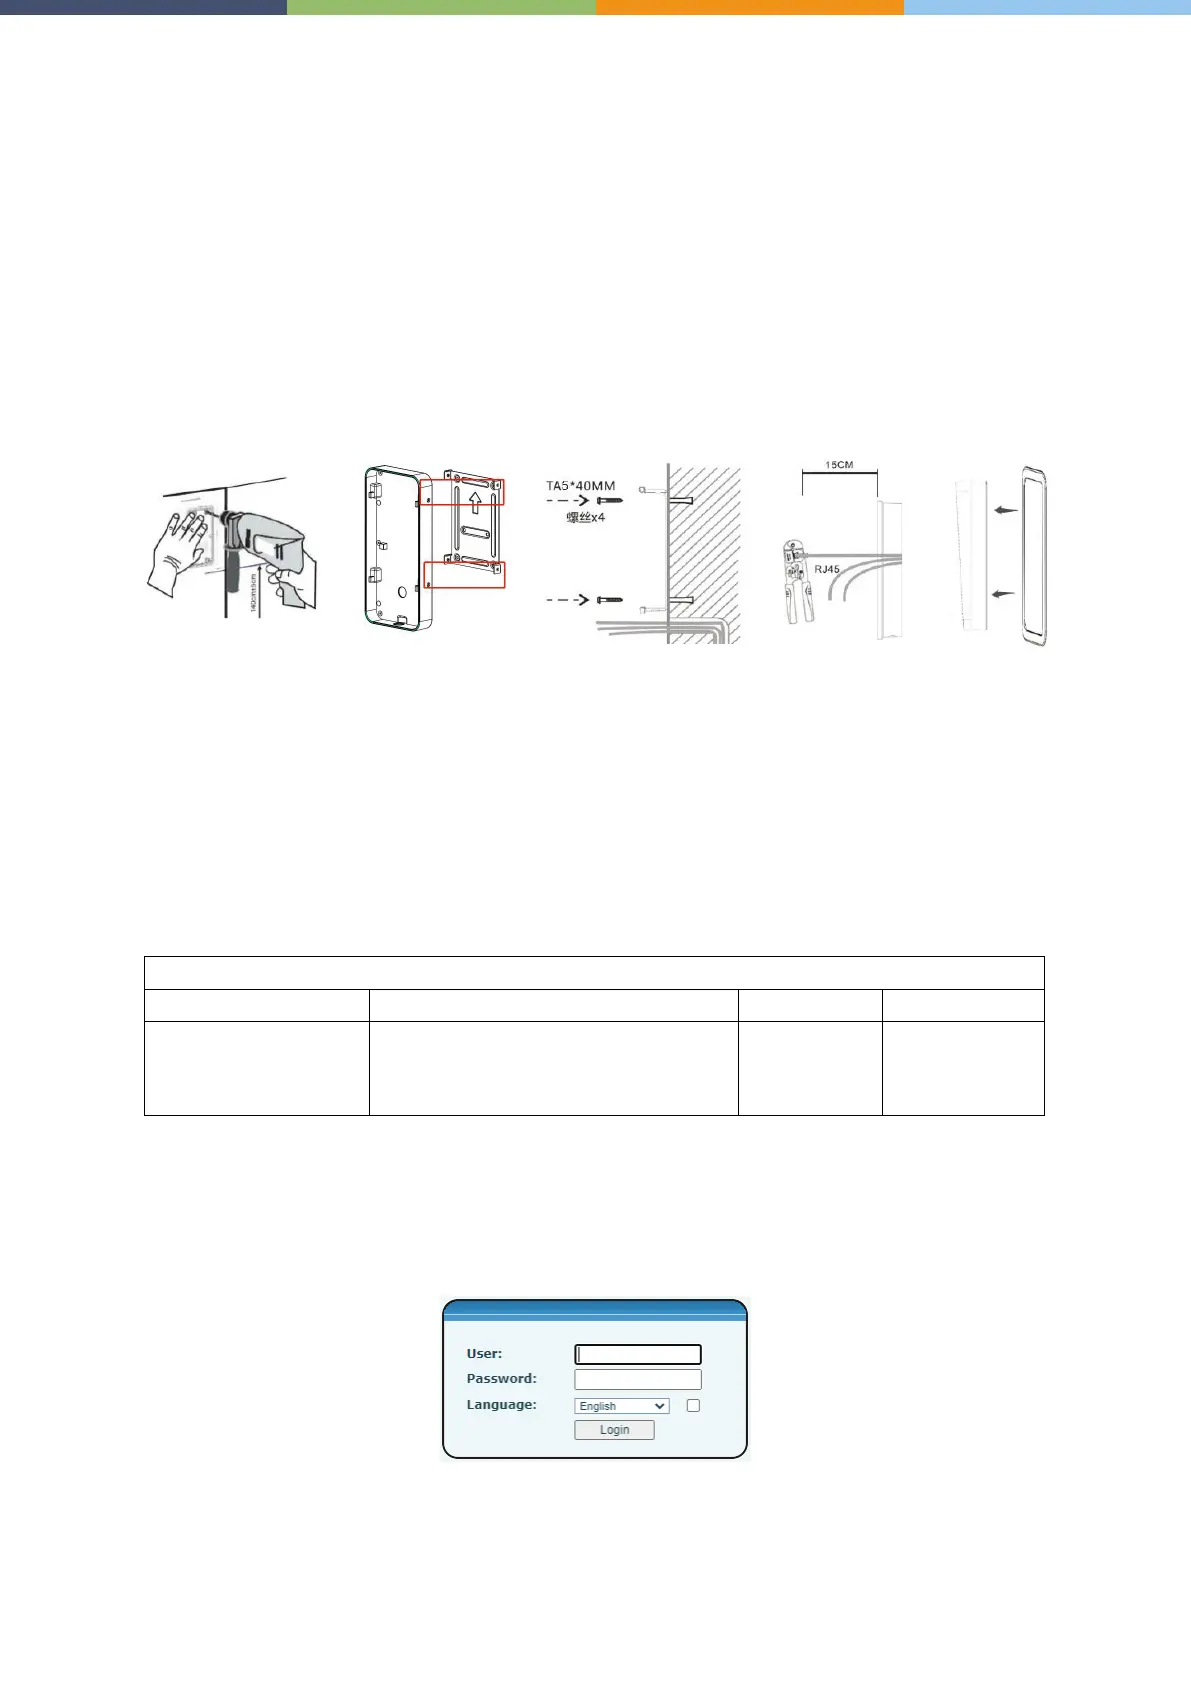
Wall Mounting
1.
Draw the installation holes on the wall according to the installation dimension drawing provided.
Use an electric drill to make the vacant place, after drilling the hole, remove the installation
dimension drawing, and use a hammer to drive the plastic plug into the drilled hole;
2.
Use a screwdriver to loosen the 4 screws on the back, separate the back shell from the wall
bracket, and lock the screws on the back of the device at the same time;
3.
Align the screw holes of the wall bracket with the holes made on the wall, and fix it to the wall with
the supplied screws;
4.
Pass all the wires through the silicone plug in the middle of the bottom shell. All wires need to
reserve a length of 8 inches (20cm).
5.
Hang the device and the wall bracket tightly from top to bottom, and tighten the screws at the
bottom
Device IP address
Method 1: Connect the speaker, press and hold the speed-dial button for 3 seconds (30 seconds after
power on), wait for the speaker to beep. Press the speed-dial button within 5 seconds, and the device
will automatically announce the IP address by voice.
Method 2: Press and hold the speed-dial button for 3 seconds, wait for the speaker to beep, press the
speed-dial button three times within 5 seconds, and the device will automatically announce the IP
address by voice after successfully switching to the network mode.
DHCP mode Default enable Static IP 192.168.1.128
Voice read IP address Press and hold the speed-
3 seconds, press the speed dial button
one times within 5 seconds.
Server port 80
WEB configuration
When the device and your computer are successfully connected to the network, enter the IP address
of the device on the browser as http://xxx.xxx.xxx.xxx/ and you can see the login interface of the web
page management.
Enter the username and password to log in to the web page. The default username and password are
admin / admin for eSIP and admin / SIPstn@ESI for eCloud.