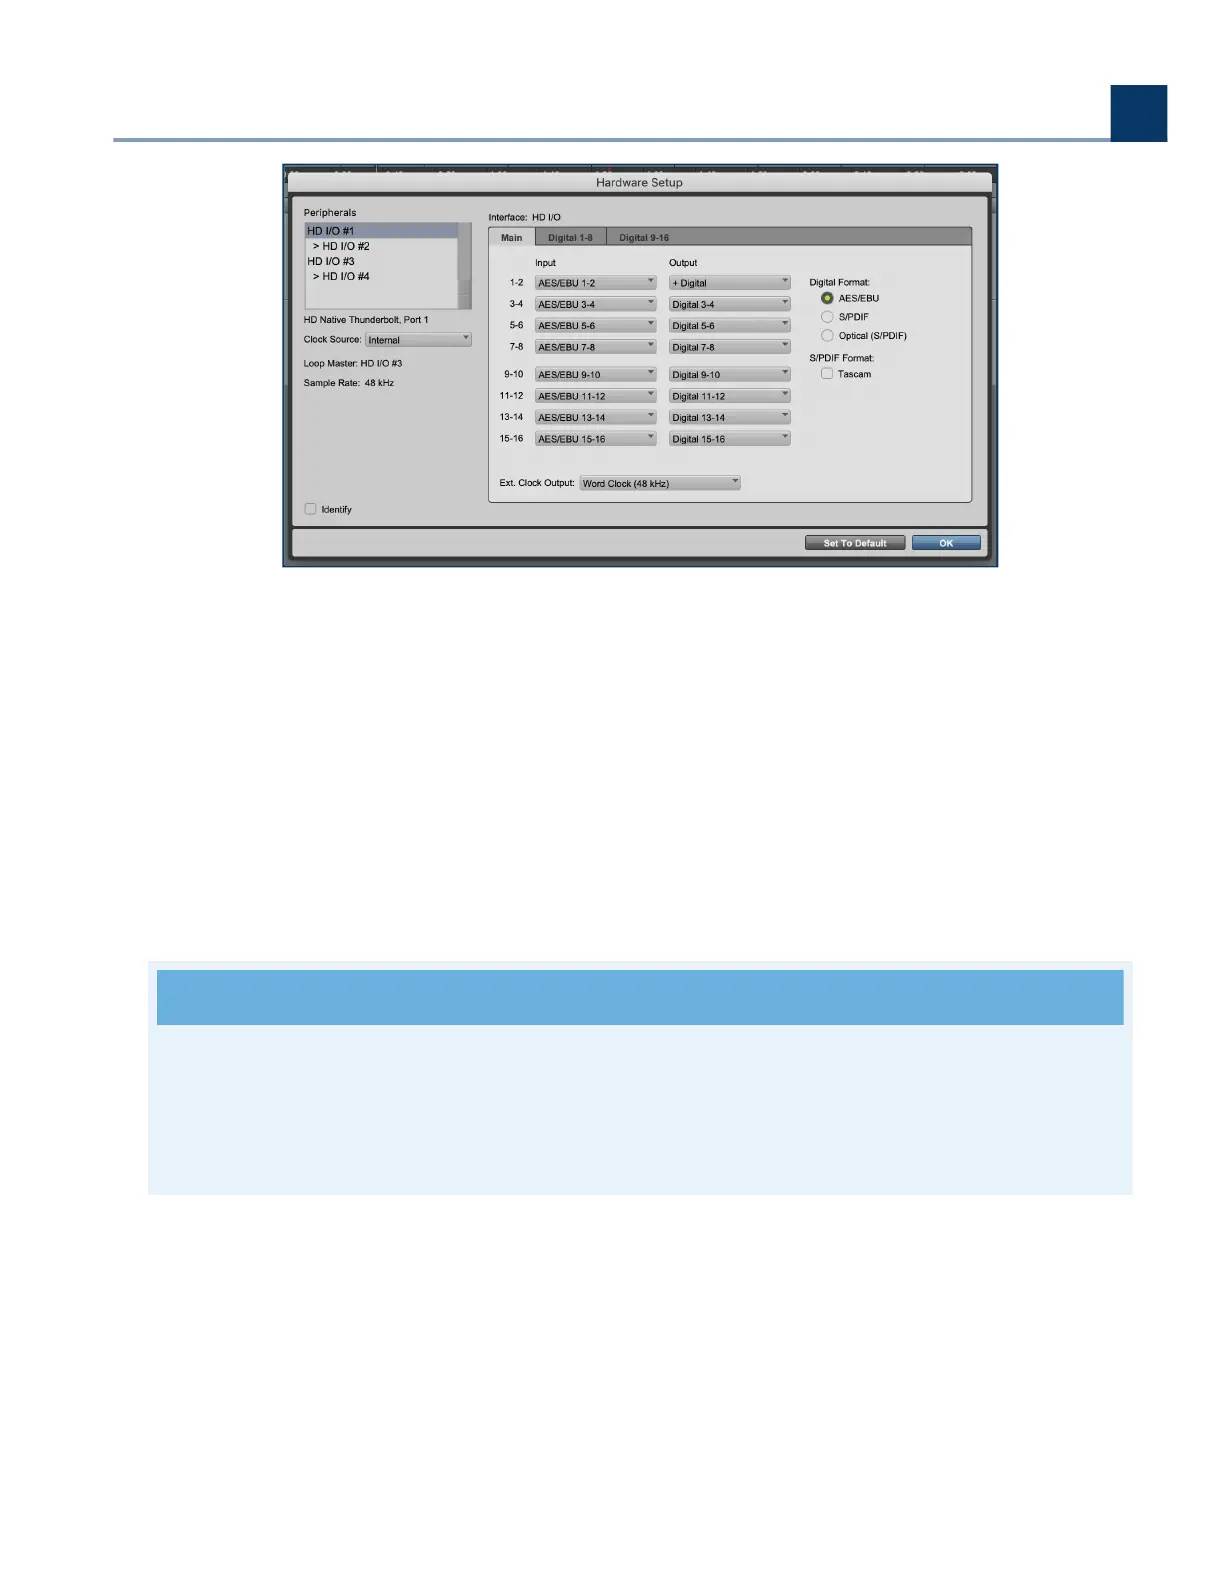
On the let side of the Hardware Setup page, your HD devices will appear in the Peripherals window.
In this case, we have our HD audio interface plugged into the Primary port, and the H9000 plugged in
to the Secondary port of the HD Native. In the Peripherals window, the HD audio interface will show
up as HD I/O #1 and #2, and the H9000 will show up as HD I/O #3 and #4.
Highlighting a device in the Peripherals window will allow you to view its I/O settings. In Pro Tools, the
hardware inserts for HD I/O #1 and #2 will appear as A 1-16 and B 1-16. Since the H9000 is plugged into
the Secondary port (HD I/O #3 and #4), its corresponding hardware inserts will be C 1-16 and D 1-16.
The I/O of the H9000 expansion card will show up in the Pro Tools Hardware Setup page as “Analog
1-16” when these are, in fact, digitally routed to the H9000.
Note
In Pro Tools, 1st party HD interfaces will show up with their proper name (i.e. HD OMNI) The
H9000 and other 3rd party HD devices will show up as “HD I/O” with its corresponding device
number as shown above.
If a LoopSync connection has been established between your H9000 and another HD device, you will
be able to use either the H9000 or the other HD device as the clock source. To select a clock source,
click on the Clock Source tab and a drop down menu will appear. In the above example, selecting HD
I/O #1 or #2 “Internal” will set the HD audio interface as the clock source and the H9000 will be
synced to it. Alternatively, selecting HD I/O #3 or #4 “Internal” will set the H9000 as the clock source.
7. Expansion Cards
Copyright © 2021, Eventide Inc.
 Loading...