Installing a Summit Family Switch (Models Other than Summit X460, X480, X650, and X670 Series)
Summit Family Switches Hardware Installation Guide
235
7 Connect the power cables.
● For AC-powered units, connect the power cable to the AC power connector on the back of the
switch. Then connect the power cable to an AC power socket.
● For information about DC-powered units, see “Installing Summit DC-Powered Switches” on
page 236.
8 Connect the switch to the redundant power supply (if applicable). For instructions to install and
connect redundant power supplies, see Chapter 2, “Summit Power Supplies.”
Free-Standing and Desktop Mounting of Multiple Switches
Summit family switches are supplied with four self-adhesive rubber pads for desktop mounting. The
pads keep the switch from scratching the supporting surface and help ensure adequate airflow around
the switches when they are mounted on top of one another.
To desktop mount your summit switches:
1 Carefully separate the four included rubber pads for each switch you are mounting.
2 Apply the pads to the underside of each device by placing a pad in the marked area at each corner
of the switch, ensuring that all corners are aligned.
NOTE
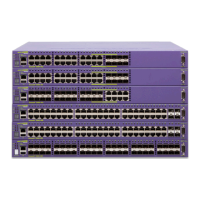
You can safely place up to four Summit family switches on top of one another.
Figure 174: Applying the Rubber Pads to the Underside Corners of the Summit Switch
CAUTION
If you are desktop mounting Summit X440-8t switches directly on top of each other, you must use the four
rubber pads to maintain adequate airflow around the units.
 Loading...