L (SX)
R (DX)
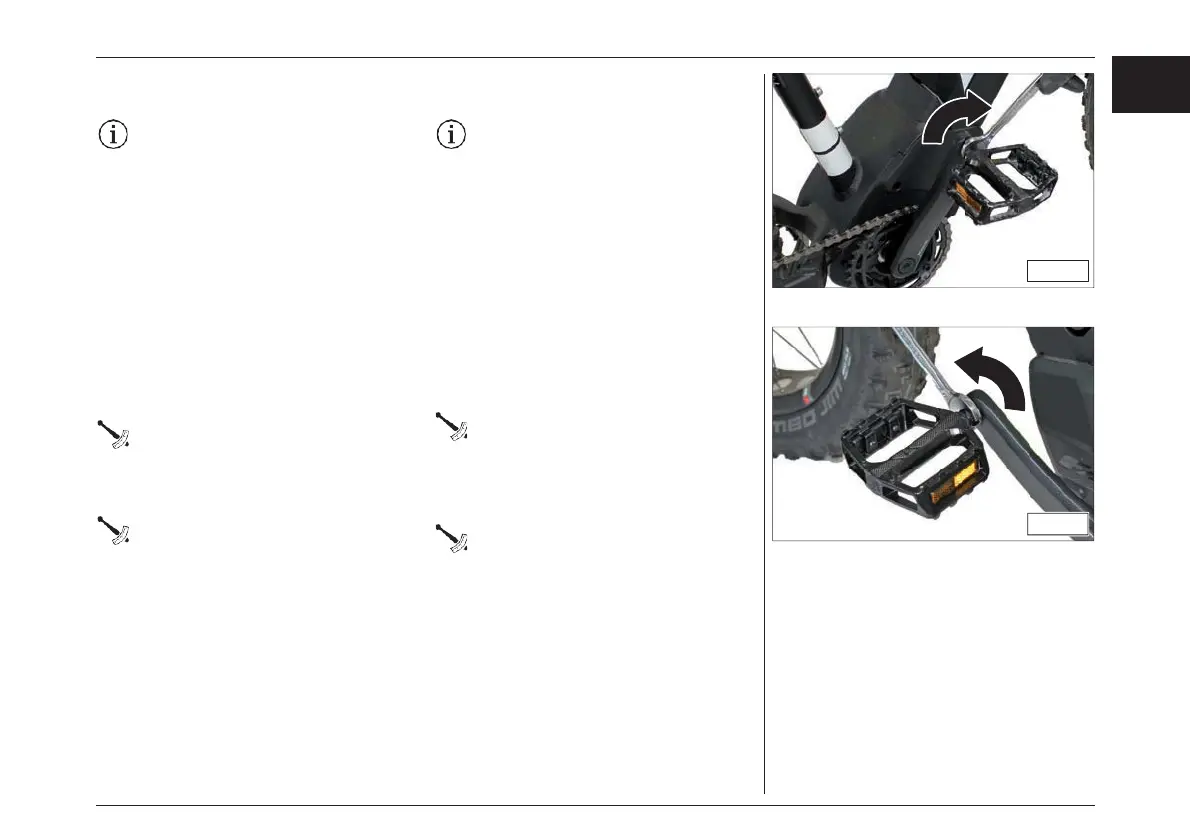
PEDALS INSTALLATION
Some of the operations described in
the section may be carried out by the
user without outside assistance. Only
attempt to carry out these procedure if
you have the correct tools.
The bicycle, for space reasons, is shipped without
the pedals.
To install the two pedals:
– Remove the film that protects the pedals.
– The pedals are different from each other and
are marked with the letters “R” (right) and “L”
(left).
– Screw the right pedal onto the right pedal
crank turning it clockwise.
Use a 15mm spanner to tighten the pedal
(see the “TIGHTENING TORQUE” table in
“CHECK AND INSPECTIONS” chapter).
Screw the left pedal onto the left pedal crank
turning it counter-clockwise.
Use a 15mm spanner to tighten the pedal
(see the “TIGHTENING TORQUE” table in
“CHECK AND INSPECTIONS” chapter).
ペダルの装着
このセクションで説明されている作業の一部
は、お客様ご自身で、技術者なしに行えま
す。但し、必ず正しい工具をお使いの上、作
業に携わってください。
自転車は梱包スペースの都合上、ペダル
を付けずに出荷しています。
ペダルの装着方法:
– ペダルを保護するフィルムを取り除いてください。
– 左右のペダルはそれぞれ専用品であり、間違
えないようにそれぞれに右“R”と左“L” の刻印
が記されています。
–
右ペダルを右ペダルクランクに時計回りにねじ込
みます。
15mm
スパナでペダルを締め付けます(「点
検・検査」の章の「締付トルク」の表を参照)。
– 左ペダルを左ペダルクランクに反時計回りにねじ
込みます。
15mm
スパナでペダルを締め付けます(「点
検・検査」の章の「締付トルク」の表を参照)。
組立と調整- ASSEMBLY AND ADJUSTMENTS
35
EN
JPN