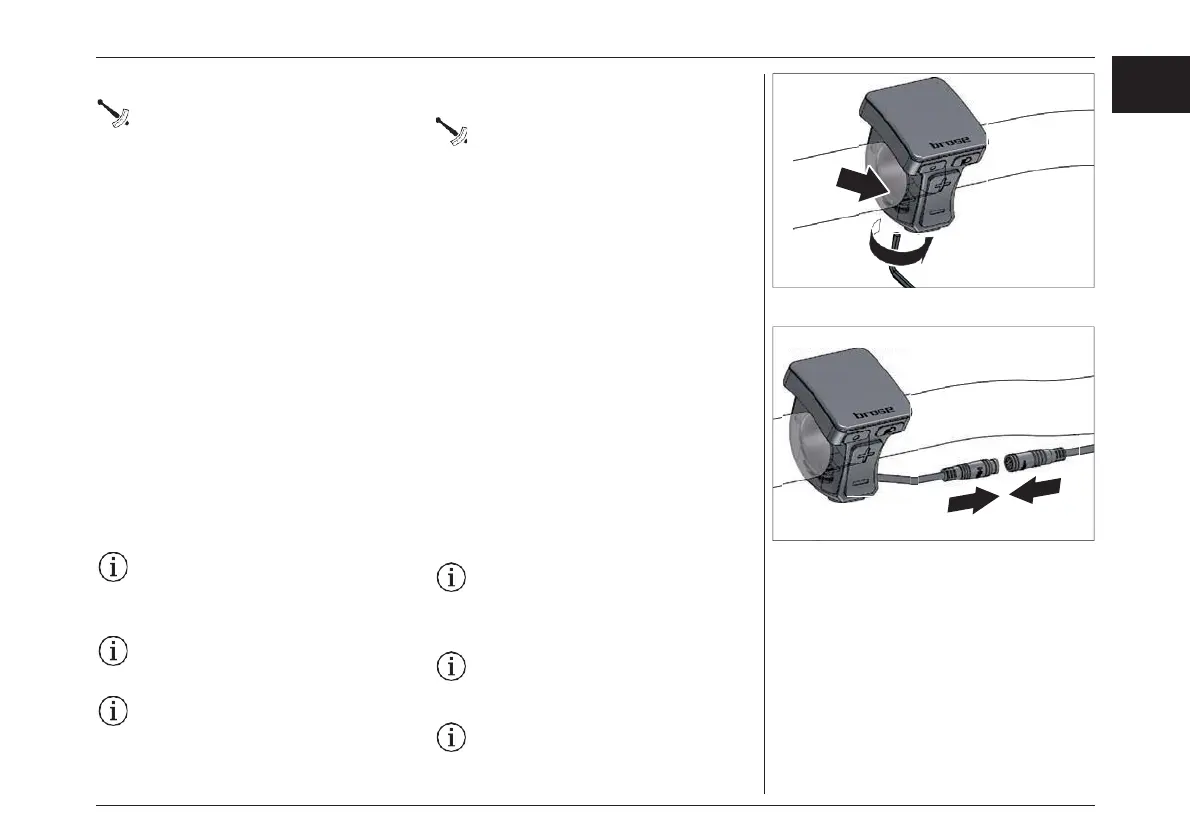
› Tighten the hexagon socket screw with the
wrench.
Torque 0.5 Nm
› Connect the control unit cable to the motor
cable connectors. This may vary depending on
the features of your e-bike.
OPERATION AND CONTROL
Before First Use
Commissioning of the display and control unit
requires no further steps after installation. The
display/control unit is ready for use as soon as it
has been correctly connected and the battery is
sufficiently charged.
A full function is only possible if the
speed sensor and all cables have been
connected correctly and the battery is
sufficiently charged.
The display unit does not have its own
battery and therefore cannot be used or
operated outside the e-bike.
If the e-bike is switched on, the display
unit remains switched on while riding;
even if the motor assistance is deactivated.
›六角レンチでネジを締めます。
指定トルク: 0,5 Nm
› コントロールユニットのケーブルを、モーターケーブ
ルのコネクターに接続します。お使いのe-bikeの機
能によって異なる場合があります。
コントロール制御
初回使用時に
ディスプレイ・コントロール・ユニットの試運転は、
設置後に必要ありません。表示・制御ユニットを
正しく接続し、バッテリーを十分に充電すれば、
すぐに使用することができます。
スピードセンサーとすべてのケーブルが正
しく接続され、バッテリーが十分に充電され
ている場合にのみ、完全な機能が発揮され
ます。
ディスプレイにはバッテリーが搭載されていないため、
e-bike以外での使用や操作はできません。
e-bike
のスイッチが入っていれば、モー
ターアシストが解除されていても、走行中
はディスプレイユニットのスイッチが入った
ままになります。
67
EN
JPN
ディスプレイ- DISPLAY