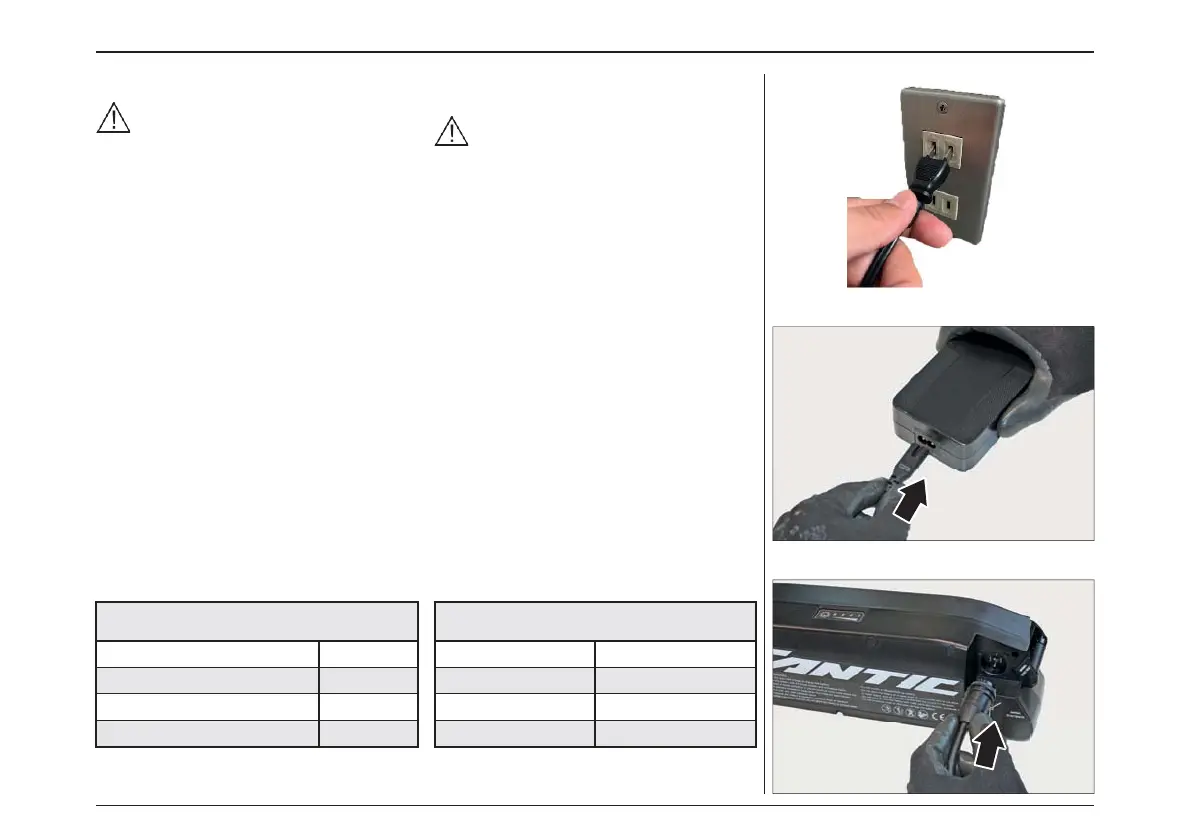
– Connect the power cable to the electrical
mains socket.
Make sure that the electrical mains
supply voltage corresponds to the value
indicated on the battery charger data
plate.
– Connect the small plug on the power cable to
the socket on the battery charger.
– Connect the charger connector to the socket
on the battery pack.
– At this point the battery starts to recharge.
– The LEDs on the battery pack light up to
indicate the charge level. When all four LEDs
are lit it indicates that the battery pack is fully
charged. Each LED corresponds to approx.
25% of the full charge.
– Disconnect the battery charger from its power
supply and the connector from the battery
pack.
– Once the battery pack has been fully charged,
if it remains connected to the battery charger,
and the latter remains connected to its power
supply, after two hours, the battery charger
re-checks the state of the battery and, if
necessary, starts to recharge it again.
– The LEDs on the battery charger indicate its
current state.
– 電源ケーブルをコンセントに接続します。
主電源の電圧が、バッテリーチャージャー
のデータプレートに記載されている電圧値
(V)の範囲内に収まっていることを確認して
ください。
– 電源ケーブルの小さなプラグを、バッテリー
チャージャー本体のソケットに接続します。
– 充電器のコネクターをバッテリーパックのソケッ
トに接続します。
– 接続するとバッテリーの充電が始まります。
– バッテリーパックのLEDが点灯して、充電レベ
ルを示します。4つのLEDがすべて点灯すると、
バッテリーパックが満充電されていることを示し
ます。それぞれのLEDは充電量、約25%を示し
ています。
– バッテリーチャージャーの電源を切り、バッテ
リーパックのコネクターを外します。
– バッテリーパックが満充電後もバッテリーチャー
ジャーに接続されたままの場合、メンテナンス
モードに切り替わり、2時間毎にバッテリーの状
態を再確認し、必要であれば再び充電を開始し
ます。
– バッテリーチャージャーのLEDの色は、下図の
状態を示しています。
Led
スタンバイ 緑
充電中 赤
充電完了(メンテナンスモード) 緑
エラー 赤点滅
Led
Stand-by Green
Carging Red
Battery charged Green
Error Blinking red
電動アシスト機構を使いこなそう- USING POWER ASSISTED PEDALLING
56