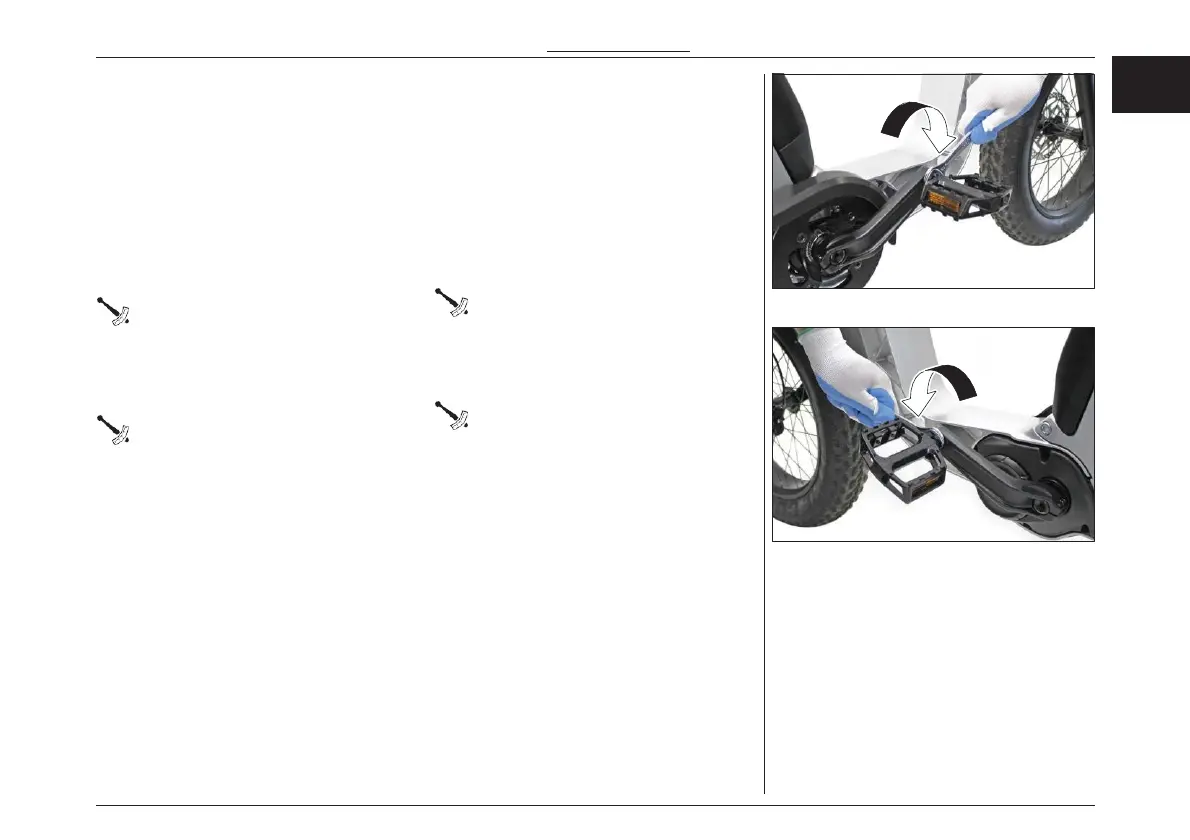
PEDALS INSTALLATION
The bicycle, for space reasons, is shipped without
the pedals.
To install the two pedals:
– Remove the film that protects the pedals.
– The pedals are different from each other and
are marked with the letters “R” (right) and “L”
(left).
– Screw the right pedal onto the right pedal
crank turning it clockwise.
Use a 15mm spanner to tighten the pedal
(see the “TIGHTENING TORQUE” table in
“CHECK AND INSPECTIONS” chapter).
Screw the left pedal onto the left pedal crank
turning it counter-clockwise.
Use a 15mm spanner to tighten the pedal
(see the “TIGHTENING TORQUE” table in
“CHECK AND INSPECTIONS” chapter).
ペダルの装着
この自転車は、スペースの都合上、ペダ
ルを付けずに出荷されます。
2つのペダルを取り付けるには:
– ペダルを保護しているフィルムを剥がします。
– ペダルは互いに異なり、「R」(右)と「L」(左)
の文字が付いています。
– 右側のペダルを右側のペダルクランクにネジ
で固定します。
ペダルの締め付けには、15mm スパナ
を使用してください(「点検・検査」の「締め
付けトルク」の表を参照)。
– 左ペダルを左ペダルクランクにねじ込み、反
時計回りに回します。
ペダルの締め付けには、15mm スパナ
を使用してください(「点検・検査」の「締め
付けトルク」の表を参照)。
分解と調整- ASSEMBLY AND ADJUSTMENTS
35
EN
JPN