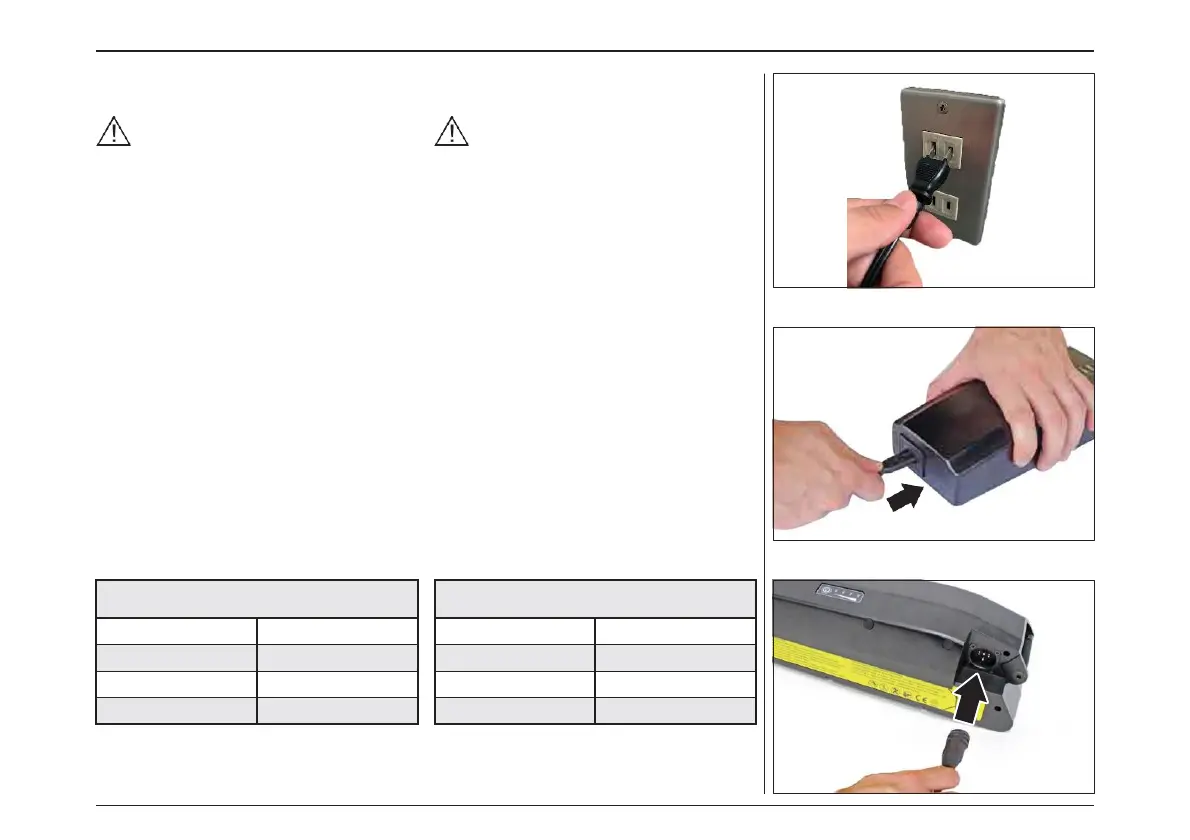
– Connect the power cable to the electrical
mains socket.
Make sure that the electrical mains sup-
ply voltage corresponds to the value indi-
cated on the battery charger data plate.
– Connect the small plug on the power cable to
the socket on the battery charger.
– Connect the charger connector to the socket
on the battery pack.
– At this point the battery starts to recharge.
– The LEDs on the battery pack light up to indi-
cate the charge level. When all four LEDs are
lit it indicates that the battery pack is fully
charged. Each LED corresponds to approx.
25% of the full charge.
– Disconnect the battery charger from its pow-
er supply and the connector from the battery
pack.
– Once the battery pack has been fully charged,
if it remains connected to the battery charger,
and the latter remains connected to its power
supply, after two hours, the battery charger
re-checks the state of the battery and, if neces-
sary, starts to recharge it again.
– The LEDs on the battery charger indicate its
current state.
– 電源ケーブルをコンセントに接続します。
主電源電圧が、バッテリー充電器のデー
タプレートに記載されている値に対応して
いることを確認してください。
– 電源ケーブルの小型プラグをバッテリー充電
器のソケットに接続します。
– 充電器のコネクタをバッテリーパックのソケッ
トに接続します。
– この時点でバッテリーの充電が始まります。
– バッテリーパックのLEDが点灯し、充電レベル
を示します。4つのLEDがすべて点灯すると、
バッテリーパックが完全に充電されていること
を示しています。各 LED は、フル充電の約
25% に対応しています。
– バッテリー充電器を電源から外し、バッテリー
パックのコネクタを外します。
– バッテリーパックが完全に充電された後、バッ
テリー充電器に接続されたままであれば、2
時間後にバッテリー充電器がバッテリーの状
態を再チェックし、必要に応じて再充電を開始
します。
– LEDは現在バッテリー充電の状態を示します。
電動アシスト機構を使いこなそう - USING POWER ASSISTED PEDALLING
48