B A
– Remove the wheel unit (see the preceding sec-
tion in this chapter).
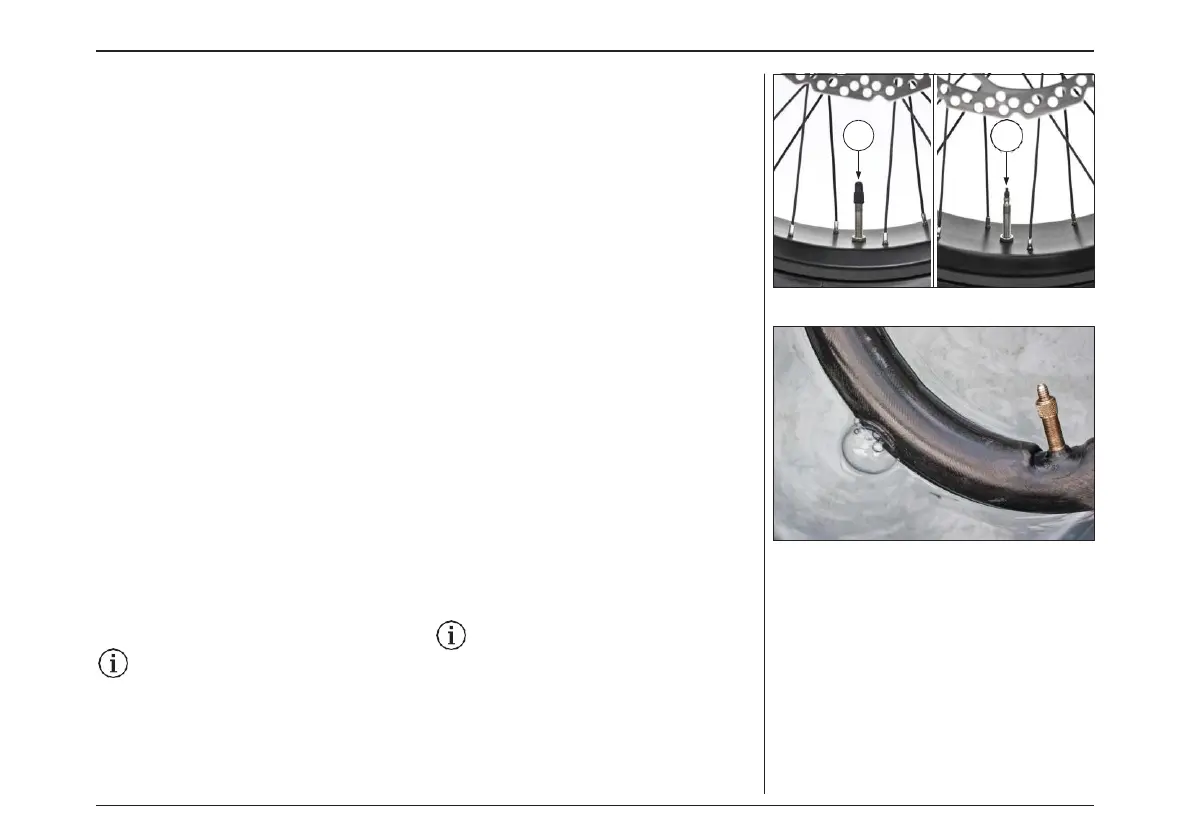
– Remove the valve safety cap “A”.
– Deflate the tyre completely by pressing the in-
ner valve “B”.
– Lift the tyre away from the wheel rim using the
tyre levers and starting from the point oppo-
site the valve.
– Remove the inner tube from inside the tyre.
Make a note of how the inner tube was aligned
inside the tyre.
– Identify the cause of the puncture:
– Inflate the defective inner tube using the bicy-
cle pump.
– Attempt to find the point where the air es-
capes.
– If it is possible to identify the air leak, twist the
inner tube around so that the valve is pointing
inwards.
If the leak is located on the inner surface:
– Check that the rim protection band is posi-
tioned correctly in its housing.
– Check that all the spoke holes are covered. If
not, contact your vendor.
– Check the rim for signs of damage (sharp
edges, chips, splinters, etc.). If you notice any
damage of this type, contact your vendor.
– Check whether there are multiple puncture
holes located close to each other.
If so, it may indicate a “snake bite”,
which is caused by riding over sharp ob-
jects when the tyre pressure is too low.
– If the rim is not damaged, fit a new inner tube.
– ホイールユニットを取り外します(本章の前項
参照)。
– バルブセーフティキャップ "A "を外します。
– インナーバルブ “B” を押して、タイヤから完
全に空気を抜いてください。
– タイヤレバーを使って、バルブの反対側から
タイヤをホイールリムから持ち上げます。
– インナーチューブをタイヤの内側から外します。
インナーチューブがタイヤの内側にどのように
配置されていたかをメモしておきます。
– パンクの原因を特定します。
– 自転車用ポンプを使って、不良のインナー
チューブに空気を入れます。
– 空気の抜けた場所を探してください。
– 空気が漏れている場所を特定できたら、バル
ブが内側に向くようにインナーチューブをね
じってください。
内面に漏れがある場合:
– リム保護バンドがハウジング内に正しく配置さ
れて いることを確認します。
– すべてのスポーク穴が覆われていることを確
認してください。覆われていない場合は、販売
店に連絡してください。
– リムに損傷の兆候(鋭利なエッジ、欠け、破片
など)がないか確認します。この種の損傷に
気づいた場合は、ベンダーに連絡してください。
– 互いに近い位置に複数のパンク穴があるか
どうかを確認してください。
もしそうであれば、タイヤの空気圧が低す
ぎるときに鋭利なものを乗り越えることで
起こる「蛇噛み」を示している可能性があ
ります。
– リ ム に 損 傷 が な け れ ば 、 新 し い イ ン ナ ー
チューブを装着します。
清掃およびお手入れ- CLEANING AND MAINTENANCE
84