Inspection Route15
Figure 15.1
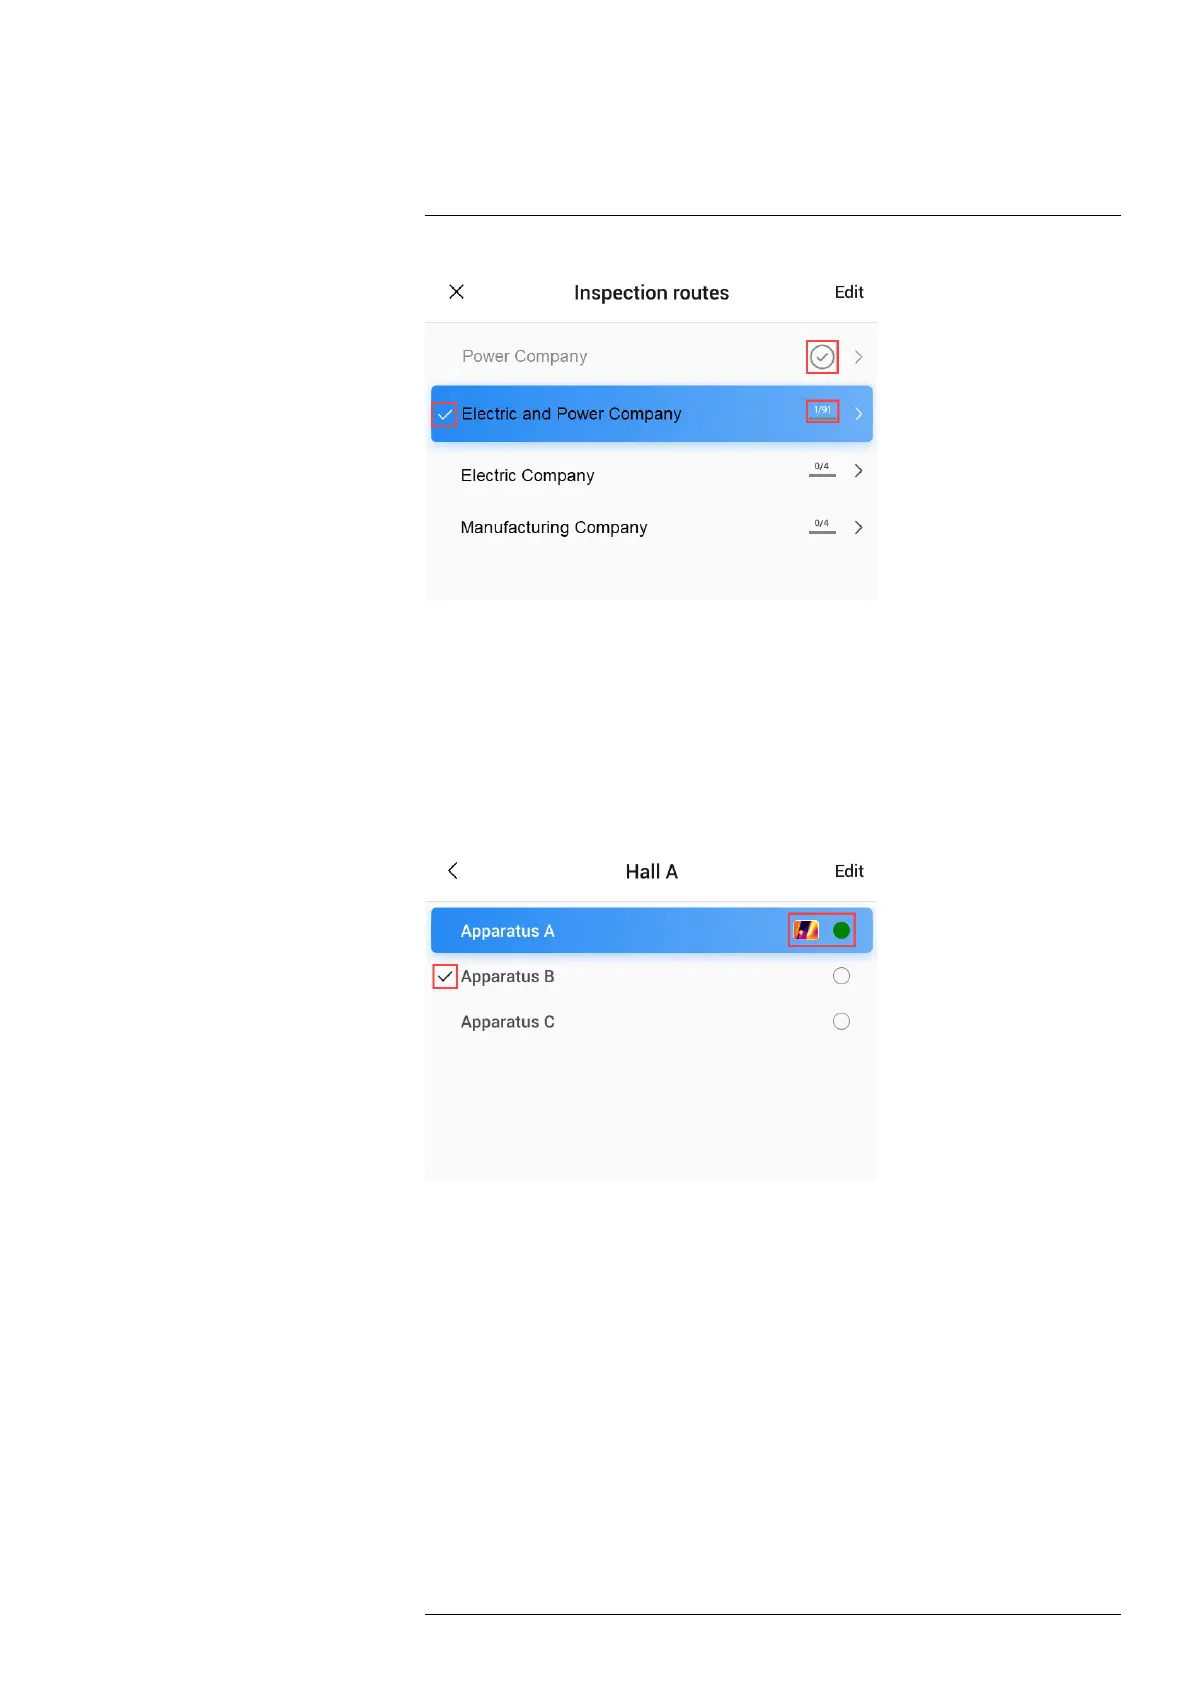
Figure 15.1 shows an example of the inspection list:
• The first inspection route is completed and locked, which is indicated by the check
mark to the right.
• The second inspection route has started. It includes a total of 91 inspection points,
and one of them has been inspected. The second inspection route includes the cur-
rent inspection point in live view, which is indicated by the check mark to the left.
To display the next level in the inspection route structure, tap an item in the list.
Figure 15.2
Figure 15.2 shows an example of a level with inspection points:
• The first inspection point has one or more images and the status is set to “green.”
• The second inspection point is the current inspection point in live view, which is indi-
cated by the check mark to the left.
15.3 Performing an inspection
15.3.1 Preparation
Note This procedure assumes that an inspection route file has been created. For more
information, see section 15.5 Creating an inspection route.
1. Add the inspection route file to the root folder on the memory card.
2. Insert the memory card into the camera.
3. Start the camera.
#T810605; r. AD/92464/92464; en-US
71

 Loading...


