Chapter 4: Maintenance
Remove and Clean the Torch Assembly
122 CyTOF XT User Guide
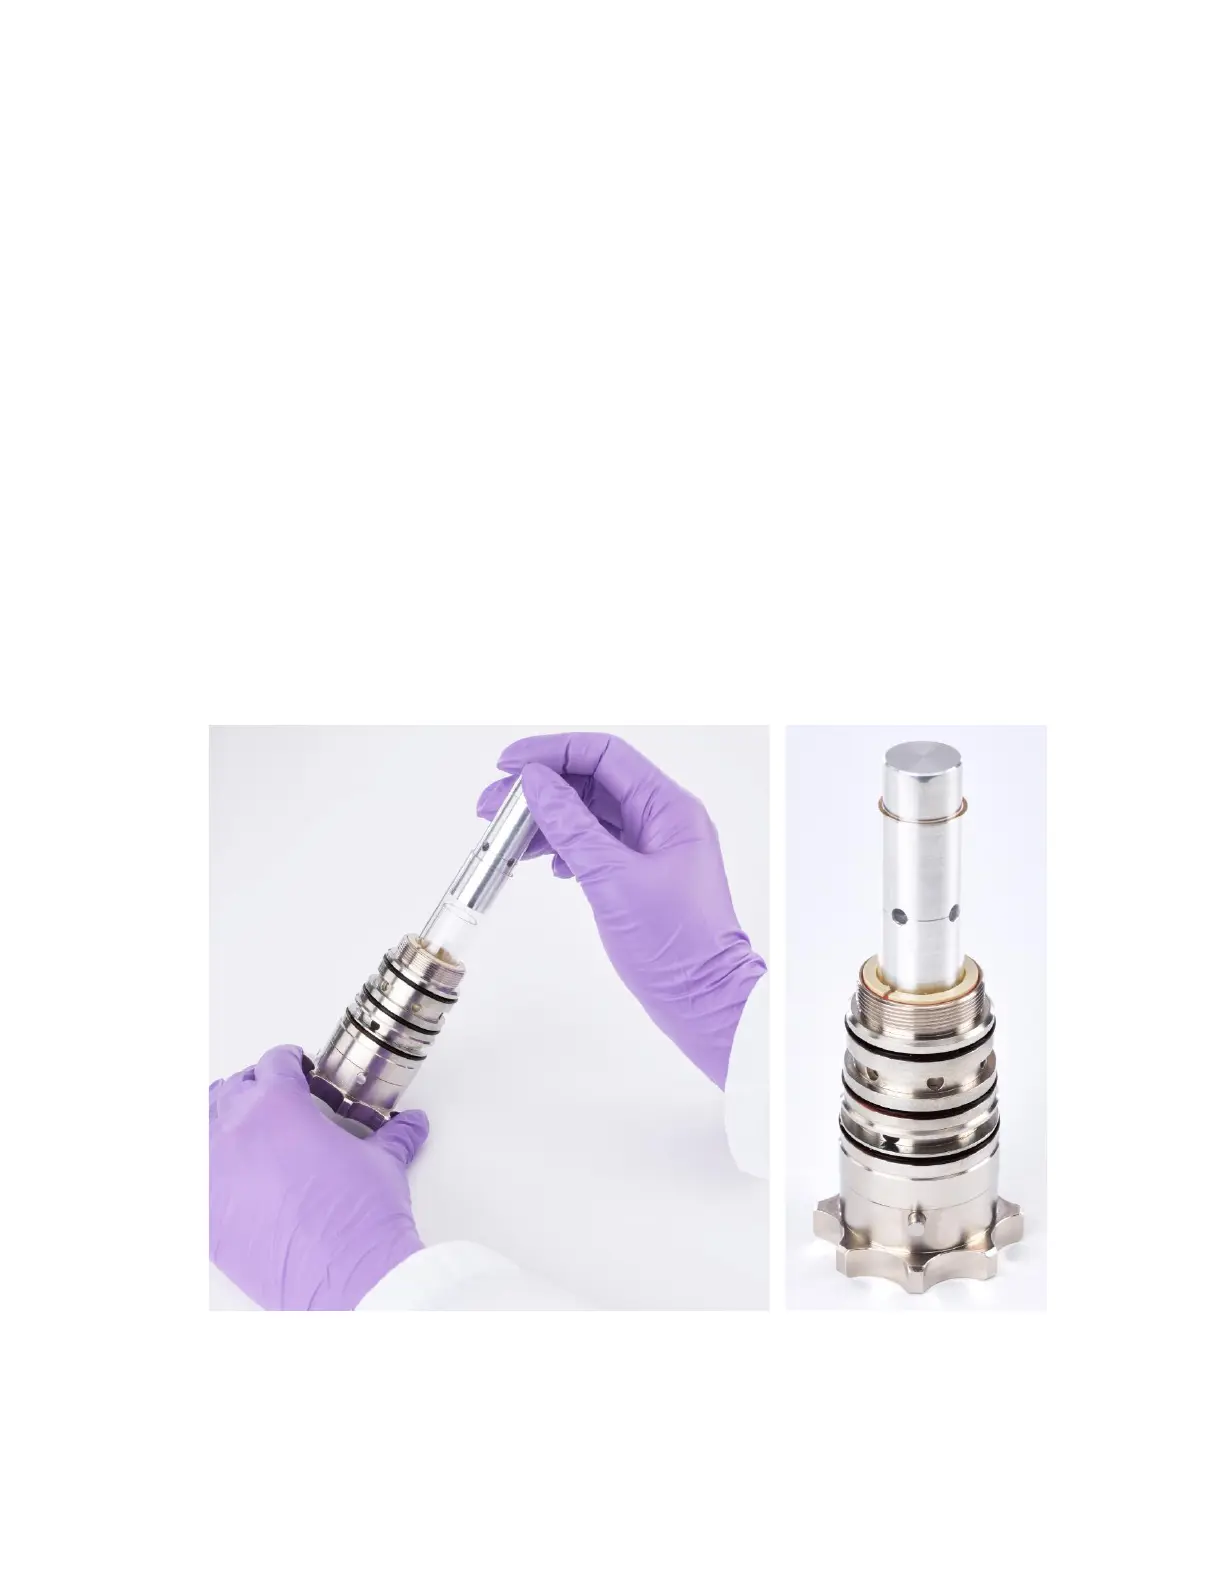
7 If replacing the O-rings, remove using the O-ring removal tool. Be careful to place the
new O-rings in the correct location. They are very similar in size.
NOTE Ensure that the parts are completely dry before reinstalling.
Reassemble the Torch Assembly
1 Use the torch removal tool (smaller-diameter end with the 4 pins) to thread the inner
torch back into the torch holder.
IMPORTANT When threading the inner torch, turn lightly clockwise. Do not overtighten.
Forceful threading may result in misalignment of the inner torch.
2 Use the torch removal tool (larger-diameter end with the 2 pins) to return the outer torch
to the torch holder.
3 Check the torch assembly alignment using the torch verification tool.
a Insert the torch verification tool between the inner torch and outer torch. The torch
verification tool should spin freely when turned using the fingers.
b If the torch verification tool does not spin freely, remove it from the torch assembly
and use the torch removal tool to apply a bit more pressure to the outer torch to
ensure that it is seated correctly.
c Repeat Step 3a to verify that the torch verification tool now spins freely between the
inner and outer torch.
d If the torch verification tool still does not spin freely, remove the inner torch and
outer torch tools using the torch removal tool and repeat the reassembly procedure.