Chapter 4: Maintenance
Clean the Vacuum Interface Cones
68 CyTOF XT User Guide
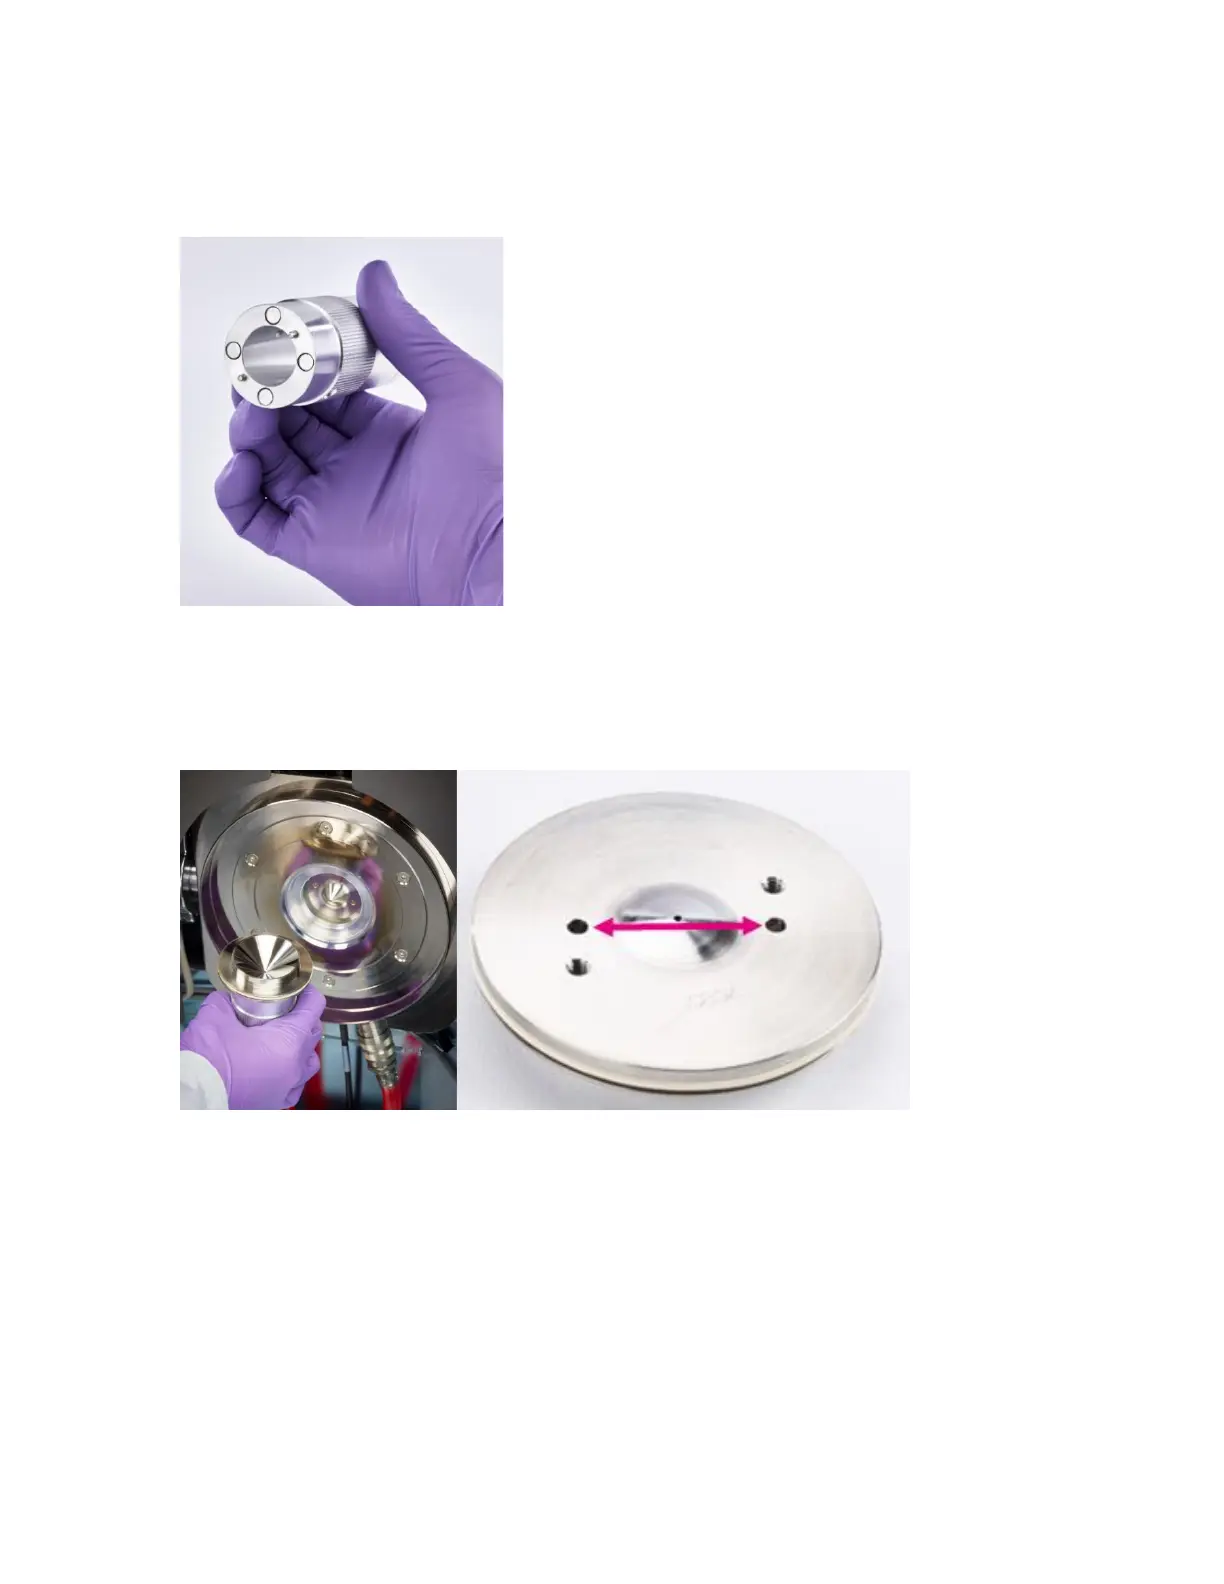
4 The sampler cone has 4 holes on the face. The non-threaded holes are slightly closer to
the cone orifice. Insert the cone removal tool (side with 4 magnets) into the 2
non-threaded holes.
5 Rotate the cone removal tool and pull toward you to release the sampler cone from the
vacuum interface.
NOTE For easier removal, drip isopropanol around the edges of the sampler cone to
lubricate the sampler O-ring.
6 Inspect the sampler cone O-ring for damage or discoloration and replace if needed.
NOTE Use O-ring removal tool to remove the damaged sampler cone O-ring and
replace (105704).
7 Remove the sampler cone from the cone removal tool and place it on a clean surface
with the tip facing up.
NOTE Place the tip up to avoid damage to the cone orifice.