Calibration Adjustment
Final Calibration For v11.10 and later 5
5-23
4. Set the 5502A to operate (OPR).
5. Press
F3
to start the calibration.
6. Wait until the display shows calibration status
:READY.
7. Press
F2
to select the next calibration step, set the 5502A to the next
calibration point, and start the calibration. Continue through all calibration
points of Table 5-6.
8. Set the 5502A to Standby, and continue at the Multimeter (DMM) Meter Zero
section.
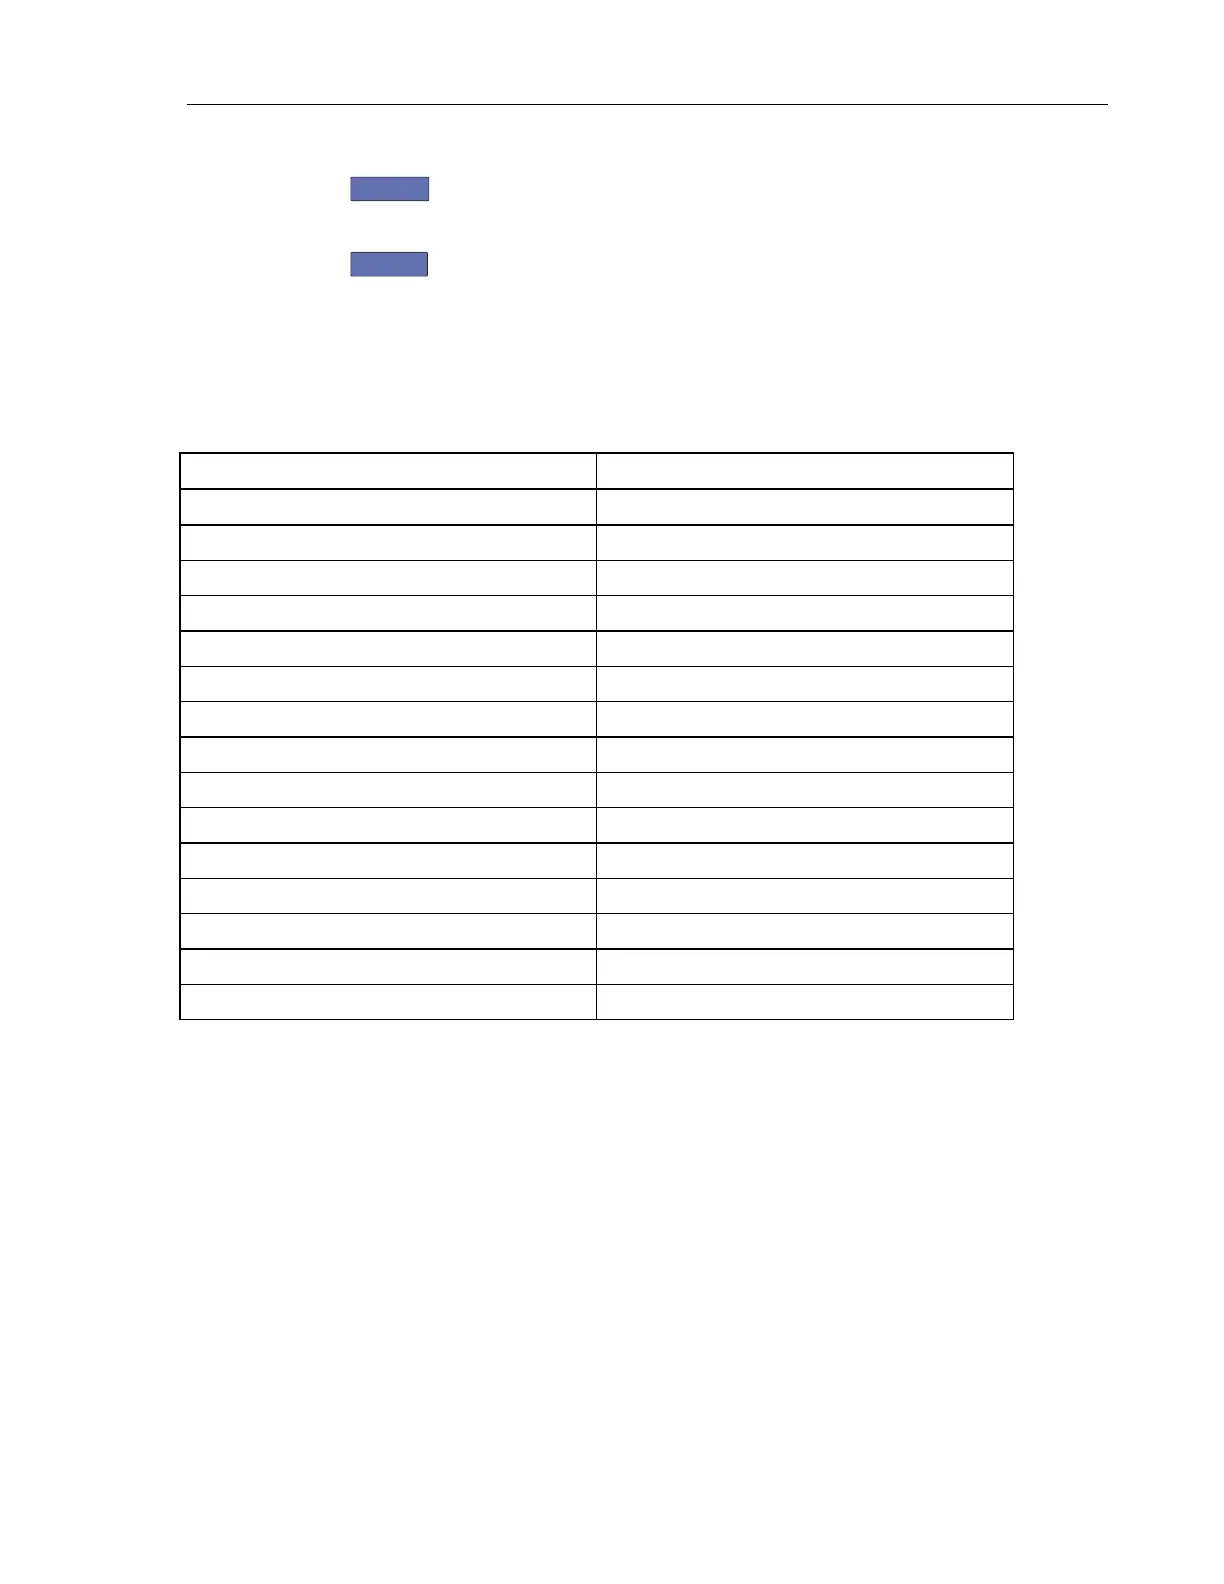
Table 5-6. Input ABCD Gain Calibration Points
Cal step UUT input value (5502A NORMAL, dc output)
CL 0799 5 mV
CL 0800 12.5 mV
CL 0801 25 mV
CL 0802 50 mV
CL 0803 125 mV
CL 0804 250 mV
CL 0805 500 mV
CL 0806 1.25 V
CL 0807 2.5 V
CL 0808 5 V
CL 0809 12.5 V
CL 0810 25 V
CL 0811 50 V (set 5502A to OPR!)
CL 0812 125 V
CL 0813 250 V
Artisan Technology Group - Quality Instrumentation ... Guaranteed | (888) 88-SOURCE | www.artisantg.com
 Loading...