Calibration Adjustment
Final Calibration For v11.10 and later 5
5-11
Warming-Up 2, Warm-Up Final, and ADC Timing
The Warming-Up 2 step (CL 0500) must be done with open inputs:
1. Press
F3
to start the calibration.
2. Wait until the display shows calibration status
End Precal:READY.
3. Press
F2
to select the next calibration step (CL 201, WarmUpFinal).
4. Press
F3
to start the calibration.
5. Wait until the display shows calibration ready. Press
F2
to select the
next calibration step (CL 0570, ADC Timing).
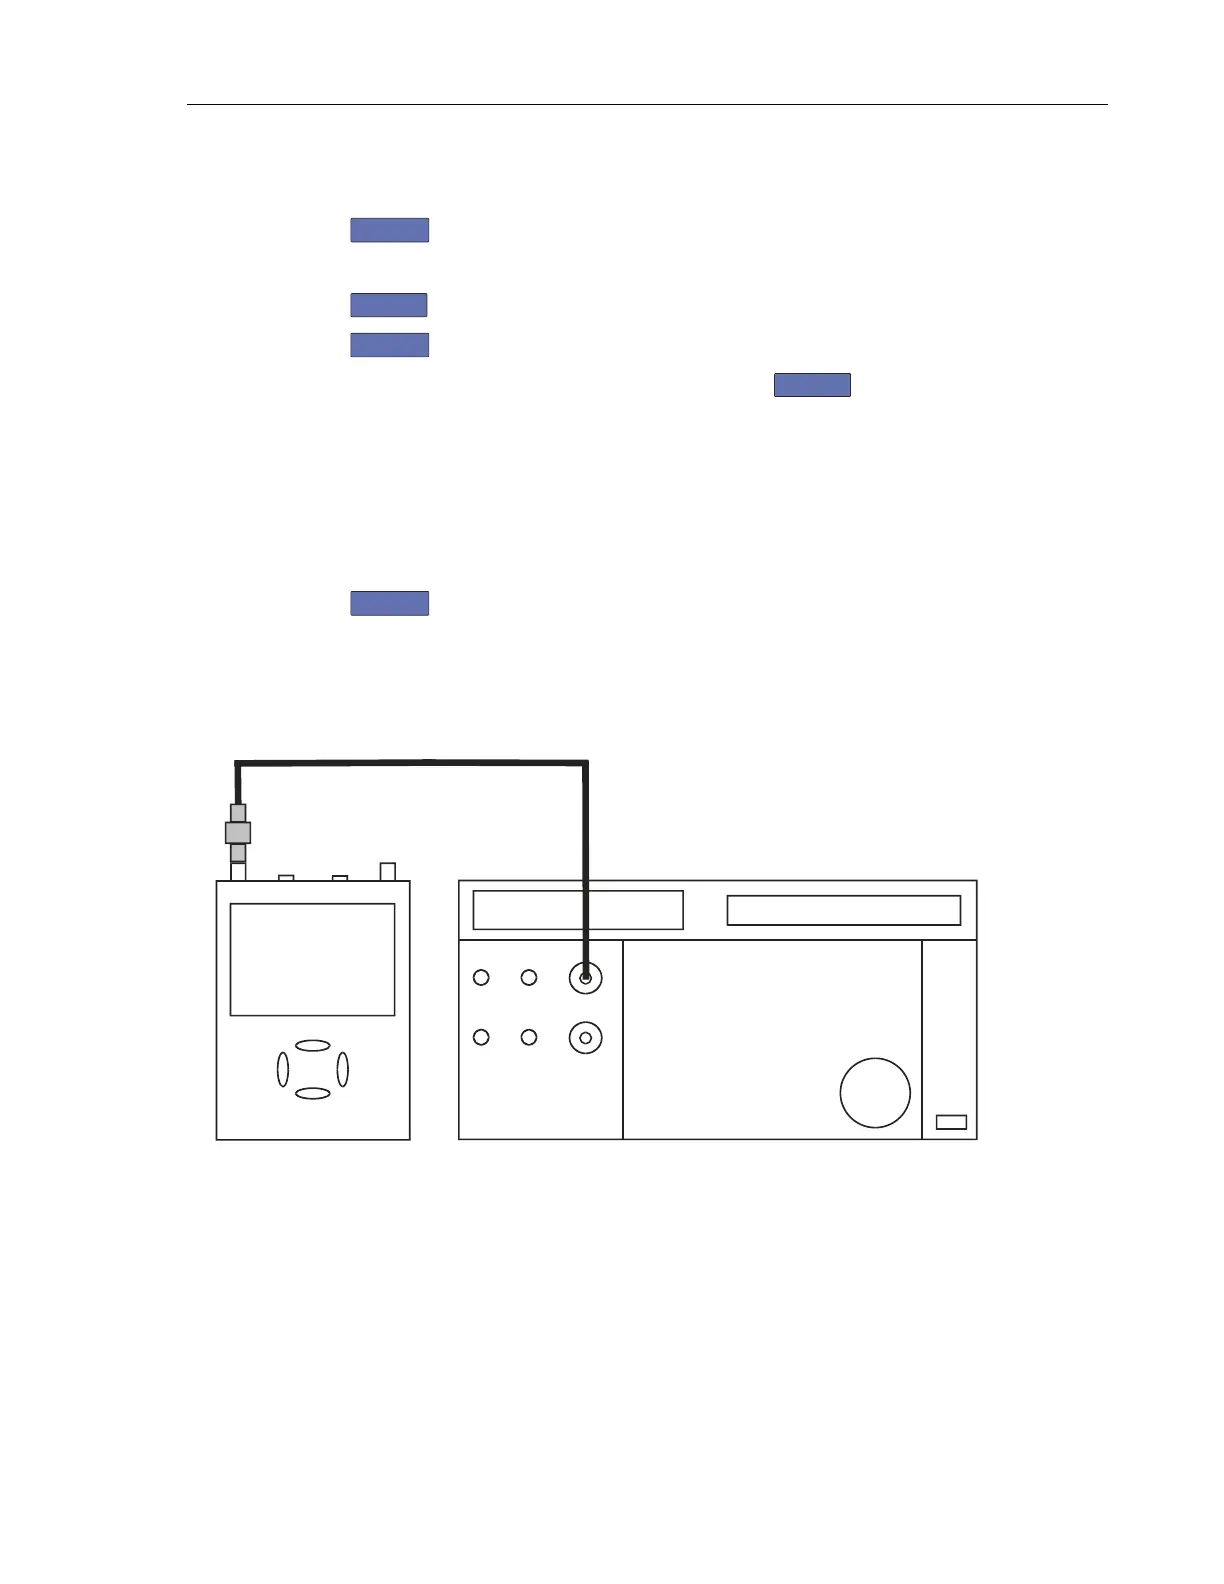
6. Connect Ch. A of the Test Tool to the 5502A SCOPE output as shown in
Figure 5-3. Use a 50 Ω termination.
7. Set the 5502A to generate a sine wave 50 MHz / 0.5 V pp (mode LEVSINE)
at the SCOPE output.
8. Set the 5502A in operate (OPR).
9. Press
F3
to start the calibration.
10. Wait until the display shows calibration status
:READY.
11. Set the 5502A in standby (STBY).
12. Continue at the Input A LF-HF Gain section.
NORMAL
SCOPE
FLUKE 5502A CALIBRATOR
USE 50 OHM
TERMINATION
AB
METER
TRM 50 - 50 OHM
PM9091
2 CHANN. + METER
For 190-502 and -504
use only TRM50!
perf-ver-d2-500.eps
Figure 5-3. 5502A SCOPE Output to Test Tool Input A
Artisan Technology Group - Quality Instrumentation ... Guaranteed | (888) 88-SOURCE | www.artisantg.com
 Loading...