Rev. 5 – Jun 2020 Page 31 of 91
USTA
(Refer to rmware v. 152)
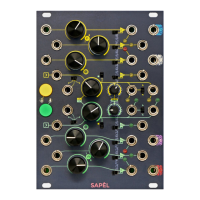
Figure 34: USTA interface.
A Stages
A.1 Stage Encoders [1→16]
A.2 Stage Arc
A.3 Stage RGB LEDs
B Buttons and LEDs
B.1 Set All
B.2 Shift All
B.3 Coarse
B.4 Esc
B.5 Pencil Button and LED
B.6 CV A button and LED
B.7 CV B button and LED
B.8 Length button and LED
B.9 Gate A button and LED
B.10 Gate B button and LED
B.11 Track buttons and LEDs [1→4]
B.12 Reset
B.13 Play
B.14 Navigation Encoder
C Other Visual References
C.1 Play LED
C.2 Pattern LED
C.3 Song LED
C.4 Menu LED
C.5 7-Segment OLED Display
C.6 Stage Loop LED
D Inputs
D.1 Clock Input
D.2 Auxiliary Gate Input
D.3 CV A Input
D.4 CV B Input
E Outputs
E.1 Track 1 – CV A
E.2 Track 1 – CV B
E.3 Track 1 – Gate A
E.4 Track 1 – Gate B
E.5 Track 2 – CV A
E.6 Track 2 – CV B
E.7 Track 2 – Gate A
E.8 Track 2 – Gate B
E.9 Track 3 – CV A
E.10 Track 3 – CV B
E.11 Track 3 – Gate A
E.12 Track 3 – Gate B
E.13 Track 4 – CV A
E.14 Track 4 – CV B
E.15 Track 4 – Gate A
E.16 Track 4 – Gate B
1 QUICK START
Once you have installed USTA and powered up your
system, you will see a fast boot screen with the Frap Tools
logo on the OLED Display (C.5), then a screen with var-
ious details concerning the project you are about to cre-
ate. Track 1 (B.11) and its CV A (B.6) are already selected
and ready to be edited.
Start rotating the 16 encoders (A.1) and you will see that
the LEDs surrounding them (A.2) are progressively light-
ing up, and at the same time a changing note name ap-
pears in the lower-left corner of the Display, indicating
the pitch of the selected stage of the sequence. This is the
content of the sequence, which will be outputted by the
CV A jack port of the first track (E.1).