Rev. 5 – Jun 2020 Page 47 of 91
To access the stored values, select the track (B.11)
whose stages you want to copy through the layer buttons,
make sure you are in Edit Mode (Pencil button and LED,
B.5) select the target pattern by rotating the Navigation En-
coder (B.14 – you can also leave the current pattern and
overwrite its values while playing), then push the Shift All
button twice (B.2) for the last full pattern, or the Coarse
button twice (B.3) for the last 16 played stages: the result
is now dumped in the desired pattern.
These actions work also when USTA is stopped, in case
you want to dump multiple layer values or make more
“copies” of a pattern. Every value is linked to its respec-
tive stage and will be dumped only on it.
All the values are set to 0 at start up. If you overwrite the cur-
rent pattern, all the previous data concerning Variation
(green and blue layers) will not be affected, so the resulting
sequence might differ from the one you copied due to the
Variation still being performed by USTA: if you want to hear
the last played sequence, simply set all the Variation Index
and the Variation Range to 0. The same approach is applied
to possible CV modulations in use. If you perform the dump
halfway through a pattern, which has for example stages 8-
16 with length 0, or if the store is performed straight after
the start-up, the dumped value of the non-played stages will
be 0.
ROTATE PATTERN
It may happen that, when improvising with various de-
grees of unpredictability, you end up with the perfect se-
quence, only to find out that it is one or two stages off-
beat. To overcome this issue, USTA allows you to Rotate
a pattern and align it to the other tracks, so that the be-
ginning of your newly found sequence is exactly where it
is supposed to be.
Figure 62: Rotate Pattern button combination.
To Rotate a pattern, push and hold the Track button
(B.11) and rotate the Navigation Encoder (B.14) either clock-
wise or counter-clockwise: you will see the 16 stages ro-
tate accordingly, and, if your sequence is running, you
will hear it changing immediately (see Figure 62).
This function shifts the Length, Channels and Layers of a
pattern at the same time (all the stage values, with their
Variation Index and Range).
CLONING
6.5.1 Clone a Stage
It is possible to clone all the data of a specific stage onto
another of the same pattern. By doing so, all the layers of
the target stage (see above the section concerning editing
stages, §3.4) will be replaced with the data contained in
the source.
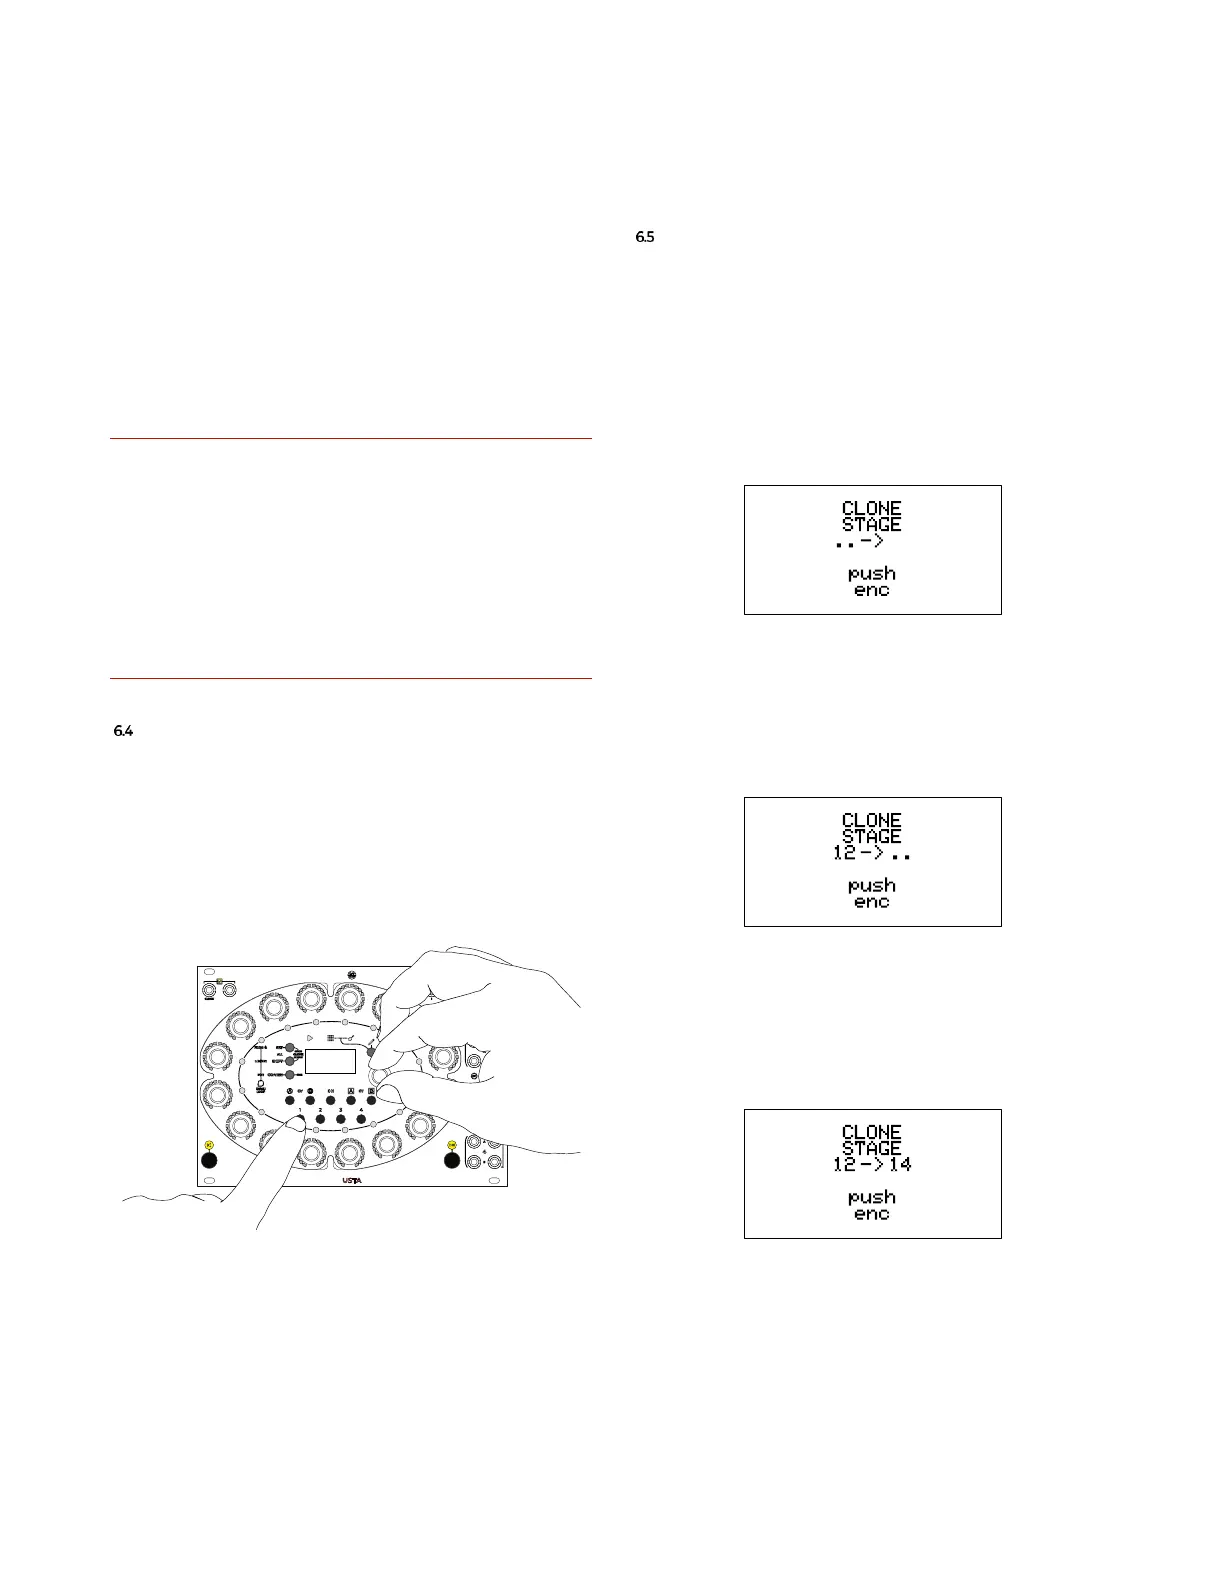
To do so, hold the Esc button (B.4) and push Set All (B.1),
then release both buttons.
Figure 63: Cloning a stage.
The Clone Stage menu will appear in the OLED display
(C.5). First, enter the stage to clone: push the correspond-
ing stage encoder (A.1, no. 12 in the example): its number
will appear within the display.
Figure 64: Cloning stage 12.
From now on, push any other Stage Encoder to clone the
data of the source stage. This last operation can be re-
peated as many times, to clone a single stage towards
multiple destinations.
Figure 65: Cloning stage 12 to 14
The last cloned target will be updated on the display, as
above (14 in the example).
At any moment push Esc to exit the Clone Stage function.