Rev. 5 – Jun 2020 Page 41 of 91
COARSE AND FINE
In the Value CV layer (§3.4.3.1 above) it is possible to
edit the stage values by increments of 1 octave or 1V (if
the selected channel is working in Pitch or Raw voltages
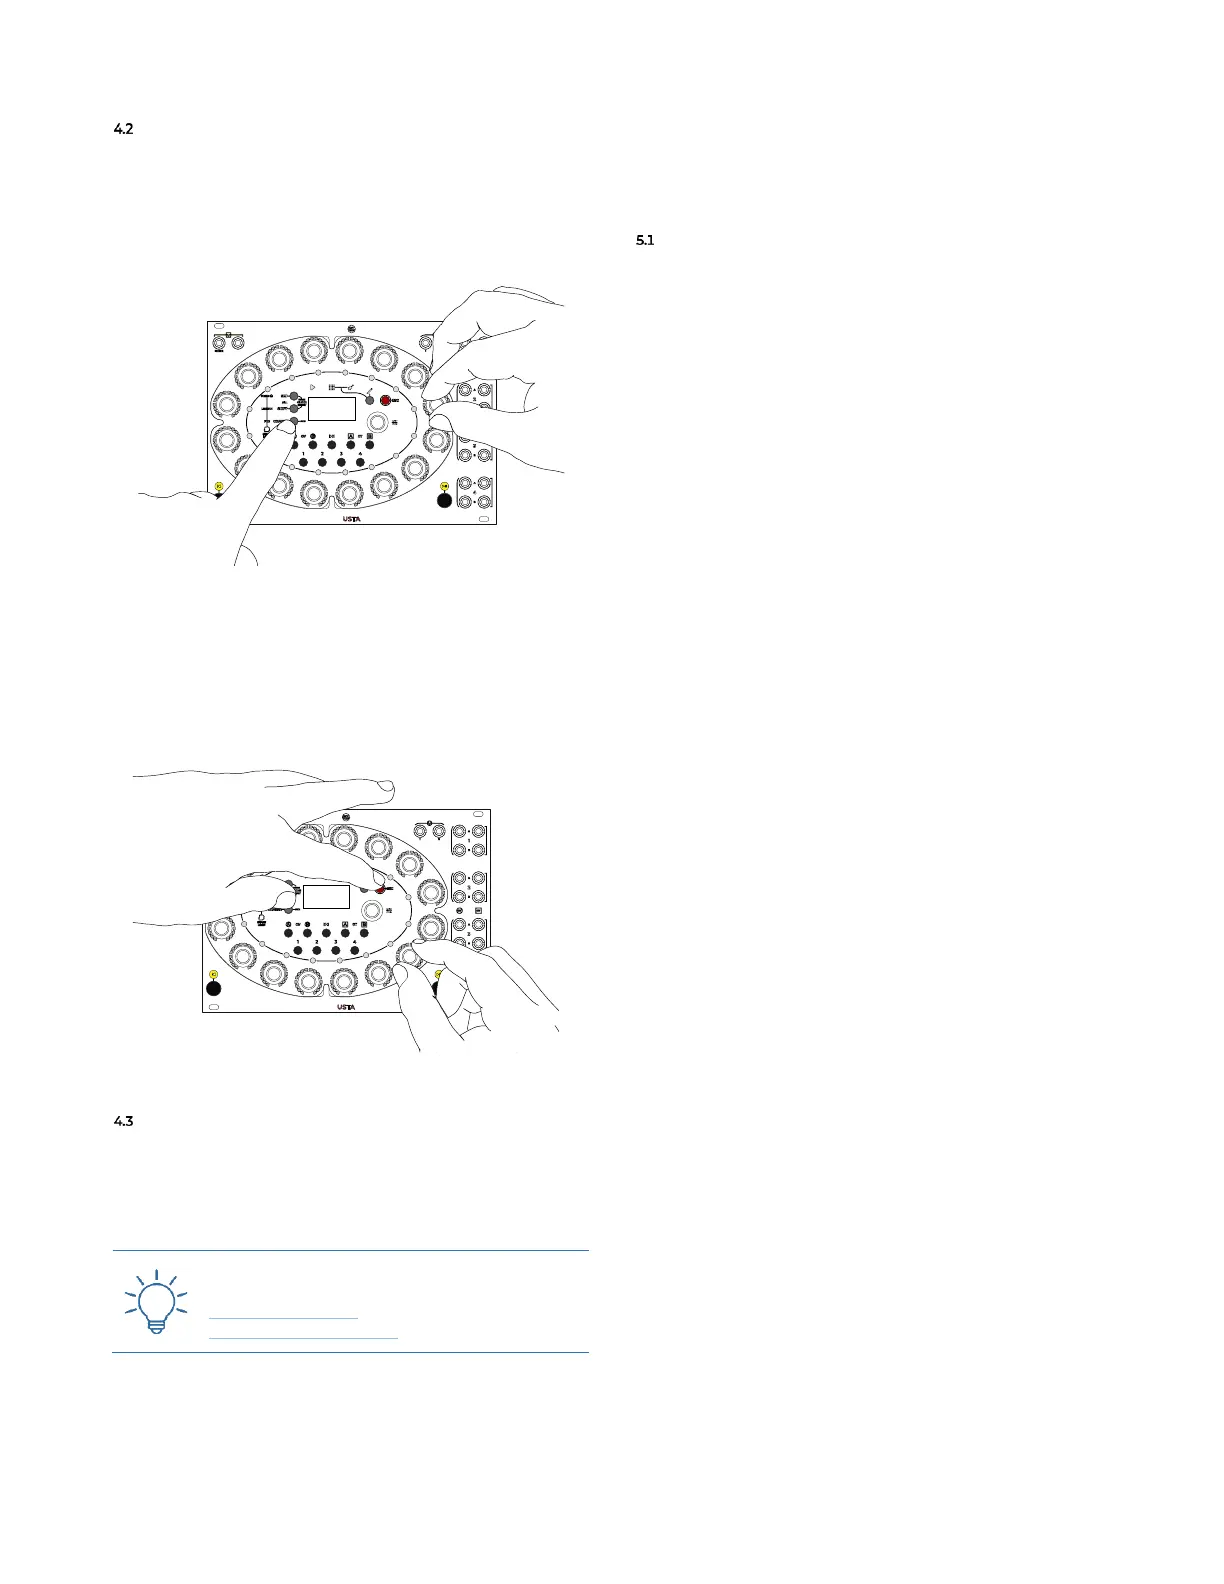
respectively): to do so, push and hold the Coarse button
(B.3) while rotating the Stage Encoder (A.1) (see Figure 50).
Figure 50: Coarse editing.
It is also possible to fine-tune the Pitch and Raw voltages.
Hold pressed Esc (B.4) then the Coarse button to access the
Fine mode: now the Stage Encoders will change the stage
value by cents of semitone in pitch mode, and by milli-
Volts in raw mode.
Figure 51: Fine editing.
COMBINING THE BUTTONS
It is possible to use the Coarse/Fine button (B.3) together
with Set All (B.1) and Shift All (B.2) in order to perform
tasks such as transposing the whole pattern by an octave
or fine-tuning all the stages at once.
5 PERFORMING
Once everything is set up according to your musical
needs, you can start to perform with USTA.
PLAY/PAUSE, RESET AND MASTER TRACK SETTINGS
In order to perform with USTA you need to start, pause
and reset your sequence. Such controls are deeply con-
nected and rely on the Master and Slave relationship be-
tween Tracks.
5.1.1 Master Track
The Master Track is the track which other tracks refer to
for play, pause and reset purposes. The Master/Slave rela-
tionship is limited to these three operations: every other
parameter such as tempo and time ratio will remain in-
dependent per each track. There can be only one Master
Track for every project loaded into USTA.
To set the Master Track, enter the Project Menu by holding
down the Navigation Encoder for three seconds (B.14),
scroll to the Master Track option and then select one of the
four tracks. By default, a project’s Master Track is track 1.
To subordinate a track to the Master Track, enter the
Track Menu by pushing the Navigation Encoder, scroll to the
Reset On option and set it on Master. By default, all the
tracks are Slave to the Master Track. The Master and Slave
tracks together are called Master Track Group.
Once the Master Track Group is defined, the Play/Pause
and Reset commands (see below, §§5.1.2-5.1.3) will affect
all the tracks, no matter which one is currently selected.
It is possible to detach a track from the Master Track:
with this option, the Play/Pause and Reset commands per-
formed within the Master Track Group will not affect this
track, and vice versa. In case more than one track is de-
tached from the master track, the Play/Pause and Reset
commands will affect them all, whenever they are per-
formed on one of these tracks.
To detach one or more tracks from the Master Track, se-
lect either the Local or Instant reset option in each track's
Reset On menu item.
5.1.2 Play/Pause
In order to start or arrest your sequence, push the
Play/Pause button (B.13). By default, this button works as
a global control: if at least one track is playing, it pauses
it; if all the tracks are playing, it pauses all of them; if all
the tracks are paused, it plays all of them.
It is possible to play or pause only the selected track by
holding Esc (B.4) before pushing the Play/Pause button.
Additional operations can be performed by combining
the Play/Pause button with the Set All (B.1) and Shift All
(B.2) buttons.
If the selected track belongs to the Master Track Group,
pushing Play/Pause while holding Shift All will play or
pause all the tracks of the group. In the case at least one