connected. A clearly numbered connection, but also at the DC terminal, makes it
easier to find the correct string, e.g. during an inspection. Set the MPP tracker 2
to the "On" during initial commissioning. The user can of course also do this later
in the Basic menu of the inverter.
Single MPP tracker mode on both MPP tracker inputs:
If the solar module strings are connected to a string combiner box (GAK - gener-
ator junction box) and the distance to the inverter is bridged by means of a DC
string, this DC string can be connected to the inverter as follows.
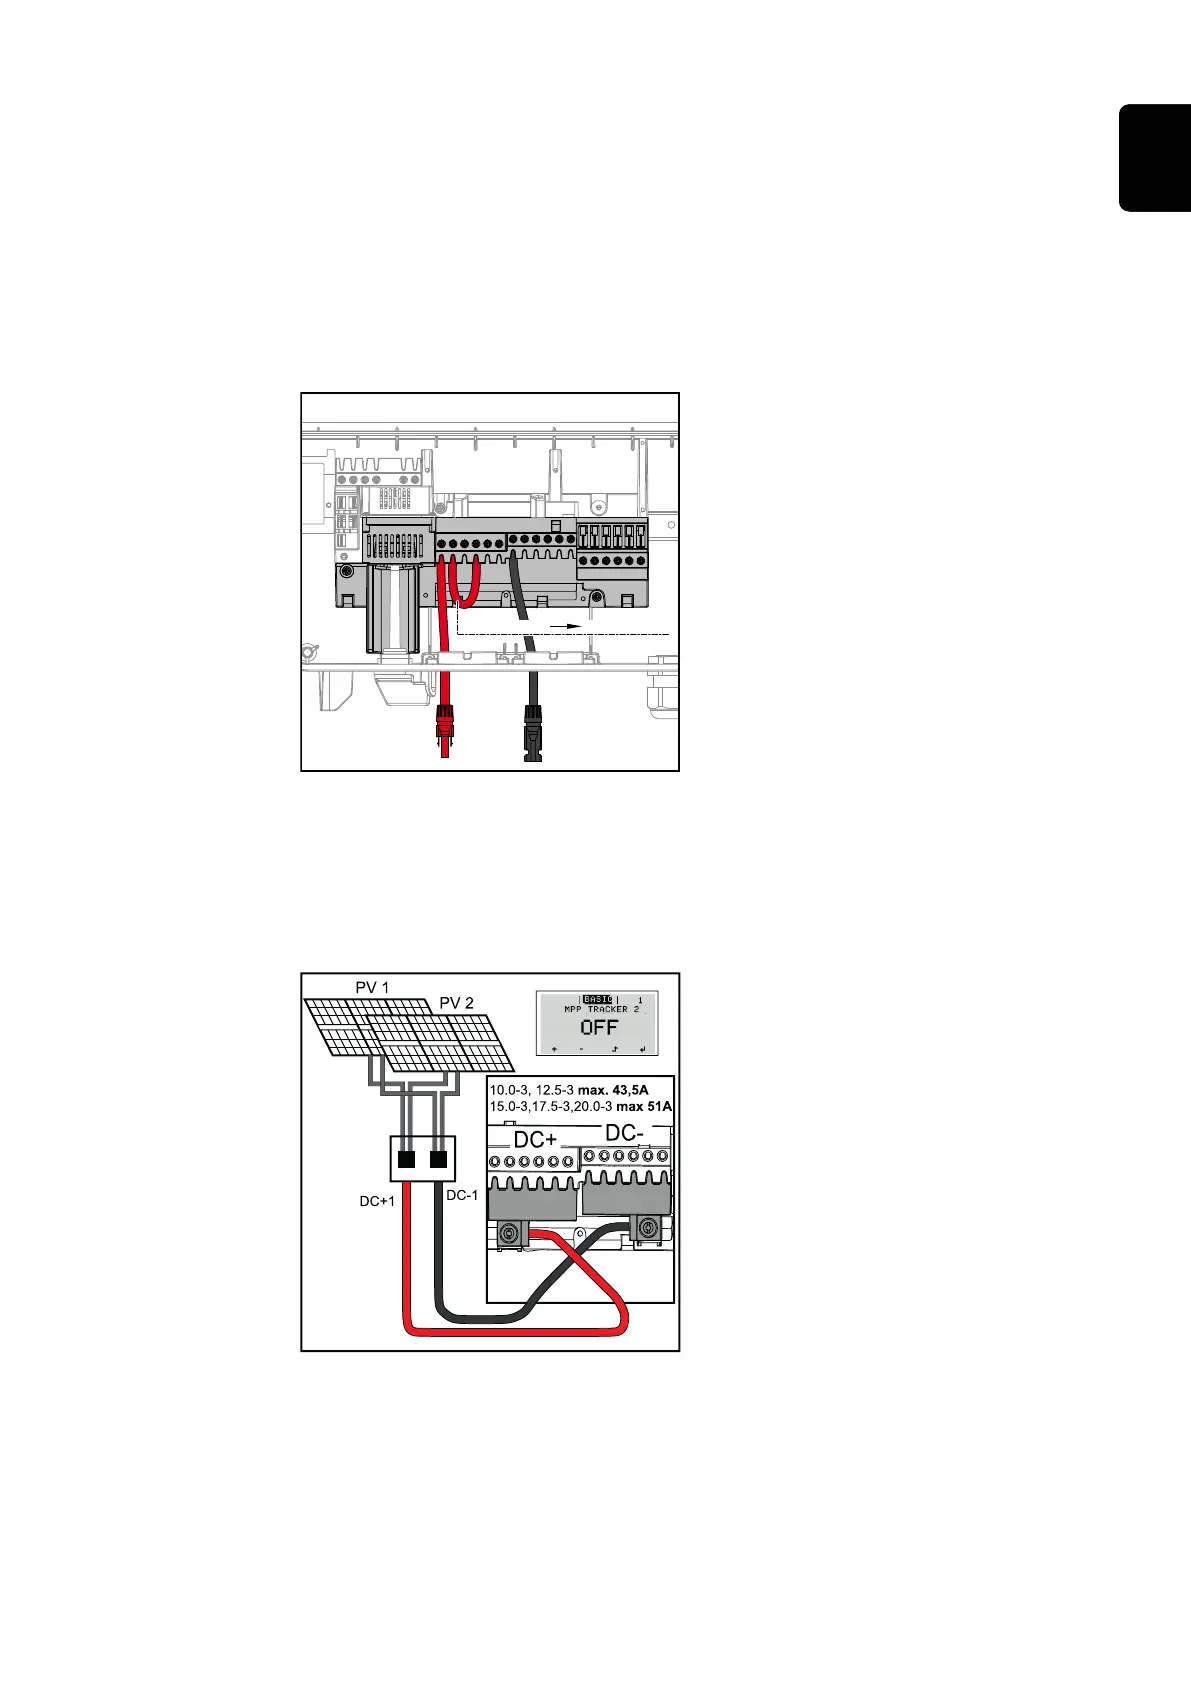
Jumpering
With jumpering, the MPP tracker 1 and
MPP tracker 2 can be jumpered to-
gether. This takes place as shown in
the image via the connection DC+1
(Pin2) to DC+2 (Pin1).
IMPORTANT! The MPP tracker 2 must
be set to OFF. This can be checked in
the Basic menu of the inverter.
IMPORTANT! The cable diameter of
the DC connection cable and the
jumpering must be the same. Jumper-
ing of the DC- terminal is not neces-
sary because it is jumpered internally.
DC Con Kit 25
If your installation requires an AFCI (AFPE) according to IEC63027, do not use a
DC Con Kit.
The Fronius DC Con Kit 25 (4,251,015) can be used to connect a solar module
string with a cross-section of up to 25 mm² to the inverter.
Set the MPP tracker 2 to "OFF" during
initial commissioning. This can also be
done later in the Basic menu of the in-
verter. By using the DC Con Kit 25, the
DC strings of the connected DC lines
are divided equally between both in-
puts.
51
EN
 Loading...