Scan to PC
183
Scan
5
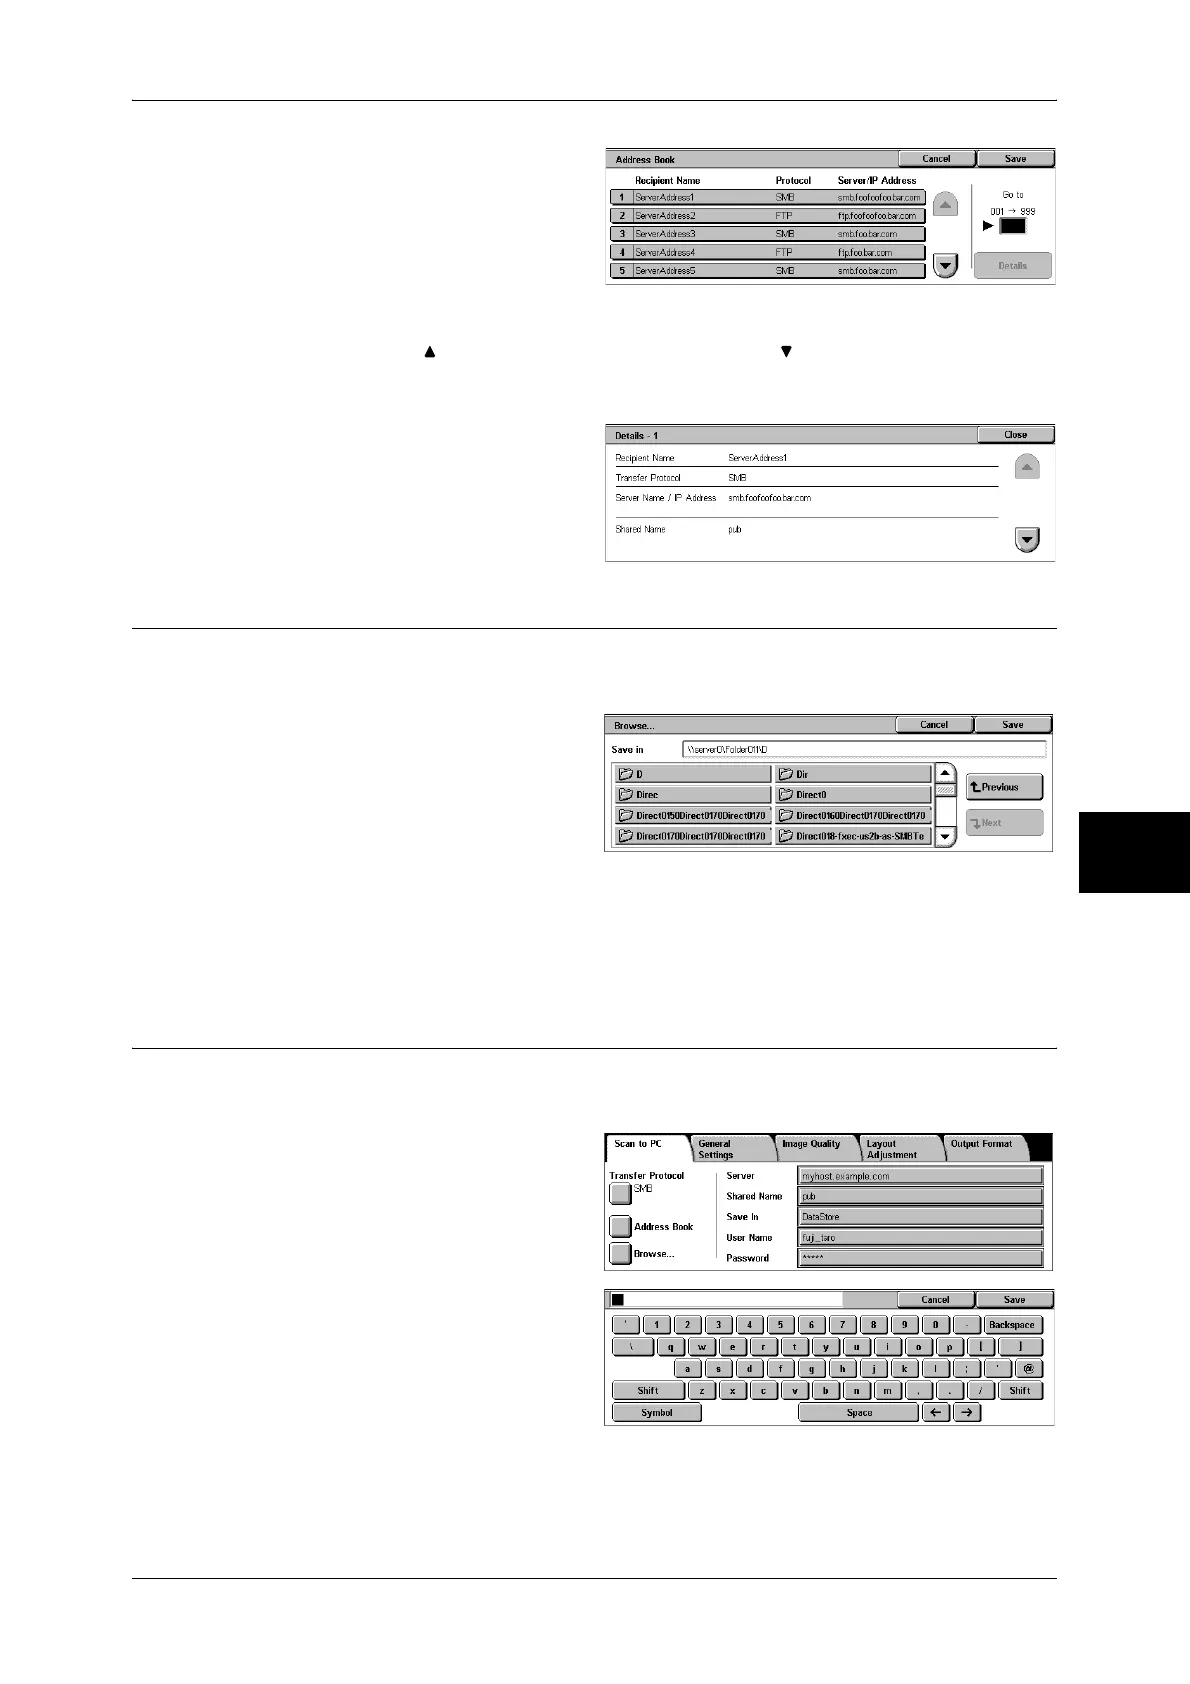
1 Select [Address Book].
2 Select the destination in which the
data is stored.
Important • You can only use destinations
configured for SMB or FTP.
Any destinations registered for
fax cannot be specified.
Note • Select [ ] to return to the previous screen and select [ ] to move to the next screen.
Details
You can confirm information such
as [Recipient Name] and [Server
Name/IP Address]
Browse...
Displays a hierarchy consisting of server names and folders. You can specify a save
destination by tracing the hierarchy.
1 Select [Browse...].
2 Select the destination in which
data is to be stored.
You can move to another level by
pressing [Previous] or [Next].
Important • You can specify recipients for SMB only.
Save in:
Shows the current location in the hierarchy.
Specifying a Destination
Enter information into the fields provided for the selected protocol, to specify a
forwarding destination.
1 Select the item to be set.
Note • You can also select [Address
Book] to enter information.
• Fields displayed vary
depending on the protocol.
2 Enter information using the
keyboard on the screen.
For information on how to enter
characters, refer to "Entering Text"
(P.273).
Note • To delete characters, select
[Backspace].
 Loading...