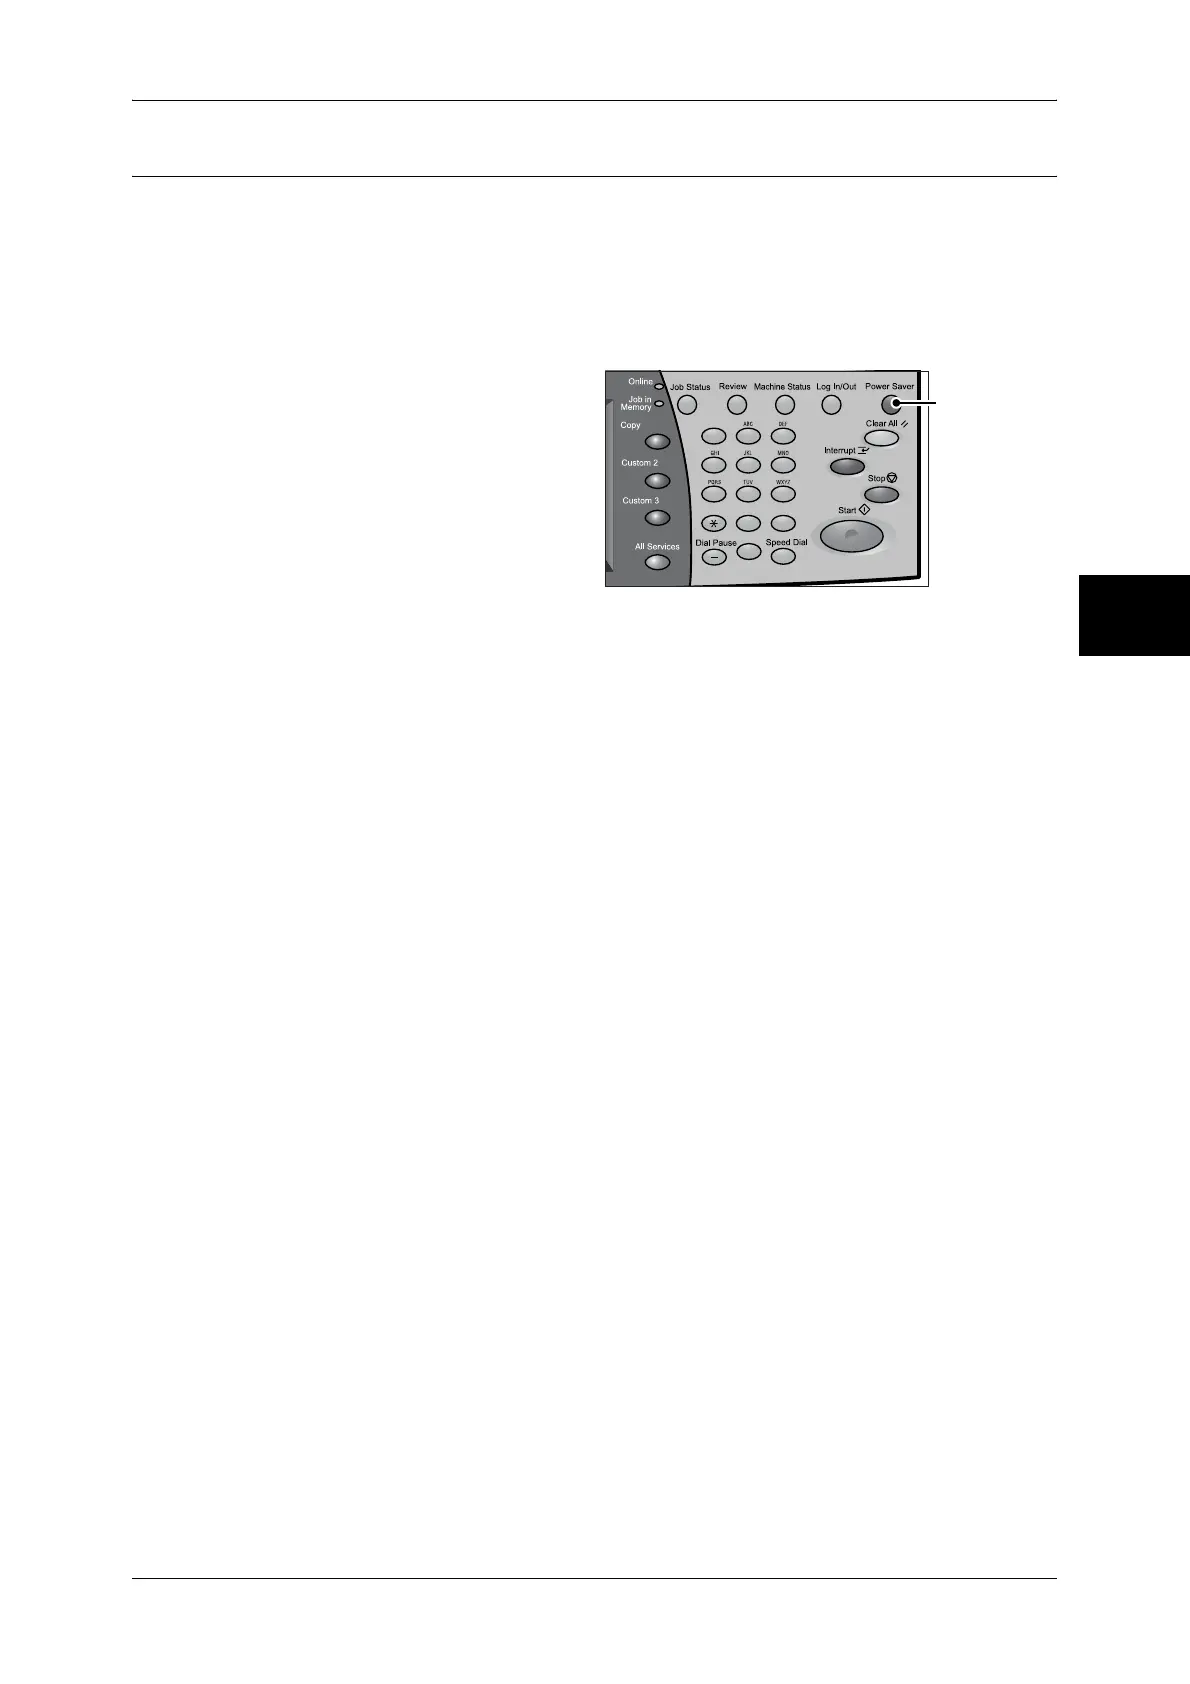
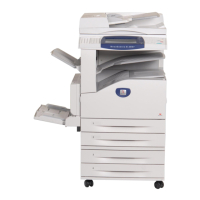
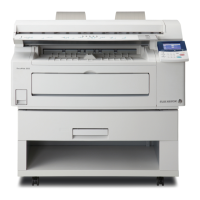
Home
Fuji Xerox
All in One Printer
DocuCentre-II 3005
Fuji Xerox DocuCentre-II 3005 User Manual
5
of 1
of 1 rating
615 pages
Give review
Manual
Specs
To Next Page
To Next Page
To Previous Page
To Previous Page
Loading...
Power Saver Mode
41
Product Overv
iew
2
Exiting the Power Saver Mode
The followin
g describes how
to exit the Po
wer Saver mode.
The Power Saver mode is exited in the followi
ng instances:
z
Pressing the <Power Saver> button
z
Receiving data
z
Selecting [Apply] in CentreWare Inte
rnet Services
1
Press the <Power Saver> button.
12
3
45
6
78
9
0
#
C
<Power Saver>
button
42
44
Table of Contents
Default Chapter
3
Table of Contents
3
Before Using the Machine
15
Preface
16
Using this Guide
17
Related Information Sources
17
Organization of this Guide
18
Conventions
19
Safety Notes
20
Electrical Safety
20
Machine Installation
21
Operational Safety
22
Consumable
24
Regulation
26
Radio Frequency Emissions (Class B)
26
Environment
27
About License
28
Rsa Bsafe
28
Heimdal
28
JPEG Code
28
Libcurl
28
Freebsd
29
Openldap
30
Legal Notice
32
Product Overview
33
Machine Components
34
Power on / off
38
Powering on
38
Powering off
39
Circuit Breaker
40
Power Saver Mode
41
Changing the Power Saver Mode Change Interval
41
Exiting the Power Saver Mode
43
Control Panel
44
Customizing the Control Panel
46
Copy
51
Copying Procedure
52
Step 1 Loading Documents
52
Step 2 Selecting Features
54
Step 3 Entering the Quantity
55
Step 4 Starting the Copy Job
55
Step 5 Confirming the Copy Job in the Job Status
56
Operations During Copying
57
Stopping the Copy Job
57
Changing the Number of Copies
58
Interrupting the Copy Job
58
Copy
60
Reduce/Enlarge (Making Enlarged/Reduced Copies)
60
Paper Supply (Selecting the Paper for Copying)
62
Sided Copying (Making 2 Sided Copies)
64
Image Shift (Shifting the Image Copy Position)
65
Edge Erase (Erasing Edges and Margin Shadows in the Document)
65
Lighten/Darken (Adjusting the Copy Density)
65
Image Quality
66
Original Type (Selecting the Document Type)
66
On the [All Services] Screen, Select [Copy]
66
Image Options (Adjusting Copy Density / Sharpness of Images)
67
Background Suppression (Erasing the Background Color of Documents)
67
Layout Adjustment
68
Book Copying (Copying Facing Pages Onto Separate Sheets)
68
Sided Book Copy (Making 2 Sided Copies of Facing
69
Original Size (Specifying the Scan Size for the Document)
70
Mixed Sized Originals (Scanning Different Size Documents Simultaneously)
71
Edge Erase (Erasing Edges and Margin Shadows of the Document)
72
Image Shift (Shifting the Image Copy Position)
73
Image Rotation (Making Copies with the Image Rotated Vertically or Horizontally)
74
Invert Image (Making Reversed Copies of Images)
75
Original Orientation (Specifying the Orientation of Loaded Documents)
76
Output Format
77
Copy Output (Outputting by Specifying Finishing)
77
On the [All Services] Screen, Select
77
Booklet Creation (Creating a Booklet)
79
Covers (Attaching a Cover to Copies)
80
Transparency Separators (Inserting Blank Sheets between Transparencies)
81
Multiple-Up (Copying Multiple Sheets Onto One Sheet)
82
Poster (Making Enlarged Copies Spread over Multiple Sheets)
83
Repeat Image (Making Multiple Copies on One Sheet)
84
Annotation (Adding Stamp/Date/Page Number to Copies)
84
Watermark (Printing Control Number on the Background)
88
Preset Repeat Image (Making Multiple Copies on a Single Sheet)
91
ID Card Copying (Copying both Sides of an ID Card)
91
Job Assembly
93
Build Job (Making Copies of Documents with Different Settings in a Single Operation)
93
On the [All Services] Screen, Select [Copy]
93
Sample Set (Checking the Finished Output of the Copy)
95
Combine Original Sets (Adding Originals)
96
Form Overlay (Making Copies to Overlay Documents)
97
Delete Outside/Delete Inside (Deleting Outside or Inside of the Selected Area)
98
Fax
101
Fax Procedure
102
Step 1 Loading Documents
102
Step 2 Selecting Features
104
Step 3 Specifying the Destination
105
Step 4 Starting the Fax Job
106
Step 5 Confirming the Fax Job in the Job Status
107
Operations During Faxing
108
Stopping the Fax Job
108
Changing the Scan Settings
109
About Internet Fax
110
Internet Fax Overview
110
Sending Ifax (Ifax Transmission)
112
Useful Features
114
About Server Fax
117
Sending Server Fax
117
Fax/Internet Fax
119
Ifax/Fax (Selecting Ifax/Fax)
119
Next Recipient (Sending Faxes to Multiple Recipients)
119
Specifying a Destination Using the Address Book
120
Speed Dialing (Entering Numbers Using Address Number)
121
Specifying a Destination Using One Touch Buttons
121
Specifying a Destination Using the Keyboard Screen
122
Entering Specific Symbols
123
Removing/Confirming Specified Recipient
123
General Settings
124
Lighten/Darken (Adjusting Density Level)
124
Sided Originals (Transmitting 2-Sided Originals)
124
Original Type (Selecting the Image Quality Type for the Document)
126
Resolution (Specifying the Scanning Resolution)
126
Layout Adjustment
128
Sided Originals (Transmitting 2-Sided Originals)
128
Original Size (Specifying the Scan Size for the Original)
128
Mixed Sized Originals (Scanning Different Size Documents Simultaneously)
129
Book Scanning (Scanning Facing Pages Onto Separate Sheets)
130
Reduce/Enlarge (Specifying the Scan Ratio for the Original)
131
Stamp (Adding a Stamp When Scanning a Document)
131
Transmission Options
133
Report / Read Receipts (Confirming Transmission Results)
133
Communication Mode (Selecting a Communication Mode)
135
Priority Send / Delayed Start (Specifying Send Priority/Send Time)
136
Send Header (Adding Sender Name and Phone Number to Faxes)
137
Cover Note (Transmitting Documents with a Cover Page)
137
Ifax Subject (Specifying the Ifax Subject)
140
Ifax Comment (Mail Contents) (Editing the Ifax Mail Contents)
140
Recipient Print Sets (Printing Multiple Copies at the Remote Machine)
141
Multiple-Up (Sending Multiple Documents with Combining in 1 Sheet)
141
Remote Mailbox (Using Remote Mailbox)
142
F Code (Using F Code Transmission)
144
Ifax Profile (Specifying Ifax Profiles)
146
Encryption (Sending Ifax Encrypted by S/MIME)
147
Digital Signature (Sending Ifax with a Digital Signature by S/MIME)
148
Advanced Features
149
Polling (Retrieving Documents from Remote Machines)
149
Select [Fax/Internet Fax] on the [All Services] Screen
149
Store for Polling (Allowing Remote Machines to Retrieve Documents from Your Machine)
150
On-Hook (Confirming Remote Machine Response Prior to Transmission)
152
Broadcast
153
Broadcast Send (Transmitting to Multiple Recipients)
153
Relay Broadcast (Transmitting Documents through a Relay Station)
153
Before Using the Relay Broadcast Send Feature
154
Fax Signal Method
155
Remote Relay Broadcast (Performing Relay Broadcast to Remote Locations)
157
Select the [Transmission Options]
157
Receiving Faxes
162
Switching between Auto Receive and Manual Receive
162
Using Auto Receive
162
Using Manual Receive
163
Using Mailbox Receive
163
Facsimile Information Services
164
Using the Receiver
164
When Not Using a Receiver
165
Scan
167
Scanning Procedure
168
Step 1 Loading Documents
168
Step 2 Selecting Features
170
Step 3 Starting the Scan Job
172
Step 4 Confirming the Scan Job in Job Status
173
Step 5 Saving the Scanned Data
173
Operations During Scanning
174
Stopping the Scan Job
174
Changing the Scan Settings
175
E-Mail
176
Address Book
176
Keyboard
178
Adding the Sender's Address
179
Recipient(S)
179
[Change Recipient Settings] Screen
180
From
180
Subject
181
Message
181
Scan to Mailbox
182
Network Scanning
183
Scan to PC
184
Transfer Protocol
184
Address Book
184
Browse
185
Specifying a Destination
185
General Settings
187
Lighten/Darken (Adjusting the Scan Density)
187
Sided Originals (Scanning both Sides of a Document)
187
Original Type (Selecting the Document Type)
189
File Format (Selecting the Format of Scanned Data)
189
Image Quality
195
Image Options (Adjusting Scan Density and Image Sharpness)
195
Background Suppression (Erasing the Background Color of Documents)
195
Layout Adjustment
196
Scan Resolution (Specifying a Scanning Resolution)
196
Sided Originals (Scanning both Sides of a Document)
196
Book Scanning (Scanning Facing Pages on Separate Sheets)
197
Original Size (Specifying an Original Size)
198
Mixed Sized Originals (Scanning Different Size Documents Simultaneously)
198
Edge Erase (Erasing Edges and Margin Shadows in the Document)
199
Reduce/Enlarge (Specifying a Scanning Ratio)
200
Output Format
201
Read Receipts
201
Split Send (Sending in Sections)
201
File Name (Specifying the Filename to be Sent)
202
Reply to (Set the Address for Reply)
202
File Name Conflict (Setting Procedures When a File Name Conflicts with Others)
203
Document Name (Specifying the Filename to be Saved)
203
Encryption (Sending E-Mail Encrypted by S/MIME)
203
Digital Signature (Sending E-Mail with a Digital Signature by S/MIME)
204
Send from Mailbox
205
Mailbox Operating Procedure
206
Step 1 Opening the [Send from Mailbox] Screen
206
Step 2 Selecting a Mailbox
206
Step 3 Checking/Selecting Mailbox Documents
206
Step 4 Operating Mailbox Documents
207
Selecting a Mailbox
208
Checking/Selecting Mailbox Documents
209
Printing/Deleting Documents in the Mailbox
210
[Mailbox - Print Settings] Screen
210
Configuring/Starting Job Flow
213
Job Flow Restrictions
216
Stored Programming
217
Stored Programming Overview
218
Registering/Deleting/Renaming Stored Programs
219
Registering Stored Program
220
Deleting a Stored Program
220
Entering/Changing a Stored Program Name
221
Assigning/Changing Icons for Stored Programs
221
Calling Stored Programs
222
Job Flow Sheets
223
Job Flow Procedure
224
Step 1 Opening the [Job Flow Sheets] Screen
224
Step 2 Selecting a Job Flow Sheet
224
Step 3 Confirming/Changing the Job Flow Sheet
225
Step 4 Starting the Job Flow Sheet
225
Selecting/Changing a Job Flow Sheet
226
Computer Operations
229
Features Overview
230
Print Driver
230
Network Scanner Utility2
232
Centreware Internet Services
232
Browser Settings
234
Proxy Server and Port Number
235
Starting Centreware Internet Services
235
Printing
236
E-Mail Printing
237
Setup
237
Sending E-Mail
237
Importing Scanned Data
239
Importing to a TWAIN Compatible Application
239
Importing Using Mailbox Viewer2
241
Importing Using Centreware Internet Services
243
Importing with the Webdav Protocol
244
Sending Fax
245
Registering Destinations
245
10 Paper and Other Media
247
Paper Types
248
Supported Paper Type
248
Storing and Handling Paper
249
Loading Paper
251
Loading Paper in the Trays 1 to 4
251
Loading Paper in the Tray 5 (Bypass)
252
Changing the Paper Sizes for the Trays
254
Changing the Paper Settings
256
11 System Settings
259
System Settings Procedure
260
Step 1 Entering System Administration Mode
260
Step 2 Entering the System Administrator User ID and Passcode
260
Step 3 Selecting the Operation Mode from the System Administrator Menu
261
Step 4 Selecting an Item on the [System Settings] Screen
261
Step 5 Setting a Feature
262
Step 6 Exiting the System Administration Mode
262
System Settings Menu List
263
Setup Menu
272
System Administrator Settings
273
Entering Text
275
Common Settings
276
Machine Clock/Timers
276
Daylight Savings
277
Audio Tones
278
Screen/Button Settings
280
Paper Tray Settings
281
Auto Tray Switching
282
Watermark
283
Image Quality
283
Reports
284
Maintenance
286
Other Settings
286
Auto Job Promotion
287
Keyboard Input Restriction
290
Data Encryption
291
Data Restoration
292
Software Download
293
Copy Mode Settings
294
Copy Tab
294
Copy Defaults
295
Output Destination
297
Stamp Position
297
Date Position
297
Copy Control
298
Original Size Defaults
300
Reduce/Enlarge Presets
300
Annotation - Create Stamps
300
Network Settings
301
Port Settings
301
Protocol Settings
301
Machine's E-Mail Address/Host Name
302
Proxy Server Settings
302
Outgoing / Incoming E-Mail Settings
303
Remote Server/Directory Service
303
Kerberos Server Settings
304
PKI (Public Key) Settings
307
Other Settings
308
Print Mode Settings
310
Allocate Memory
310
Delete Form
312
Other Settings
313
Scan Mode Settings
315
General Settings Tab
315
Scan Defaults
315
Scan to PC Defaults
316
Original Size Defaults
317
Output Size Defaults
317
Reduce/Enlarge Presets
317
Other Settings
317
Fax Mode Settings
319
Screen Defaults
319
Fax Defaults
320
Fax Control
321
File Destination/Output Destination
325
Reduce/Enlarge Presets
325
Original Size Defaults
325
Local Terminal Information
326
Ifax Control
327
E-Mail/Internet Fax Settings
329
E-Mail Control
329
Mailbox/Stored Document Settings
332
Mailbox Settings
332
Stored Document Settings
333
Job Flow Settings
335
Setup Menu
336
Mailbox
336
Job Flow Sheets
338
Job Flow Sheet Keywords
344
Address Book
345
Group Send
351
Comments
352
Paper Size/Type
352
System Administrator Settings
353
System Administrator Login ID
353
System Administrator's Passcode
353
Maximum Login Attempts
354
Login Setup/Auditron Administration
355
Create/Check User Accounts
355
Account Details
357
Reset User Accounts
357
System Administrator's Meter (Copy Jobs)
358
User Details Setup
358
Charge / Private Print Settings
359
Fax Billing Data
361
Passcode Entry from Control Panel
361
Login Setup/Auditron Mode
362
Xerox Standard Accounting
363
Job Status
365
Job Status Overview
366
Checking Current/Pending Jobs
367
Checking Completed Jobs
368
Printing and Deleting Stored Documents
369
Private Charge Print
369
Charge Print
371
Secure Print
372
Sample Print
374
Delayed Print
375
Public Mailbox
376
Undelivered Faxes
377
Printing Pending Jobs
379
Handling Error Terminations
380
13 Machine Status
381
Overview of Machine Status
382
Machine Status
383
Machine Information
383
Paper Tray
384
Overwrite Hard Disk
385
Print Mode
385
Fax Receiving Mode
387
Billing Meter/Print Report
388
Billing Meter
388
User Account Billing Meter
389
Print Report/List
390
Mailbox List
395
Auditron Administration
395
Automatically Printed Reports/Lists
397
Broadcast Report
398
Relay Broadcast Report
398
Job Flow Error Report
398
Supplies
399
Faults
400
Authentication and Auditron Administration
401
Overview of Authentication
402
Users Controlled by Authentication
402
Types of Authentication
402
Features Controlled by Authentication
403
Remote Access
404
Authentication for Job Flow Sheets and Mailboxes
406
Job Flow Sheet Types
406
Types of Mailboxes
409
Linking Job Flow Sheets to Mailboxes
411
Overview of Auditron Administration
413
Authentication and Auditron Administration
413
Manageable Features and Services
414
15 Maintenance
421
Replacing Consumables
422
Replacing the Toner Cartridge
424
Replacing Drum Cartridge (for Customers Having a Spot Maintenance Contract)
425
Replacing the Staple Cartridge (for B-Finisher)
428
Replacing the Stamp Cartridge
430
Cleaning the Machine
432
Cleaning the Exterior
432
Cleaning the Document Cover and Document Glass
432
Cleaning the Film and Constant Velocity Transport Glass
433
Cleaning the Document Feeder Roller
434
Printing a Report/List
435
16 Problem Solving
437
Troubleshooting
438
Machine Trouble
440
Image Quality Trouble
445
Trouble During Copying
450
Unable to Copy
450
The Copy Result Is Not What was Expected
450
Trouble During Printing
454
Unable to Print
454
The Print Result Is Not What was Expected
455
Trouble During Faxing
457
Sending Problems
457
Receiving Problems
458
Trouble During Scanning
461
Unable to Scan with the Machine
461
Unable to Import Scanned Documents to the Computer
461
Unable to Send a Scanned Document over the Network (FTP/SMB)
462
Unable to Send E-Mail
463
The Image Is Not What was Expected
463
Error Code
466
Other Errors
520
Paper Jams
521
Paper Jams in the Top Left Cover a
522
Paper Jam in the Bottom Left Cover B
525
Paper Jams in the Bottom Left Cover C
526
Paper Jams in the Top Cover E
527
Paper Jams in the Duplex Kit
528
Paper Jams in the Trays 1 to 4
529
Paper Jams in the Tandem Tray Module
529
Paper Jams in the Tray 5 (Bypass)
530
Paper Jams in the B-Finisher
531
Document Jams
533
Stapler Faults
535
Staple Jams in the Staple Cartridge (for B-Finisher)
536
17 Appendix
539
Specifications
540
Printable Area
548
Standard Printable Area
548
Extended Printable Area
548
ESC/P Emulation
549
Emulation
549
Fonts
550
Output Feature
550
ESC/P Emulation Print Features
551
ESC/P Emulation Settings
551
Magnification Table
557
Paper Size and Number of Printable Characters
561
PDF Direct Print
563
PDF Direct Print Settings
563
PCL Emulation
565
HP-GL2 Emulation
568
Advanced Settings
569
Hard Clip Area
572
Printable Area
573
Auto Layout
574
Optional Components
581
Notes and Restrictions
583
Notes and Restrictions on the Use of the Machine
583
Notes and Restrictions in the Interrupt Mode
585
Notes and Restrictions on the Use of the Ifax Feature
586
Notes and Restrictions When Connecting with Internet Service Provider
588
Using the Telephone
591
Placing a Call
591
Simple Operating Procedures
593
Fax Settings
593
Scan Settings
594
Copy Settings
595
Common Settings
595
18 Glossary
597
Glossary
598
Index
603
Other manuals for Fuji Xerox DocuCentre-II 3005
Administrator's Guide
178 pages
5
Based on 1 rating
Ask a question
Give review
Questions and Answers:
Need help?
Do you have a question about the Fuji Xerox DocuCentre-II 3005 and is the answer not in the manual?
Ask a question
Fuji Xerox DocuCentre-II 3005 Specifications
General
Brand
Fuji Xerox
Model
DocuCentre-II 3005
Category
All in One Printer
Language
English
Related product manuals
Fuji Xerox DocuCentre-II 2055
615 pages
Fuji Xerox DocuCentre-IV 2060
399 pages
Fuji Xerox DocuCentre-IV 3060
399 pages
Fuji Xerox DocuCentre-IV 3065
399 pages
Fuji Xerox DocuCentre-IV C4475
459 pages
Fuji Xerox DocuCentre-IV C3373
459 pages
Fuji Xerox DocuCentre-IV C3375
459 pages
Fuji Xerox DocuCentre-IV C2263
443 pages
Fuji Xerox DocuCentre-IV C5575
459 pages
Fuji Xerox DocuCentre-IV C5570
433 pages
Fuji Xerox DocuCentre-III 2007
503 pages
Fuji Xerox DocuCentre-IV C2265
443 pages