Checking/Selecting Mailbox Documents
207
Send from Mailbox
6
Checking/Selecting Mailbox Documents
You can check or select documents stored in the mailbox.
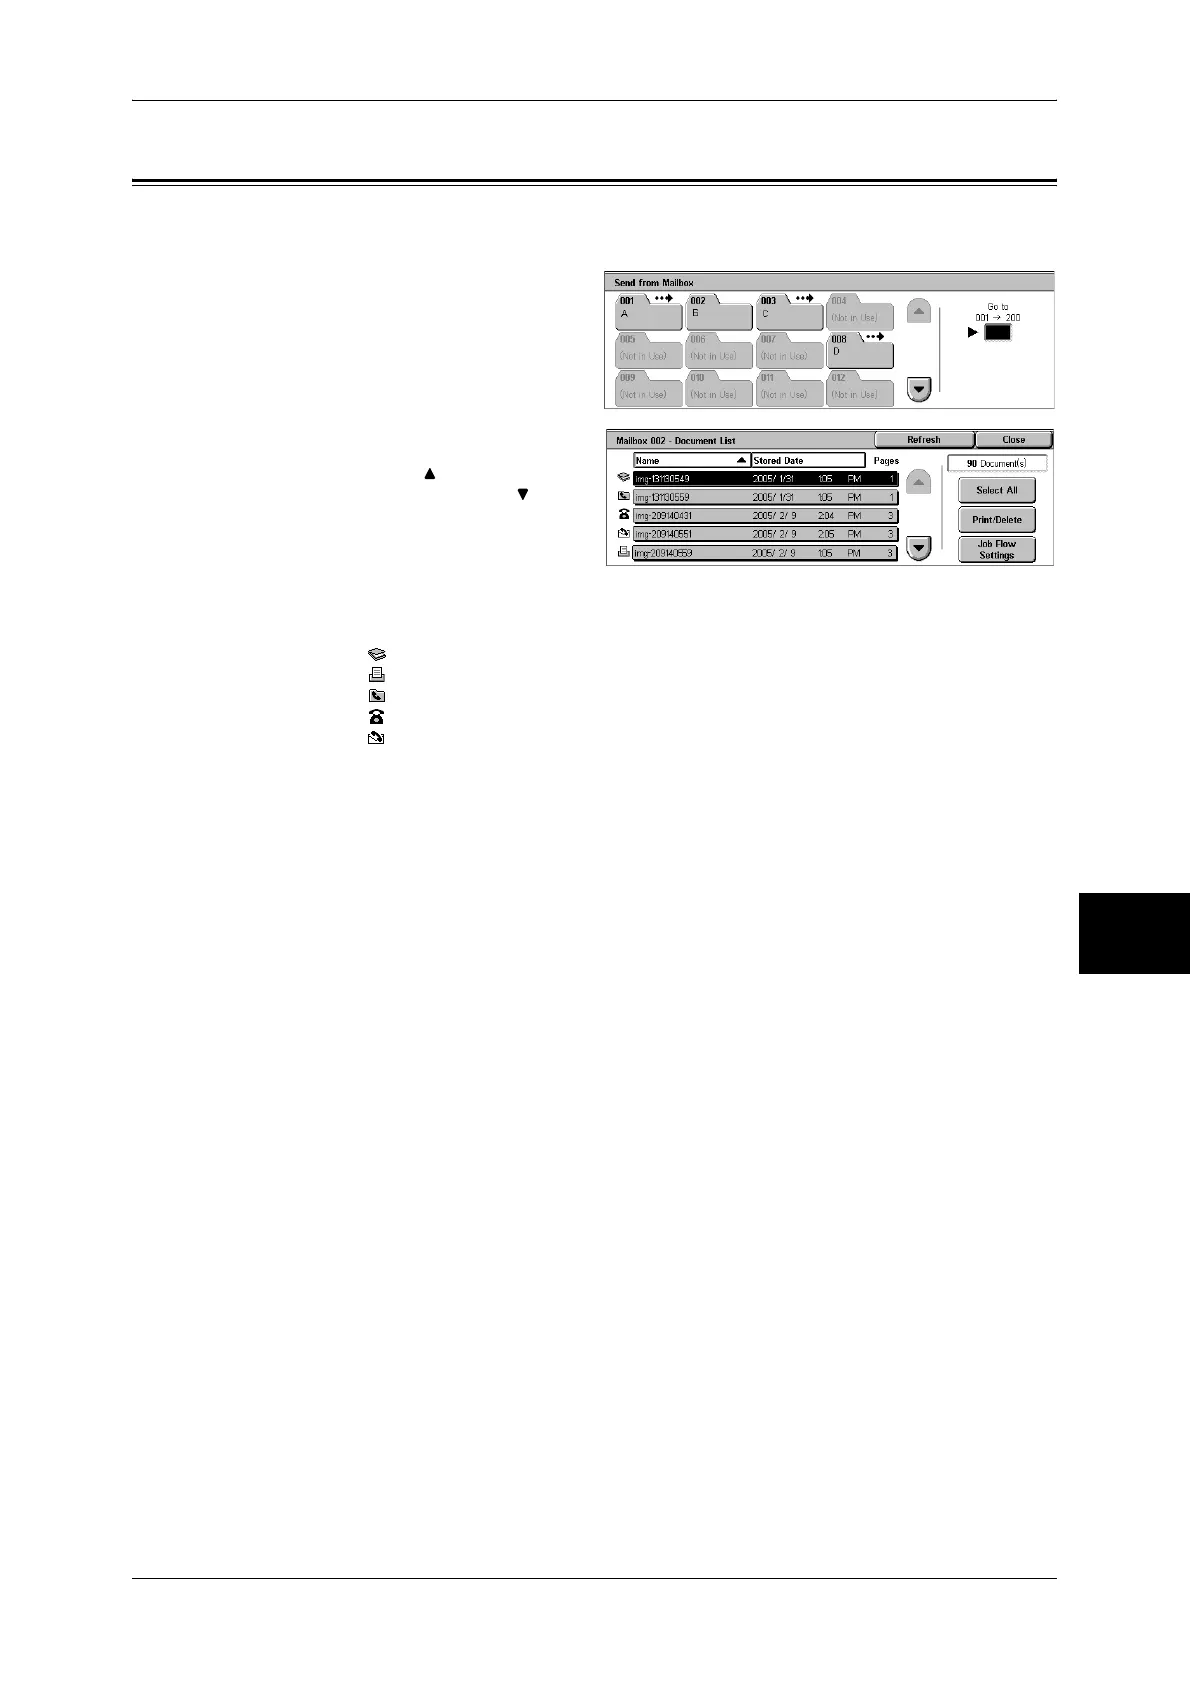
1 On the [Send from Mailbox] screen,
select a mailbox.
2 Select a document.
Note • Select [ ] to return to the
previous screen or [ ] to
move to the next screen.
• You can sort documents in
ascending or descending
order by pressing either
[Name] or [Stored Date].
• At the left of the document name, an icon is displayed to show the document type.
: Scanned document
: Print document
: Document for Private Polling
: Fax to Mailbox
: iFax to Mailbox
• Up to 9 documents can be selected separately. You can also select all documents. When
selecting individual documents, a number appears to the left of the document icon indicating
the order in which it was selected. Documents are processed in this order.
3 Select any item.
Refresh
Displays the refreshed information.
Document(s)
Displays the number of documents stored in the mailbox.
Select All
Selects all the documents in the mailbox. This selection will be cancelled if [Select All]
is selected again.
Print/Delete
Displays the [Print/Delete] screen. This screen allows you to print/delete documents
stored in the mailbox.
Refer to "Printing/Deleting Documents in the Mailbox" (P.208).
Job Flow Settings
Displays the [Job Flow Settings] screen. This screen allows you to create, link, and
execute job flows.
Refer to "Configuring/Starting Job Flow" (P.211).
Note • Print documents are not supported by job flows. If print documents are included in the
selected documents, the job flow is executed for the documents other than the print
documents.
 Loading...