Home
Fuji Xerox
All in One Printer
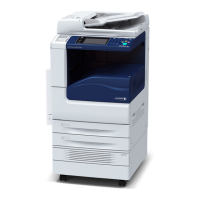
DocuCentre-IV C2260
Fuji Xerox DocuCentre-IV C2260 Administrator's Guide
4
of 1
of 1 rating
617 pages
Give review
Manual
Specs
To Next Page
To Next Page
To Previous Page
To Previous Page
Loading...
9 Scanner Environment Settings
306
Scanner
Environmen
t Settin
gs
9
Step 5 C
onfig
uratio
n on the C
ompu
ter
Create a des
tinati
on folder on
your compute
r and set it as
a shared folder,
and then se
t
write rights on the fold
er.
Note
•
To u
se SMB
on Mac
OS X, se
t [Windo
ws Sha
ring] t
o [On] in
the [Ser
vice] t
ab of [Sh
aring
]
under [
System Pre
feren
ces].
307
309
Table of Contents
Table of Contents
3
1 Before Using the Machine
13
Preface
14
This Guide
14
Types of Manuals
15
Organization of this Guide
16
Using this Guide
16
Conventions
17
Interface Cables
19
Using the Ethernet Interface
19
Using the USB Interface
19
Changing the Interval for Entering Energy Saver Mode
21
Energy Saver Mode
21
Changing the Screen Default
24
Customizing the Control Panel
24
Setting the Screen after Auto Clear
25
Customizing the Button Layout
26
Assigning Services to <Custom> Buttons
30
Adjusting Screen Brightness
31
Entering Text
32
2 Paper and Other Media
33
Paper Types
34
Loadable Quantity and Weight for Supported Paper
34
Supported Paper Type
35
Usable Paper
37
Special Media
39
Storing and Handling Paper
42
Unusable Paper
42
Loading Paper
44
Loading Paper in Trays 1 to 4
44
Loading Paper in Tray 5
46
Changing the Paper Size
48
Changing the Paper Size for Trays 1 to 4
48
Changing the Paper Settings
49
Changing the Paper Settings
51
3 Maintenance
55
Replacing Consumables
56
Replacing Toner Cartridges
58
Replacing Waste Toner Container (R5)
60
Replacing Drum Cartridges R1, R2, R3, or R4
63
Replacing Staple Cartridge (for Finisher-A1)
67
Replacing Staple Cartridge (for Finisher-B1)
68
Replacing Staple Cartridge (for Booklet Maker Unit for Finisher-B1)
70
Emptying Punch Waste Container (for Finisher-B1)
70
Replacing Stamp
71
Replacing Fuser Unit
73
Replacing IBT Unit
74
Replacing 2Nd BTR Unit
79
Cleaning the Machine
83
Cleaning the Exterior
83
Cleaning the Interior (Laser Scanners)
83
Cleaning the Touch Screen
85
Cleaning the Document Cover and Document Glass
85
Cleaning the Film and Constant Velocity Transport Glass
86
Cleaning the Document Feeder Rollers
87
Executing Calibration
88
Printing a Report/List
91
Deleting a Private Charge Print Job with an Invalid User ID
92
Setting Restore Tool
93
4 Machine Status
95
Overview of Machine Status
96
Machine Information
97
Default Chapter
97
General Information
97
Paper Tray Status
99
Print Reports
99
Printer Reports
100
Fax Reports
103
Automatically Printed Reports/Lists
107
Overwrite Hard Disk
108
Print Mode
108
Fax Receiving Mode
111
1 Press the <Machine Status> Button
112
Faults
112
Supplies
113
Billing Information
114
2 On the [Machine Information] Screen
114
User Account Billing Information
115
5 Tools
117
System Settings Procedure
118
Step 1 Entering System Administration Mode
118
Step 2 Entering the System Administrator User ID and Passcode
118
Step 3 Selecting [Tools]
119
Step 4 Selecting a Setting Item on the [Tools] Screen
119
System Settings Procedure
119
Step 5 Setting a Feature
120
Step 6 Exiting System Administration Mode
121
Common Service Settings
122
Tools Menu List
122
Copy Service Settings
124
Connectivity & Network Setup
126
Print Service Settings
127
Fax Service Settings
128
Scan Service Settings
128
E-Mail/Internet Fax Service Settings
130
Folder Service Settings
130
Job Flow Service Settings
130
Media Print Service Settings
131
Setup
131
Stored File Settings
131
Accounting
132
Authentication/Security Settings
133
Common Service Settings
134
Machine Clock/Timers
134
Auto Print
135
Connection Interval
135
Daylight Savings
136
Audio Tones
137
Screen/Button Settings
138
Default Language
139
Paper Tray Settings
140
Image Quality Adjustment
143
Reports
145
Maintenance
146
Watermark
147
Force Annotation
149
Print Universal Unique ID
150
Notify Job Completion by E-Mail
151
Other Settings
151
Auto Job Promotion
152
Software Download
158
Copy Service Settings
160
Copy Tab - Features Allocation
160
Preset Buttons
161
Copy Defaults
161
Background Suppression
162
Original Type
162
Color Shift
163
Copy Control
166
Original Size Defaults
167
Reduce/Enlarge Presets
168
Custom Colors
168
Annotations - Create Comments
168
Connectivity & Network Setup
169
Port Settings
169
Upnp Discovery
172
Protocol Settings
173
Machine's E-Mail Address/Host Name
176
Proxy Server Settings
176
Outgoing/Incoming E-Mail Settings
177
Remote Authentication/Directory Service
178
Kerberos Server Settings
179
Security Settings
183
Other Settings
186
Print Service Settings
188
Allocate Memory
188
Delete Form
190
Other Settings
190
Scan Service Settings
194
First Tab
194
Scan Defaults
195
Scan to PC Defaults
197
Original Size Defaults
197
Output Size Defaults
198
Reduce/Enlarge Presets
198
Other Settings
198
Background Suppression Level
199
Shadow Suppression Level
199
Fax Service Settings
201
Screen Defaults
201
Fax Defaults
202
Fax Control
203
Fax Received Options
207
Local Terminal Information
208
Original Size Defaults
208
Reduce/Enlarge Presets
208
Company Logo
209
Internet Fax Control
210
E-Mail/Internet Fax Service Settings
212
E-Mail Control
212
Folder Service Settings
215
Job Flow Service Settings
216
Media Print Service Settings
217
Stored File Settings
218
Setup
220
Create Folder
220
Stored Programming
222
Create Job Flow Sheet
222
Restrictions on Using Job Flow
223
Create Job Flow Sheet Keyword
229
Add Address Book Entry
229
Transfer Protocol
232
Relay Broadcast
235
Create Fax Group Recipients
236
Add Fax Comment
237
Paper Tray Attributes
237
Accounting
238
Create/View User Accounts
238
Account Limit
239
Reset Account
240
View Accounts
241
Reset User Accounts
241
System Administrator's Meter (Copy Jobs)
242
Accounting Type
242
Accounting Login Screen Settings
243
Fax Billing Data
244
Accounting/Billing Device Settings
244
Interrupt Mode
245
Authentication/Security Settings
247
System Administrator Settings
247
Authentication
248
Create Authorization Groups
250
User Details Setup
251
Passcode Policy
252
Allow User to Disable Active Settings
254
Job Status Default
255
Overwrite Hard Disk
255
6 Centreware Internet Services Settings
257
Installation of Centreware Internet Services
258
Configuration on the Machine
258
Preparations
258
Starting Centreware Internet Services
260
Configuring Machine Settings Using Centreware Internet Services
261
7 Printer Environment Settings
265
Default Chapter
266
Print Overview
266
Supported Operating Systems
268
Installation When Using USB Port
269
Step 1 Preparations
269
Step 2 Configuration on the Machine
269
Centreware Internet Services Setting Items
270
Step 3 Configuration on the Computer
270
Installation When Using TCP/IP (Lpd/Port 9100)
271
Step 1 Preparations
271
Step 2 Configuration on the Machine
271
Step 3 Configuration on the Computer
272
Centreware Internet Services Setting Items
273
Installation When Using Netware
274
Step 1 Preparations
274
Step 2 Configuration on the Machine
274
Centreware Internet Services Setting Items
276
Step 3 Configuration on the Computer
276
Installation When Using Microsoft Network (SMB)
277
Step 1 Preparations
277
Step 2 Configuration on the Machine
277
Centreware Internet Services Setting Items
278
Step 3 Configuration on the Computer
278
Installation When Using Internet Printing Protocol (IPP)
279
Step 1 Preparations
279
Step 2 Configuration on the Machine
279
Centreware Internet Services Setting Items
280
Step 3 Configuration on the Computer
280
Installation When Using Ethertalk
281
Step 1 Preparations
281
Step 2 Configuration on the Machine
281
Centreware Internet Services Setting Items
282
Step 3 Configuration on the Computer
282
8 E-Mail Environment Settings
283
E-Mail Overview
284
Preparations
286
Installation Procedures
288
Step 1 Enabling Port and Setting up TCP/IP
288
Step 2 Configuring E-Mail Environment
289
Centreware Internet Services Setting Items
290
9 Scanner Environment Settings
291
Scan Service Overview
292
Configuration of Store to Folder
294
Step 1 Enabling Port and Setting up TCP/IP
294
Step 2 Registering a Folder
295
Step 3 Configuring a Computer
295
Configuration of Scan to PC
296
Step 1 Preparations
296
Step 2 Enabling Port and Setting up TCP/IP
297
Step 3 Configuration on the Computer
298
Configuration of Store to USB
299
Step 1 Preparations
299
Step 2 Enabling USB Port
299
Centreware Internet Services Setting Items
300
Configuration of Network Scanning (Job Template Scanning)
301
Step 1 Preparations
301
Step 2 Enabling Ports and Setting up TCP/IP
301
Step 3 Configuring the SNMP Port
302
Step 4 Configuration on the Computer
303
Configuration of Scan to Home
304
Step 1 Preparations
304
Step 2 Enabling SMB Port and Setting up TCP/IP
304
Step 3 Configuring Remote Authentication
305
Step 4 Configuring Scan to Home
306
Step 5 Configuration on the Computer
308
Configuration of Job Flow Sheets
309
Step 1 Enabling Ports and Setting up TCP/IP
309
Step 2 Configuring the SNMP Port
310
Step 3 Configuration on the Computer
310
Configuration of Store & Send Link
311
Centreware Internet Services Setting Items
311
Step 1 Configuring E-Mail
311
Step 2 Enabling Authentication
311
Step 3 Other Settings
311
10 Using the Internet Fax Service
313
Internet Fax Overview
314
Preparations
314
E-Mail Environment
314
System Requirements for the Machine
314
Installation Procedures
316
Step 1 Enabling Port and Setting up TCP/IP
316
Step 2 Configuring E-Mail Environment
317
Step 3 Testing the Internet Fax
318
11 Using the Server Fax Service
319
Server Fax Overview
320
Preparations
320
System Requirements for the Machine
320
Installation Procedure
321
Installation Overview
321
Step 1 Fax Settings
321
Step 2 Setting the Server Fax Feature
322
12 Encryption and Digital Signature Settings
325
Encryption and Digital Signature Overview
326
Types of Certificate
326
Encryption Features for Communication
326
Encryption and Digital-Signature Features for Scan Files
327
Configuration of HTTP Communications Encryption
328
Installation Overview
328
Step1 Configuration on the Machine
328
Step2 Configuration on the Computer
329
Configuration of HTTP Communications Encryption
329
Configuration of Encryption Using Ipsec
330
Installation Overview
330
Step1 Import and Configuration of a Certificate
330
Step2 Configuration on the Machine (Configuration of Ipsec)
331
Step3 Configuration on the Computer
332
Configuration of E-Mail Encryption/Digital Signature
333
Installation Overview
333
Step1 Configuration on the Machine
333
Step2 Configuration on Sender and Recipient
335
Configuration of Pdf/Docuworks/Xps Signature
337
Installation Overview
337
Step1 Configuration on the Machine
337
Step2 Configuration on the Computer
338
13 Authentication and Accounting Features
341
Overview of Authentication and Accounting Feature
342
Overview of Authentication Feature
342
Overview of Accounting Feature
343
Authentication
344
User Types Managed by Authentication Feature
344
User Roles and Authorization Groups
345
Types of Authentication
346
Types of Account Administration
347
Authentication and Accounting Relationship
348
Services Controlled by Authentication
349
Overview
349
Services Restricted by User ID Authentication
349
Services Restricted by the Combined Use of Smart Card Authentication and User ID Authentication
351
Authentication for Job Flow Sheets and Folders
354
Overview
354
Authentication for Job Flow Sheets and Folders
355
When the Authentication Feature Is Disabled
356
When the Authentication Feature Is Enabled
359
Jobs Manageable by Account Administration
362
Jobs Manageable by Account Administration
363
Configuration for Authentication
365
Installation Overview
365
Enabling Authentication
365
Changing the Default Authorization Group Settings
368
Creating an Authorization Group
368
Configuration for Account Administration
370
Step 1 Selecting an Accounting Type
370
Step 2 Registering User Information
370
User Authentication Operations
372
Authenticating Login Users
372
Changing Passcode
372
14 Problem Solving
375
Image Quality Trouble
376
Trouble During Copying
376
Troubleshooting
376
Machine Trouble
377
Image Quality Trouble
382
Trouble During Copying
388
Unable to Copy
388
The Copy Result Is Not What was Expected
389
Trouble During Printing
392
Unable to Print
392
The Print Result Is Not What was Expected
393
Trouble During Faxing
395
Sending Problems
395
Receiving Problems
397
Trouble During Scanning
399
Unable to Scan with the Machine
399
Unable to Import Scanned Documents to the Computer
400
Unable to Send a Scanned Document over the Network (FTP/SMB)
401
Unable to Send E-Mail
402
The Image Is Not What was Expected
402
Network-Related Problems
404
When Using SMB
404
When You Cannot Print
405
When Using Netware
406
When Using TCP/IP
410
When Using Ethertalk
411
Centreware Internet Services Problems
412
E-Mail Features Problems
413
Internet/Intranet Connection Problems
414
Ipv4 and Ipv6 Connection Problems
415
Media Print - Text Trouble
418
Media Print - Photos Trouble
419
Error Code
420
Other Errors
494
Paper Jams
495
Paper Jams in Top Left Cover a
496
Paper Jams in Bottom Left Cover B
497
Paper Jams in Bottom Left Cover C
497
Paper Jams in Top Left Cover E
498
Paper Jams in Trays 1 to 4
498
Paper Jams in Tray 5
499
Paper Jams in Duplex Module D
500
Paper Jams in Finisher-A1
500
Paper Jams in Finisher-B1
501
Document Jams
503
Stapler Faults
505
Staple Jams in Staple Cartridge (for Finisher-A1)
506
Staple Jams in Staple Cartridge (for Finisher-B1)
507
15 Appendix
509
Specifications
510
Print Function
512
Fax Function
515
Printable Area
519
Standard Printable Area
519
Extended Printable Area
519
Internal Fonts
520
Optional Components
522
ESC/P-K Emulation
525
Emulation
525
Fonts
526
Output Feature
526
ESC/P-K Emulation Print Features
526
ESC/P-K Emulation Settings
527
Magnification Table
534
Paper Size and Number of Printable Characters
538
PDF Direct Print
540
PDF Direct Print Settings
540
PCL Emulation
542
Emulation
542
Fonts
542
PCL Emulation
543
Output Feature
544
PCL Emulation Settings
544
Pcl Settings List
545
HP-GL2 Emulation
550
Emulation
550
Fonts
550
HP-GL2 Emulation
551
Output Feature
551
HP-GL/2 Emulation Settings
552
Hard Clip Area
558
Printable Area
559
Auto Layout
561
Notes and Restrictions
568
Notes and Restrictions on the Use of the Copy Feature
571
Notes and Restrictions on the Use of the Scan Features
573
Notes and Restrictions on the Use of the Fax Feature
577
Notes and Restrictions on the Use of the E-Mail/Internet Fax Feature
578
Notes and Restrictions When Connecting with Internet Service Provider
582
Notes and Restrictions on the Interrupt Mode
584
Notes and Restrictions on Folders
585
Notes and Restrictions When Operating from Computers
586
Notes and Restrictions on Job Flows
587
Notes and Restrictions for Using SMB
588
Notes and Restrictions for Using TCP/IP
590
Notes and Restrictions for Using Ethertalk
591
Notes and Restrictions for Using Bonjour
592
Using the Telephone
595
Activity Report
597
Installing the HDD Extension Kit (Optional)
599
Installing the Extension System Memory (2 GB) (Optional)
601
Glossary
603
Index
605
Other manuals for Fuji Xerox DocuCentre-IV C2260
User Guide
401 pages
Quick Reference Notes
5 pages
4
Based on 1 rating
Ask a question
Give review
Questions and Answers:
Need help?
Do you have a question about the Fuji Xerox DocuCentre-IV C2260 and is the answer not in the manual?
Ask a question
Fuji Xerox DocuCentre-IV C2260 Specifications
General
Brand
Fuji Xerox
Model
DocuCentre-IV C2260
Category
All in One Printer
Language
English
Related product manuals
Fuji Xerox DocuCentre-IV C2263
443 pages
Fuji Xerox DocuCentre-IV C2265
443 pages
Fuji Xerox docucentre-iv C2270
433 pages
Fuji Xerox DocuCentre-IV C3373
459 pages
Fuji Xerox DocuCentre-IV C5570
433 pages
Fuji Xerox docucentre-iv C4470
433 pages
Fuji Xerox docucentre-iv C3370
433 pages
Fuji Xerox DocuCentre-IV C4475
459 pages
Fuji Xerox DocuCentre-IV C3375
459 pages
Fuji Xerox DocuCentre-IV C5575
459 pages
Fuji Xerox DocuCentre-IV 3065
399 pages
Fuji Xerox DocuCentre-IV 2060
399 pages