CT114_Rev2
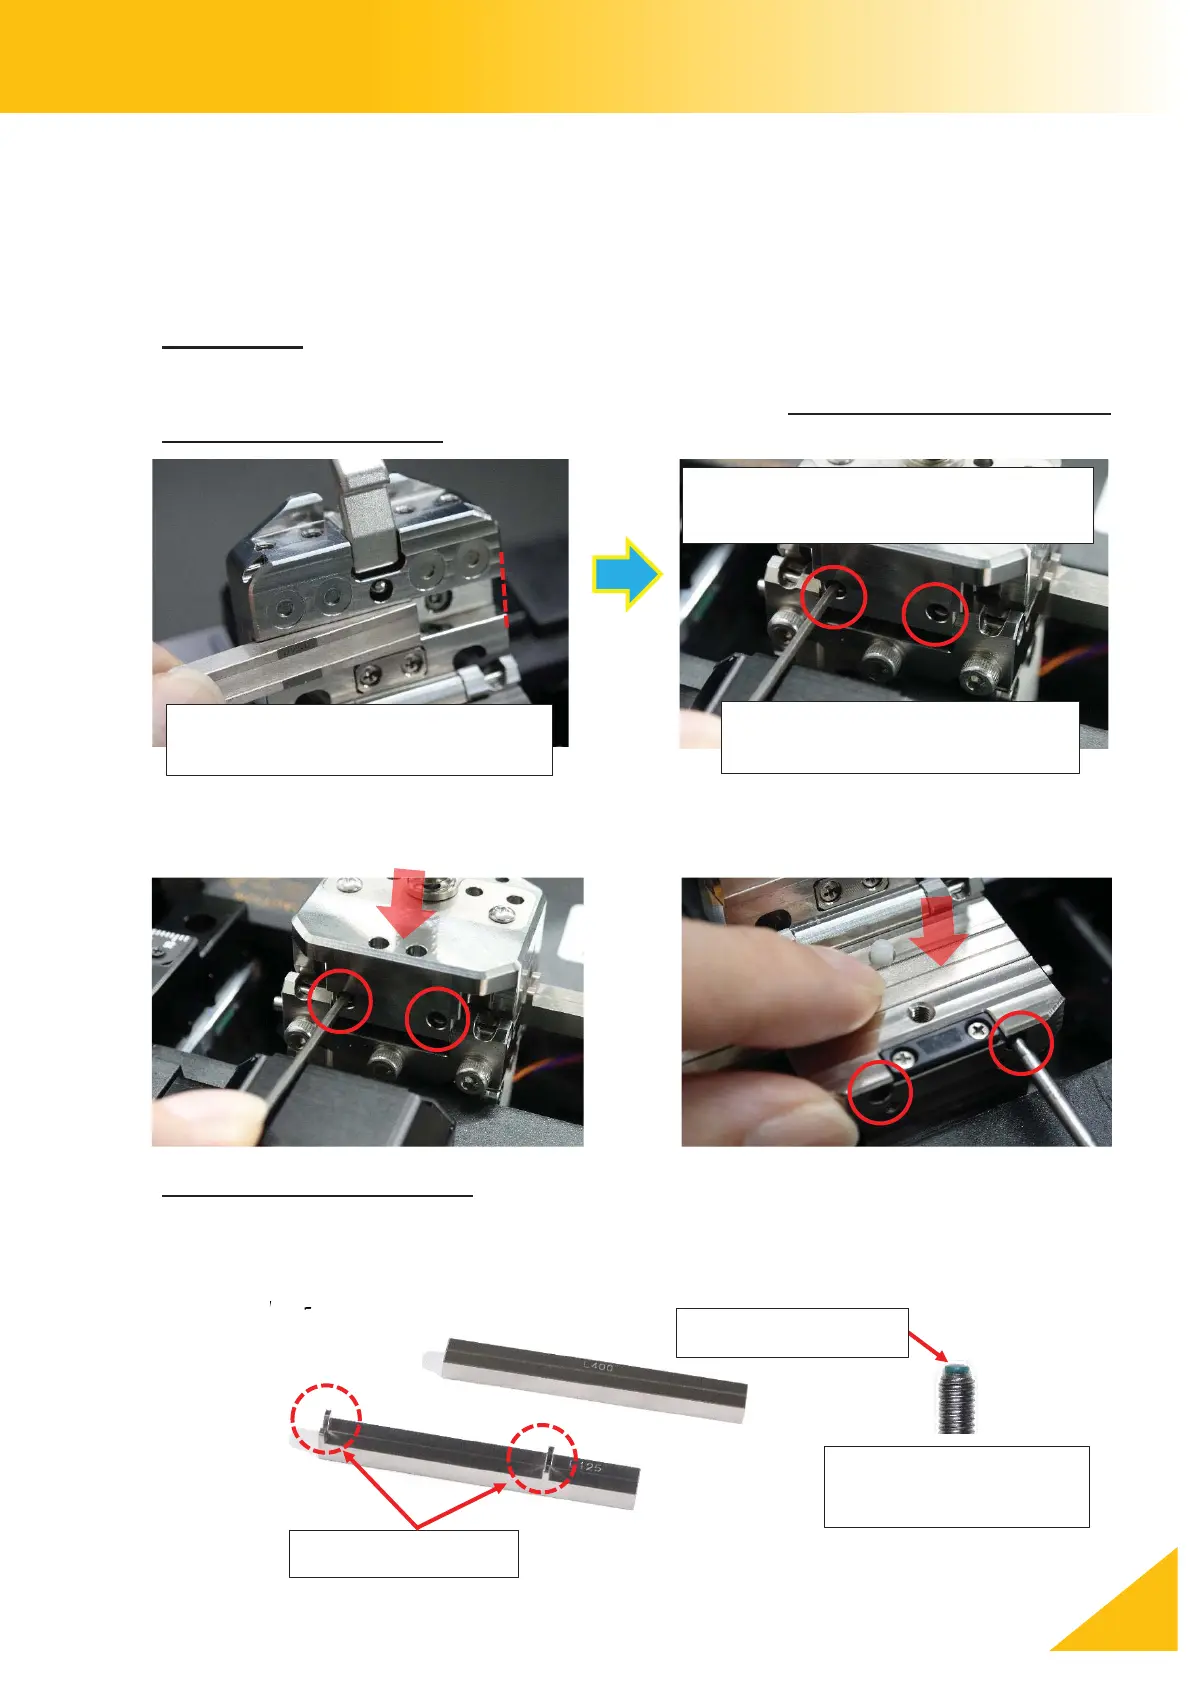
Set Up the Cleaver
How to Install the Inserts
Select the inserts according to the cladding diameter and the jacket diameter of the optical
fiber being cleaved. The coating-side of the optical fiber will be held by the left clamp unit,
and the bare, cladding-side of the optical fiber will be held by the right clamp unit.
Upper Insert
Install the upper inserts so that the end-face of each insert aligns with the side of the upper
clamp facing the blade (toward the center of the machine). Install the upper inserts before
installing the lower inserts.
Tighten the screws with the attached hex wrench (HEX-01) while holding the insert.
If you tighten the screws too much, the soft tip of the screw will be damaged.
Installing the Lower Inserts
There are two kinds of lower insert: one is with the V-shaped fiber guide, and the other is flat,
with no fiber guide. Secure the insert by tightening the screws (SCREW-CT-01) with the hex
wrench (HEX-01)
(SCREW-CT-01)
Confirm the end-face is aligned
to the edge
Tighten the set screws after
confirming the lid is closed
Access holes are on the back
of the upper lid