EasyManuals Logo

GE Dash 4000 Service Manual

GE Dash 4000
282 pages
To Next Page IconTo Next Page
To Previous Page IconTo Previous Page
Page #164 background imageLoading...
Page #164 background image
Field replaceable units: Remove or replace display assembly
7-18 Dash 3000/4000/5000 2000966-542D
Remove or replace display assembly
1. Remove the handle assembly from the patient monitor. Refer to
“Remove or replace handle assembly” on page 7-10.
NOTE
This step is not necessary for Dash 5000 patient monitors.
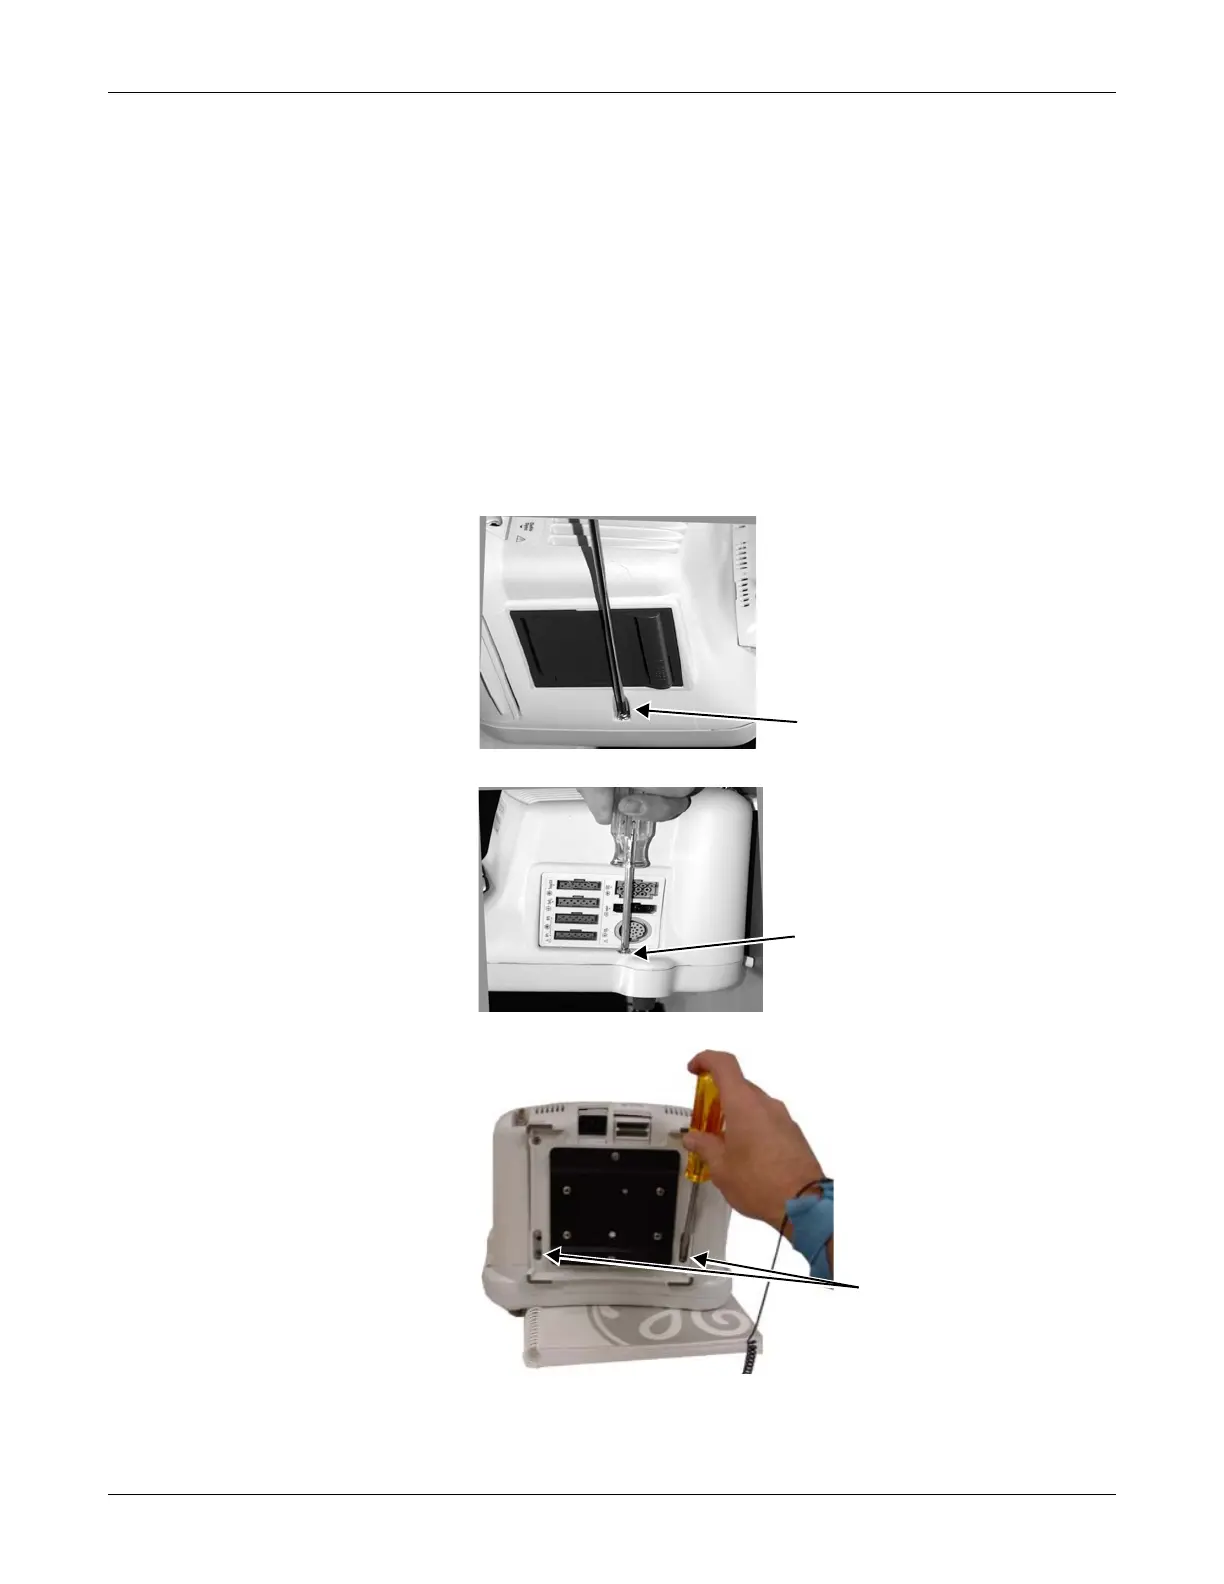
2. Place the patient monitor face down on a non-abrasive, static-free
surface. Make sure the Trim Knob control hangs off the edge of the
surface to avoid damage.
3. Use a Phillips head screw driver to remove the four screws (six
screws for Dash 5000 patient monitors) holding the display assembly
to the main unit.
...and the two shorter
screws from the bottom of
the unit.
one screw on the right side of the
unit...
one screw on the left side of the
unit...
579A
578B
580A
Note: Use a screwdriver
with a long blade or
remove the GCX plate first
for easy access to the
bottom screws.

Table of Contents

Other manuals for GE Dash 4000

Questions and Answers:

Question and Answer IconNeed help?

Do you have a question about the GE Dash 4000 and is the answer not in the manual?

GE Dash 4000 Specifications

General IconGeneral
Resolution640 x 480 pixels
Power Supply100-240 VAC, 50/60 Hz
ECG3/5/12-lead
IBPUp to 4 channels
Battery BackupYes
CertificationsCE, UL, CSA
Parameters MonitoredECG, SpO2, NIBP, IBP, Temperature, Respiration, Cardiac Output
ConnectivityEthernet, USB, Serial
Display TypeTFT LCD
RecorderIntegrated thermal printer
Battery TypeLithium-ion
Operating Temperature0 to 40°C
Storage Temperature-20 to 60°C
Humidity Range15% to 95% non-condensing
Display Size10.4 inches
Cardiac OutputAvailable

Related product manuals