3
Select Filter Customization in the Option menu in the ImageQuant LAS 4000 Control Software
main window.
4
Click the Filter down button.
The filter changer is lowered.
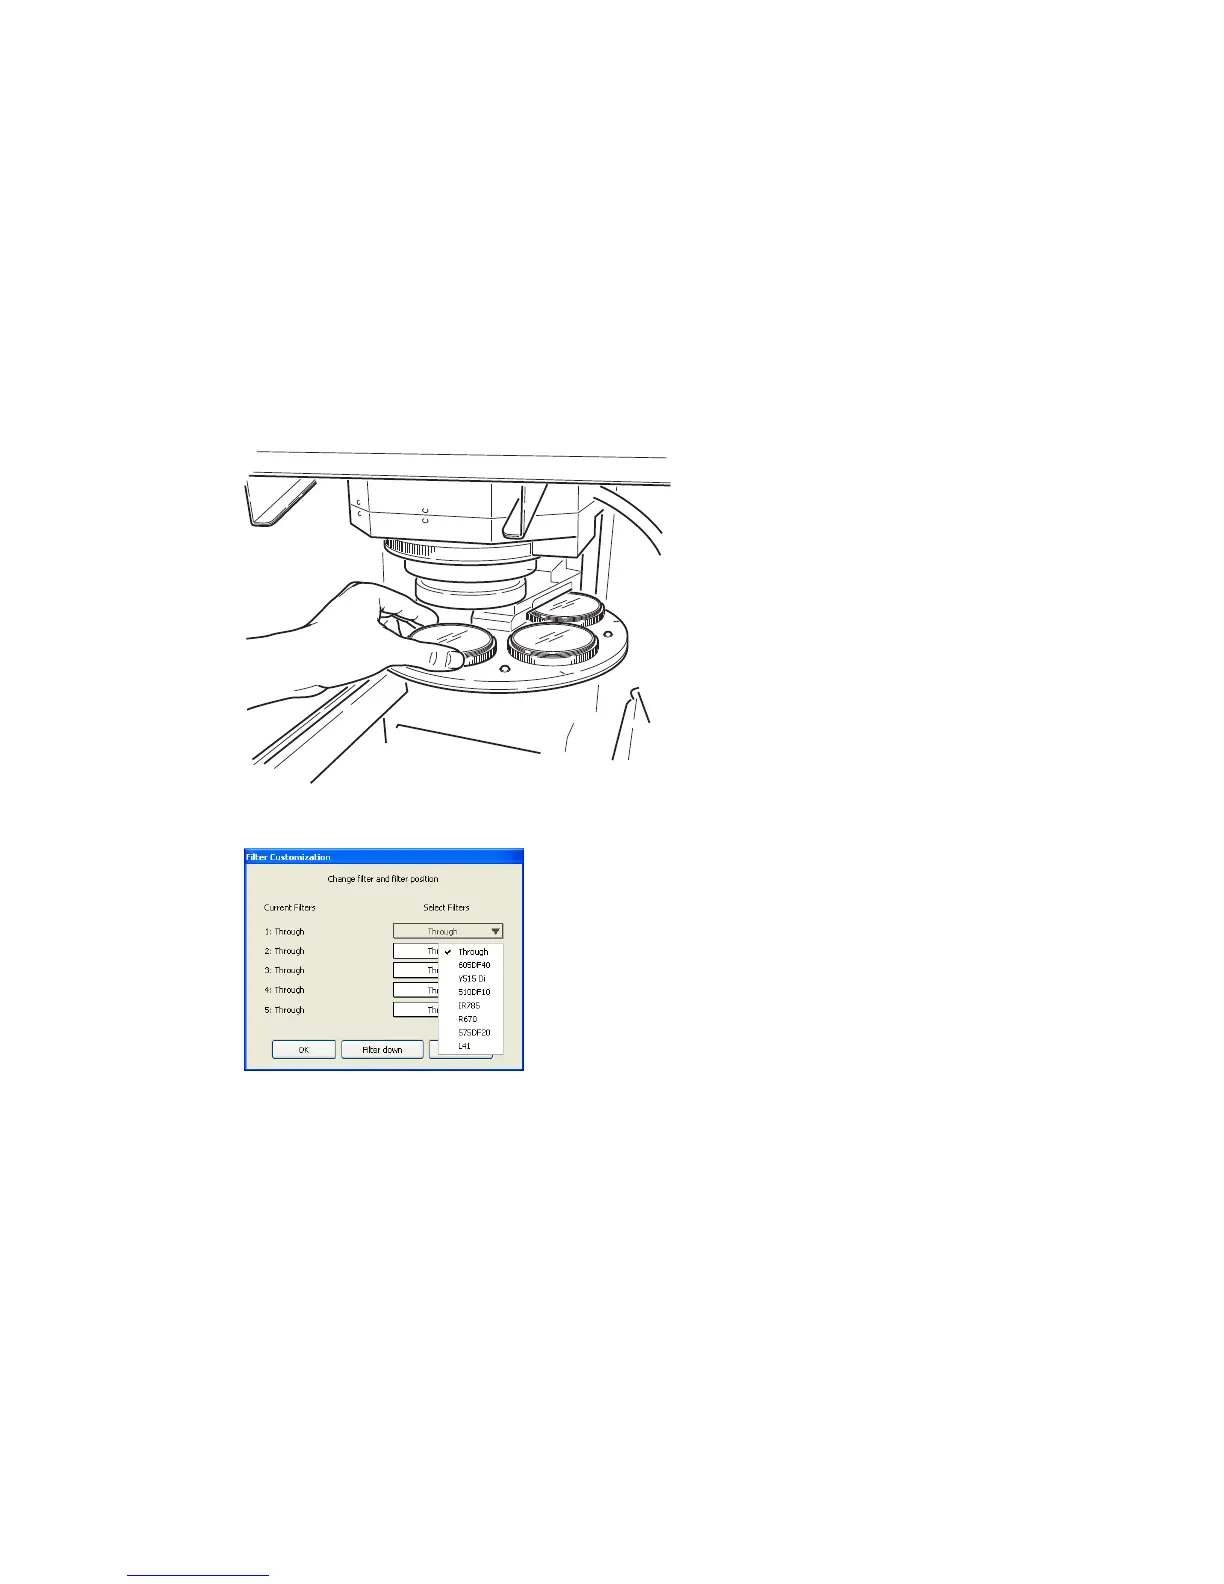
5
Open the instrument door.
6
Turn the filter changer so the desired position is easily accessible. If a filter is already in place at
this position, unscrew it carefully and put it back in its cover.
7
Screw the new filter into place.
8
Select the appropriate filter from the drop-down list and click the OK button.
Note:
The filter changer returns to the original position when you click the Start, Focusing or
Method/Tray position buttons.
3.2 Installing or exchanging the lens
Two lenses can be used with the ImageQuant LAS 4000, an F0.85 43mm LAS High Sens. lens, and an
optional F1.8 24mm wide view lens. The wide view lens can image samples up to 250 x 250 mm in size.
For all other applications, the LAS High Sens. lens is recommended. This section describes how to install
or exchange the lenses.
18 ImageQuant LAS 4000 User Manual 28-9607-42 AB
3 Exchanging accessory parts
3.1 Changing or installing a filter