Page 8 VRC2000 Installation and Operations Manual
Technical or Setup Assistance
Telephone: 800.945.7730 (USA) or 801.975.7200 (worldwide) • Worldwide Web @ http://www.gentner.com
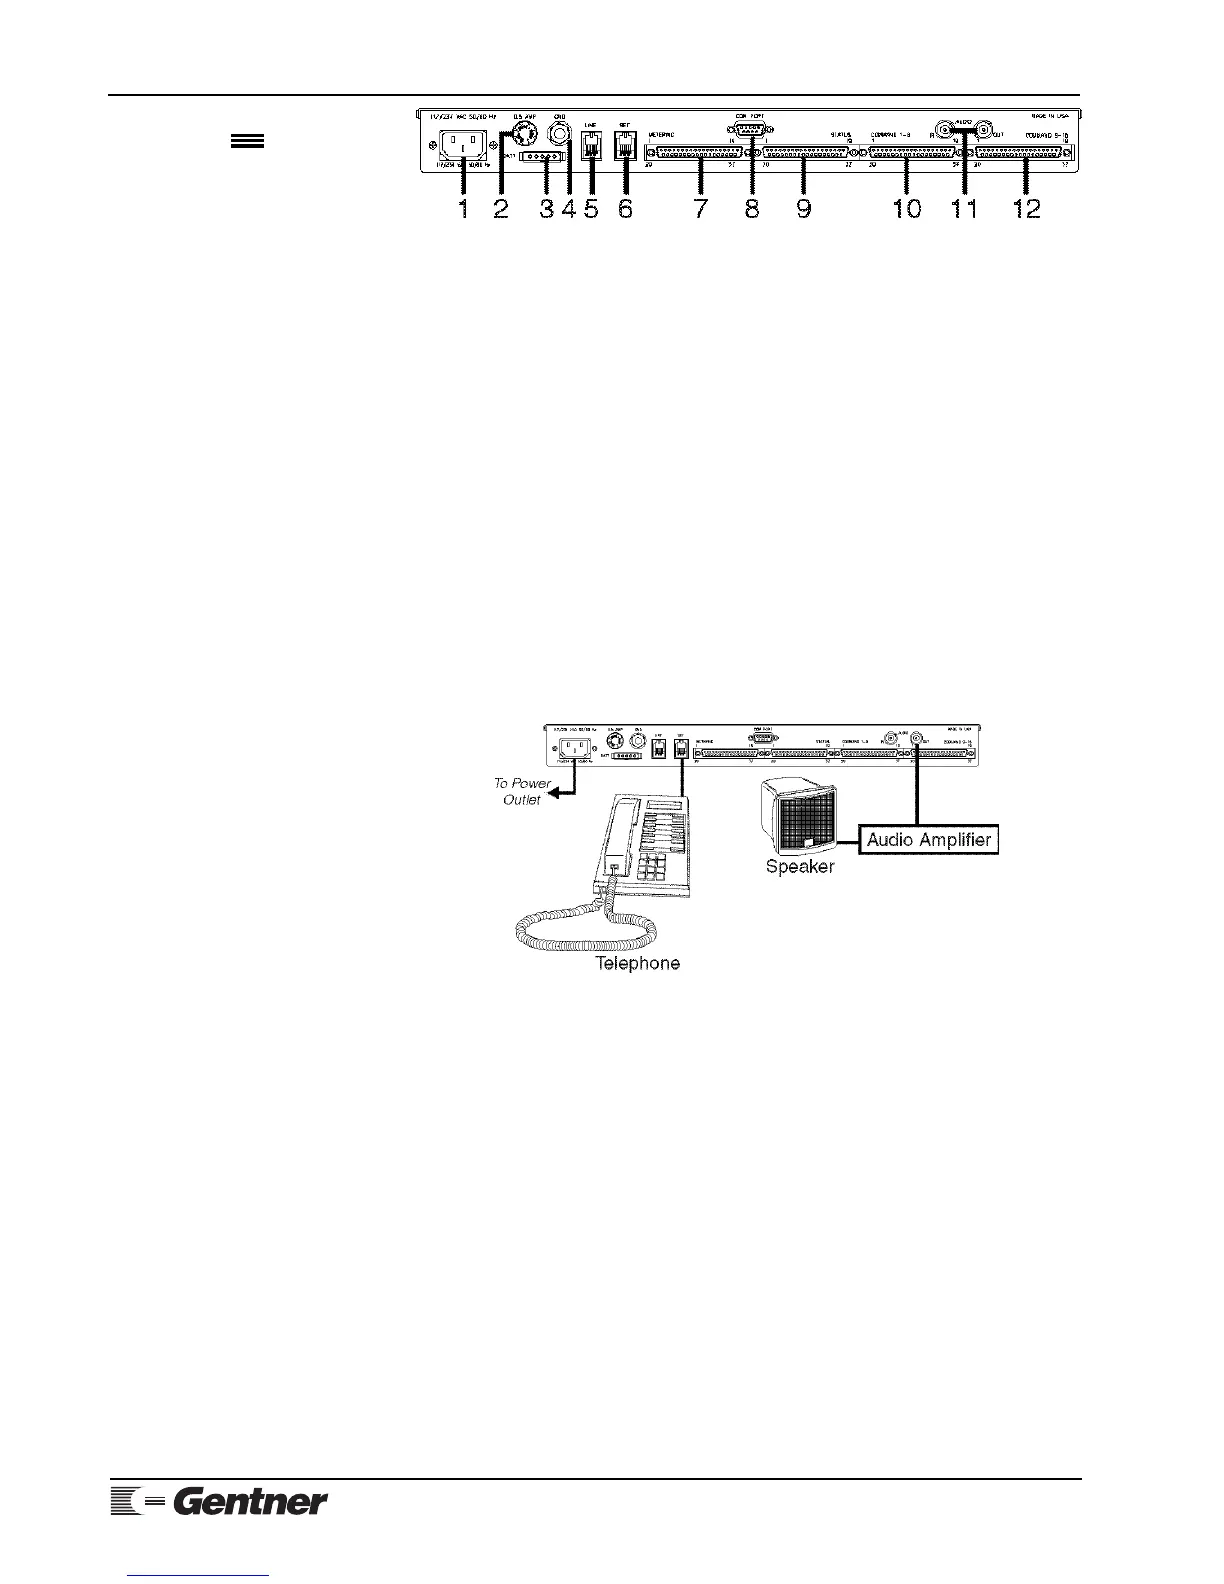
Audio Amplifier
If possible, attach an audio amplifier and speaker to the BNC connector
marked AUDIO OUT [11] (Figure 7a, above).
Step 5 — Power Up
Connect the supplied AC power cord to the power module [1], and apply AC
power to the VRC2000.
MANUAL NOTE:
In instances where the VRC2000 responds verbally, the VRC2000’s verbiage will
be set off by a bullet (•) and printed in SMALL CAPS. Numbers and phrases you
should send back to the VRC2000 with your DTMF keypad will be offset with a
block (
☎
) and quotation marks (“ ”).
With Audio Amplifier
If you have an audio amplifier and speaker attached to the VRC2000 (See
Figure 8, below.), the unit should respond with the spoken phrase:
• DATA ERASED. CLOCK ERASED.
Now remove AC power from the VRC2000, and plug the unit back in. The
VRC2000 should respond with the phrase
• DATA OK. CLOCK OK.
However, if the VRC2000 also responds
• DATA ERASED. CLOCK ERASED.
the internal lithium battery has not been properly connected. Perform
Step 2 — Internal Lithium Battery (See Page 7.) again.
Without Audio Amplifier
If you do not use an audio amplifier to confirm that your VRC2000 is ready
for operation, follow these directions:
1) Apply AC power to the VRC2000.
2) Pick up the telephone handset and listen.
Initialization
Continued
Figure 7a. VRC2000 back-panel
connectors
Figure 8. Power-up configuration