EasyManuals Logo

GeoVision GV-IPCamera Series User Manual

GeoVision GV-IPCamera Series
306 pages
To Next Page IconTo Next Page
To Previous Page IconTo Previous Page
Page #95 background imageLoading...
Page #95 background image
Target Mini Fixed Rugged Dome
61
7
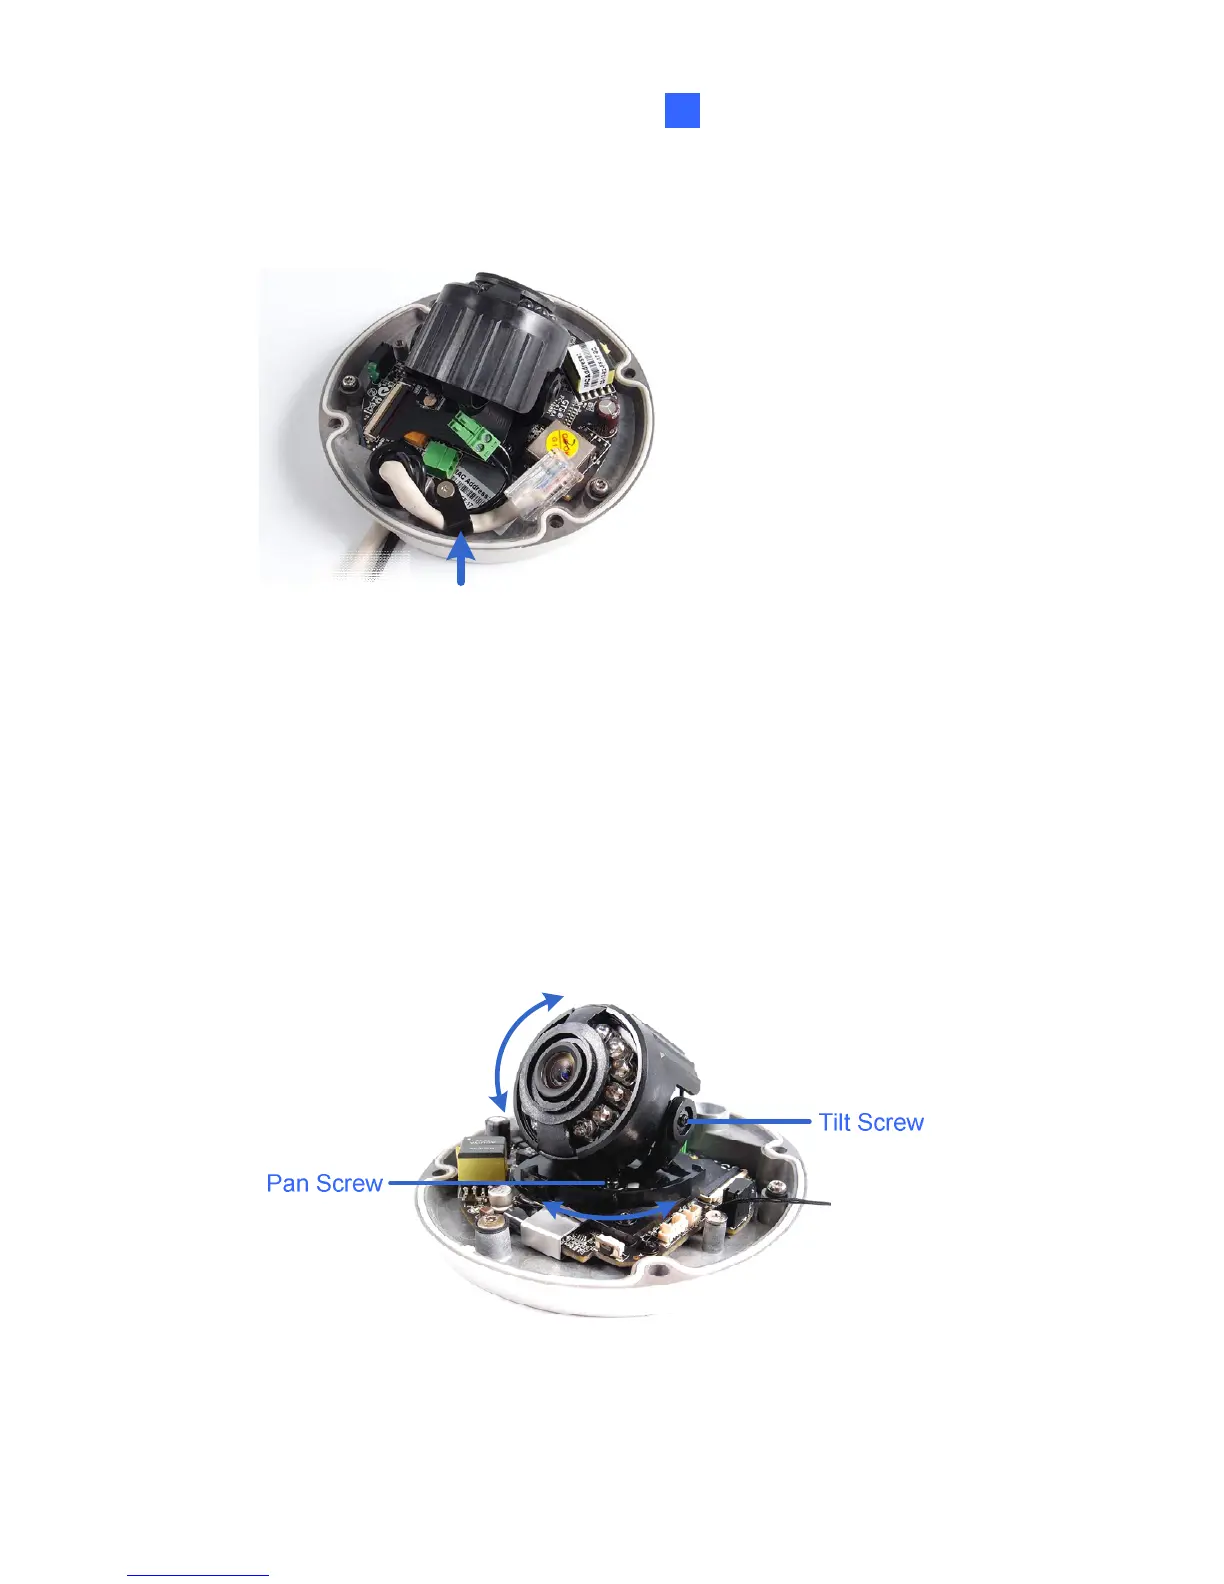
9. Thread the cable(s) under the black cable holder. You can loosen the
screw on the cable holder if needed.
10. Connect the camera to network and power. For details, see 7.4
Connecting the Camera.
11. Secure the camera to the back plate by tightening the three screws as
shown in Step 4.
12. Access the live view. For details, see 24.2 Accessing the Live View.
13. Adjust image clarity using the GV-IP Device Utility program. For details,
see 24.3 Adjusting Image Clarity.
14. Loosen the tile screw and pan screw, adjust the angles based on the
live view as needed, and tighten the screws again.

Table of Contents

Other manuals for GeoVision GV-IPCamera Series

Questions and Answers:

Question and Answer IconNeed help?

Do you have a question about the GeoVision GV-IPCamera Series and is the answer not in the manual?

GeoVision GV-IPCamera Series Specifications

General IconGeneral
BrandGeoVision
ModelGV-IPCamera Series
CategorySecurity Camera
LanguageEnglish

Related product manuals