66
GERBERplotter MP Series User Manual
English
Verify cones
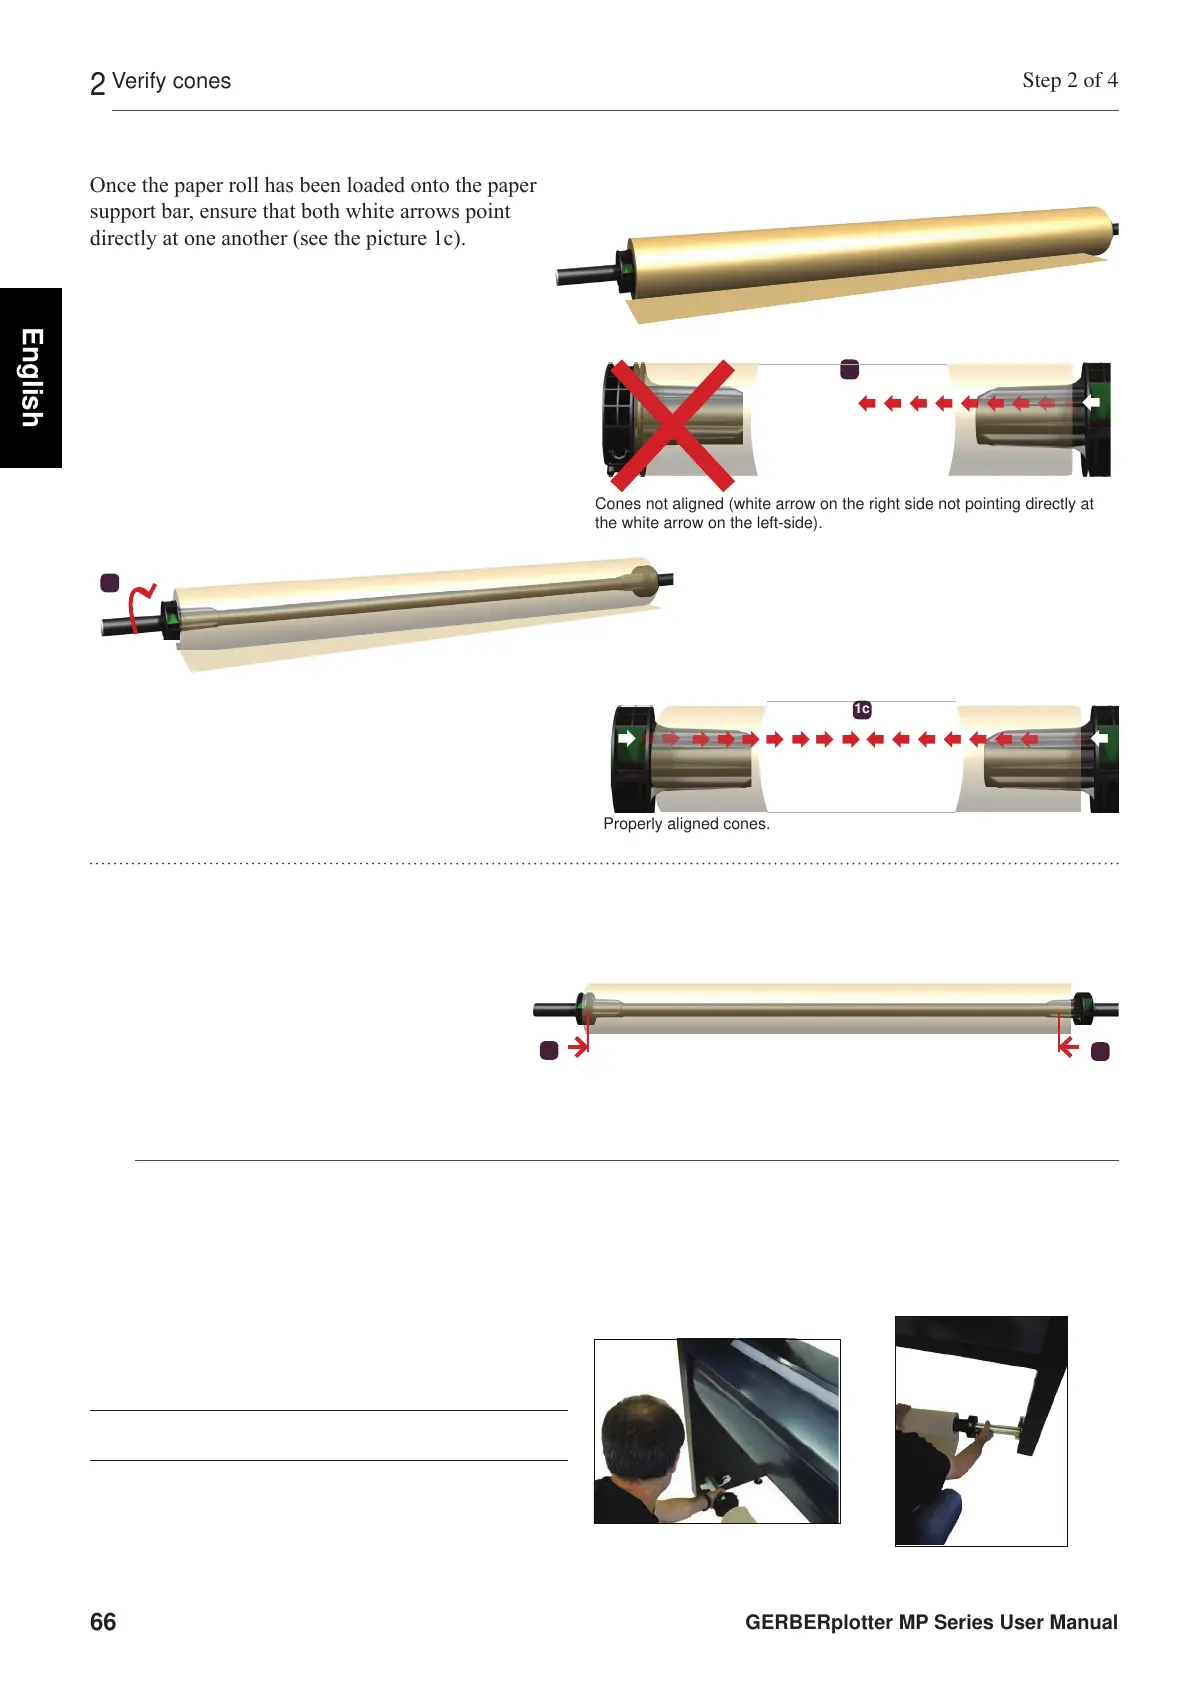
Once the paper roll has been loaded onto the paper
support bar, ensure that both white arrows point
directly at one another (see the picture 1c).
Step 2 of 4
2
Properly aligned cones.
1c
Cones not aligned (white arrow on the right side not pointing directly at
the white arrow on the left-side).
1a
If necessary, turn the left cone to remove it from the paper roll.
1b
1
If necessary, turn the left cone until the white ar-
row is pointed directly towards the white arrow
of the right cone.
2
Ensure that the left and right cones are rmly
xed in position, and that the screws are tight-
ened.
Push both cones into the center of the paper roll until they are securely held in
place.
2
2
Place the support bar
Step 3 of 4
3
In the following step, the paper support bar with the blank paper roll is positioned in the supports in the side panels
of the plotter.
1
Lift the paper roll support bar along with the paper,
and place it in the at part of the support on each of
the side panels (so that both ends of the paper roll
support bar sit properly).
2
Slide the bar into the bottom of plotter.