79
GERBERplotter MP Series User Manual
English
After you have the paper and print jobs in the correct posi-
tion, cut the paper and remove it, as follows:
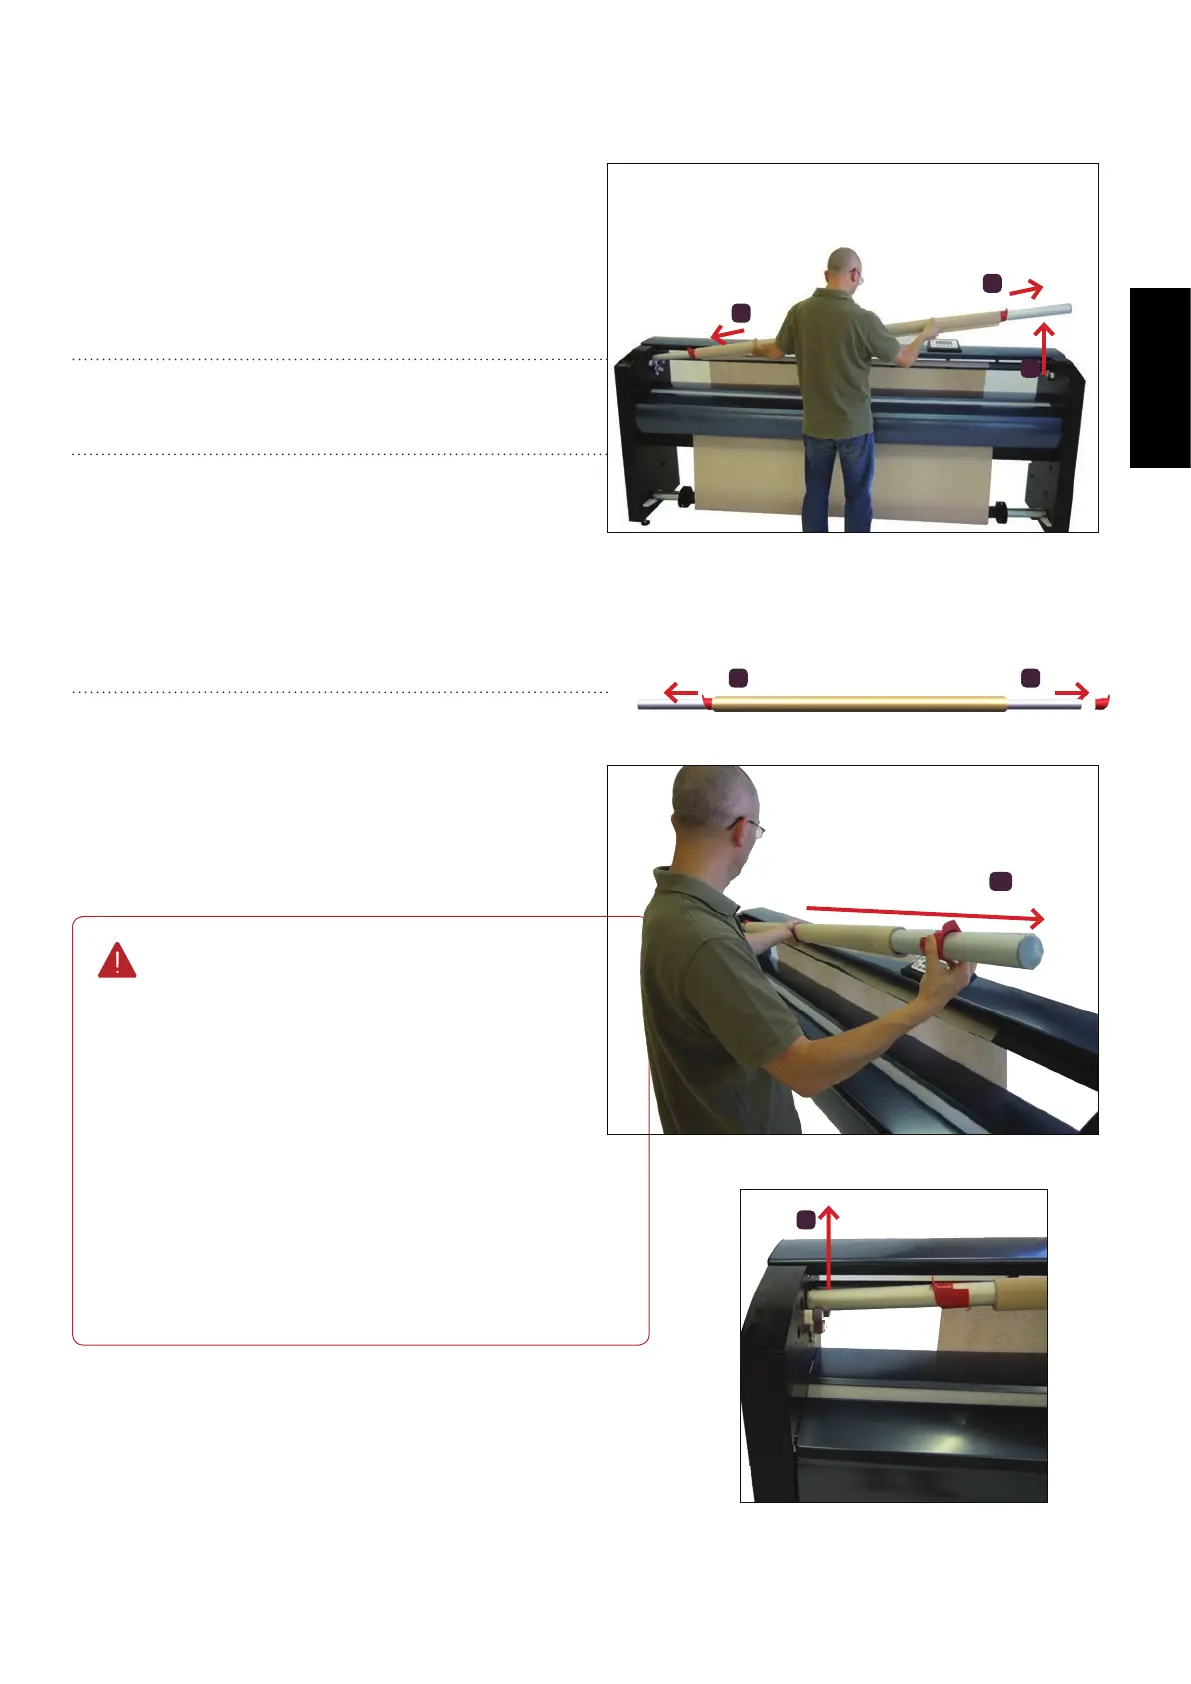
5.3.3 Removal of the printed paper roll
3b2
3a
3b
2
1
Cut the paper.
2
Slide the left clip (2) toward the end of the bar.
3
Raise bar at the right end (3a).
Remove the right-side clip (3b) from the take-up bar.
The right end of the bar rests on the right support base,
to which it is not attached. With the bar raised and held
by the left end, slide the paper outside the take-up bar
(3c).
4
Once the paper roll is completely off the take-up bar,
place the right-side clip on the bar, to the approximate
position it was before, and leave the tube in place.
The take-up bar is attached to the left sup-
port base with a cable and a stroke stop. So,
you can slide the paper roll to the right and
remove printed paper roll from the take-up
bar. This facilitates handling the paper roll,
because there is no need to remove the bar.
If necessary, to remove the take-up bar and
the paper roll completely, slide the cable to
the upper side of the hole, which lets you
release the top end of the cable.
Remove the paper from the plotter (3d).
3c
3d