GM Energy V2H Bundle Installation Manual 90
E.1.1 Charger
Remove the charging connector from the vehicle, and then LOTO the AC circuit as described in Section E.1 (OCPD or AC
disconnect if present).
E.1.2 Inverter
1. Verify that the charging connector is removed from the vehicle
2. In the Hub, turn OFF (open) the two-pole 60 A OCPD (circuit breaker) labeled BDI Inverter. LOTO the OCPD handle.
E.1.3 Hub
1. Verify that the two-pole 60 A circuit to the Inverter is OFF (open) and is LOTO. .
2. If a main breaker was installed in the Hub, turn OFF (open) the Hub main breaker by moving the handle to the left, and then
LOTO the breaker handle.
3. If a main breaker is not present in the Hub, turn OFF (open) the Hub feeder power source circuit (meter AC disconnect, or
feeder OCPD at upstream electrical equipment). After this disconnect is open, or the OCPD is open (OFF), LOTO the
disconnect; or LOTO the breaker handle; or close the equipment door and LOTO the door in its closed position.
To re-energize, perform the steps in Section E.1.1, E.1.2, and E.1.3 in reverse order.
E.2 Field-Replaceable Components
The following components may be replaced in the field after system installation.
Important! For some of the procedures in this appendix, the customer’s vehicle will be required to fully test and verify the
replacement process. Recommissioning using the PowerShift Install application, verifying operation of the full V2H Bundle, and
verification of continuity for the backup circuits are also required.
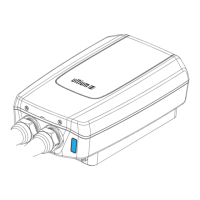
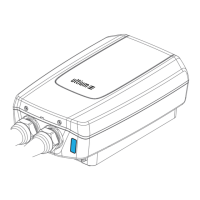
E.2.1 Charger
This section outlines the troubleshooting and replacement procedures for the Charger. it may need to be reset, may require
new firmware to be downloaded, or simply may be defective and need replacement.
This overview does not include all the steps in the actual procedure:
1. If the Charger will be replaced under warranty, service personnel will be issued an RMA number to receive the replacement
component.
2. Upon arrival at the site, service personnel must coordinate planned site activity with homeowner and clearly communicate
the duration of time that power to the premises will be off.
3. Perform site arrival inventory and evaluation.
4. Replace the Charger.
5. Perform the “change device” function through the commissioning app and perform post-commissioning system & voltage
checks.
6. Prepare an RMA for shipping and complete any job closeout procedure (or through other approved method).
7. Ship the defective Charger back to the supplier using the original shipping box and return label provided.
8. Inform the homeowner of the work performed and of any next steps
Note: The Charger cable may be replaced separately.