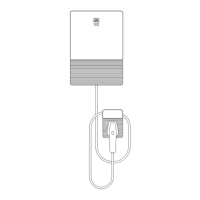
GM Energy V2H Bundle Installation Manual 31
Configuring DIP switches during initial installation
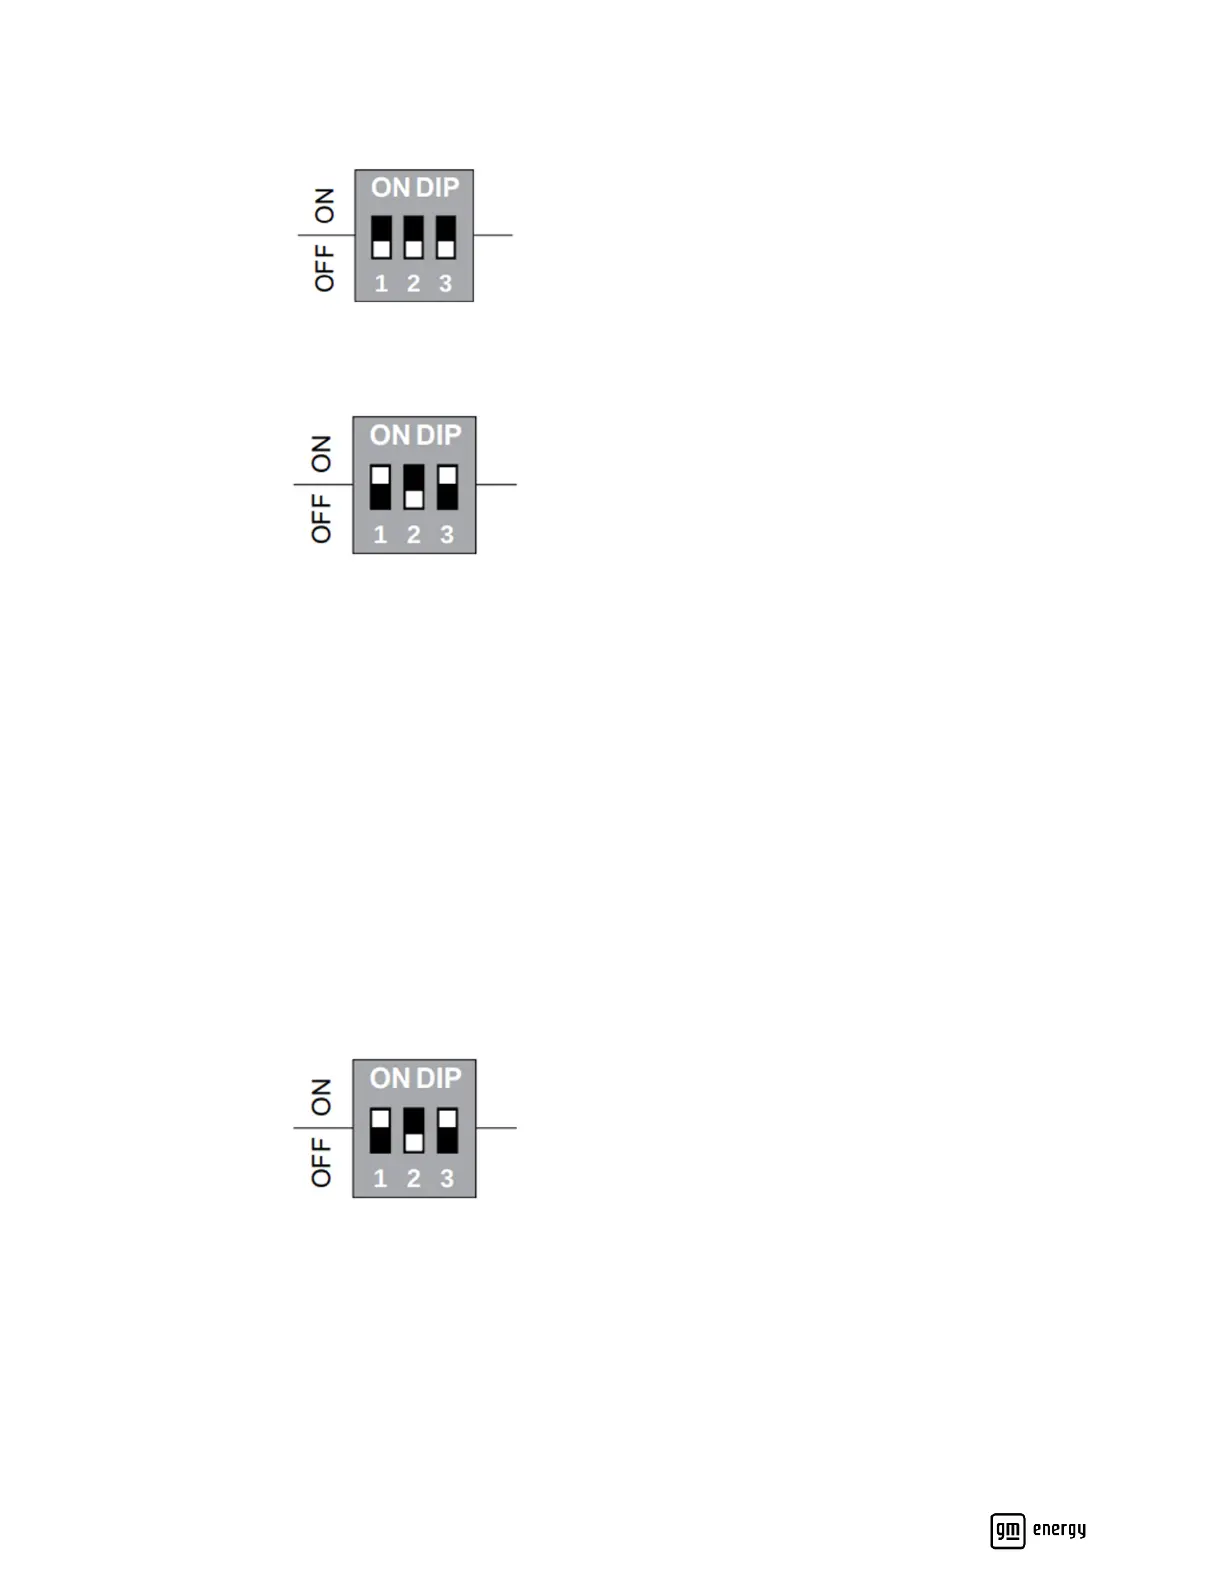
1. Open the black middle cover to view the DIP switch. By default, the DIP switch is set to 000.
2. Using Table 3 as a reference, set the DIP switch pins to the amperage of the installation. In this example, the
maximum AC output is 48A.
3. Turn on the breaker to power on the Charger. When the LED is solid white, plug the charging connector into the EV
to start the charging.
4. DIP switch settings will be confirmed during the commissioning process near the end of installation.
Changing output current after initial setup
In this scenario, the output current has already been set through the DIP switch. If the output current rating for the
installation needs to be changed, follow the instructions below. In this example, the DIP switch setting is being changed
from 48A to 80A.
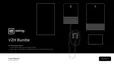
1. Deenergize the Charger and open the black middle cover to view the DIP switch pins. Here, the DIP switch setting
is 101, corresponding to a 48A output current.
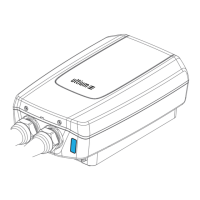
2. Adjust the DIP switch to the original factory default setting (i.e., 000). Energize the Charger to verify the LED shows
solid red. If the output current setting is changed without reverting to factory default setting, the LED turns to
blinking red once the Charger is powered back up, and the Charger will not charge. The alarm code will be displayed
as EV4299, which can be checked in the commissioning app.