TM054896
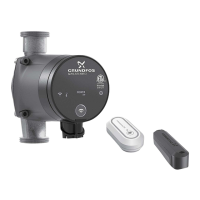
Maximum curve duty
Setting to minimum curve:
• Press continuously to change over to the minimum curve of
the pump (bottom light field flashes). When the bottom light field
is on, press and hold for 3 seconds until the light field starts
flashing.
• To change back, press continuously until the desired setpoint
is indicated.
Example: Pump set to minimum curve.
The figure below shows that the bottom light field is flashing,
indicating minimum curve.
TM054897
Minimum curve duty
8.1.2 Start or stop the system
Start each pump by pressing or by continuously pressing until
the desired setpoint is indicated.
Stop the system by pressing
on each pump. When the pump is
stopped, the Stop text next to the button will illuminate. Each pump
can also be stopped by continuously pressing until none of the
light fields are on.
If a pump has been stopped by pressing , it can only be released
for operation by pressing again.
If a pump has been stopped by pressing , it can only be restarted
by pressing .
The pump can also be stopped with Grundfos GO or via a digital
input set to External stop. See section Priority of settings.
Related information
14. Priority of settings
8.1.3
Resetting of fault indications
A fault indication can be reset in one of the following ways:
• Via the digital input if it has been set to Alarm resetting.
• Briefly press
or on one of the pumps. This will not change
the setpoint. A fault indication cannot be reset by pressing or
if the buttons have been locked.
• Switch off the power supply until the indicator lights are off.
• Switch the external start/stop input off and then on again.
• With Grundfos GO.
8.2
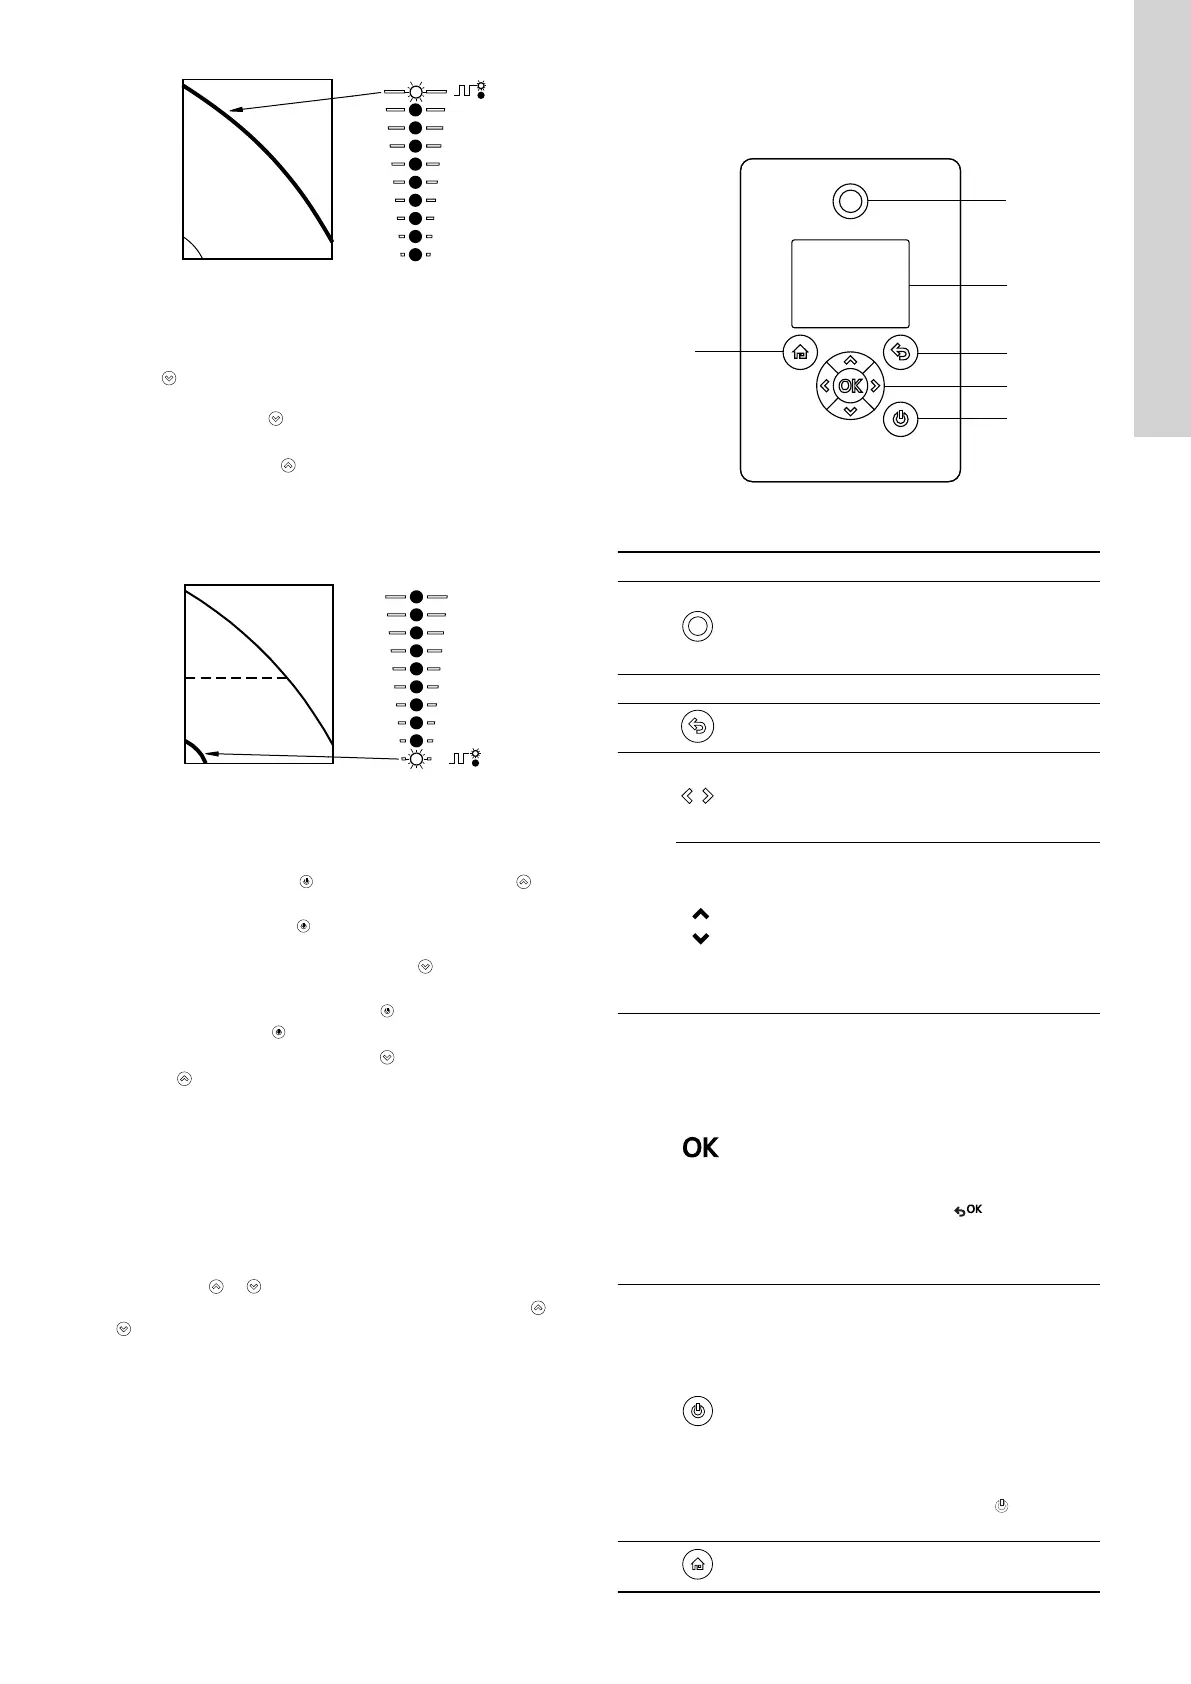
Advanced control panel on the pump
The pumps can be fitted with the advanced control panel as an
option.
TM054849
Advanced control panel
Pos. Symbol Description
1
Grundfos Eye
Shows the operating status of individual pumps.
For further information, see section Grundfos
Eye.
2 - Graphical colour display.
3 Goes one step back.
4
Navigates between main menus, displays and
digits.
When you change the menu, the display always
shows the top display of the new menu.
Navigates between submenus.
Changes value settings.
Note: If you have disabled the function to
configure settings with the Enable/Disable
Settings function, you can temporarily enable it
again by pressing these buttons simultaneously
for at least 5 seconds. See Buttons on product
in section Factory settings.
4
Saves changed values, resets alarms and
expands the value field.
Enables radio communication with Grundfos
GO and other products of the same type.
When you try to establish radio communication
between the pump and Grundfos GO or another
pump, the green indicator light in Grundfos Eye
flashes. A note also appears in the pump
display stating that a wireless device wants to
connect to the pump. Press
on the pump
control panel to allow radio communication with
Grundfos GO and other products of the same
type.
5
Makes the pump ready for operation, and starts
and stops the pump.
Start:
If you press the button when the pump is
stopped, the pump only starts if no other
functions with higher priority have been
enabled. See section Priority of settings.
Stop:
If you press the button when the pump is
running, the pump will always stop. When you
stop the pump via this button, the
icon
appears in the bottom of the display.
6 Return to the Home menu.
19
English (GB)