159
3. Turn the main switch off.
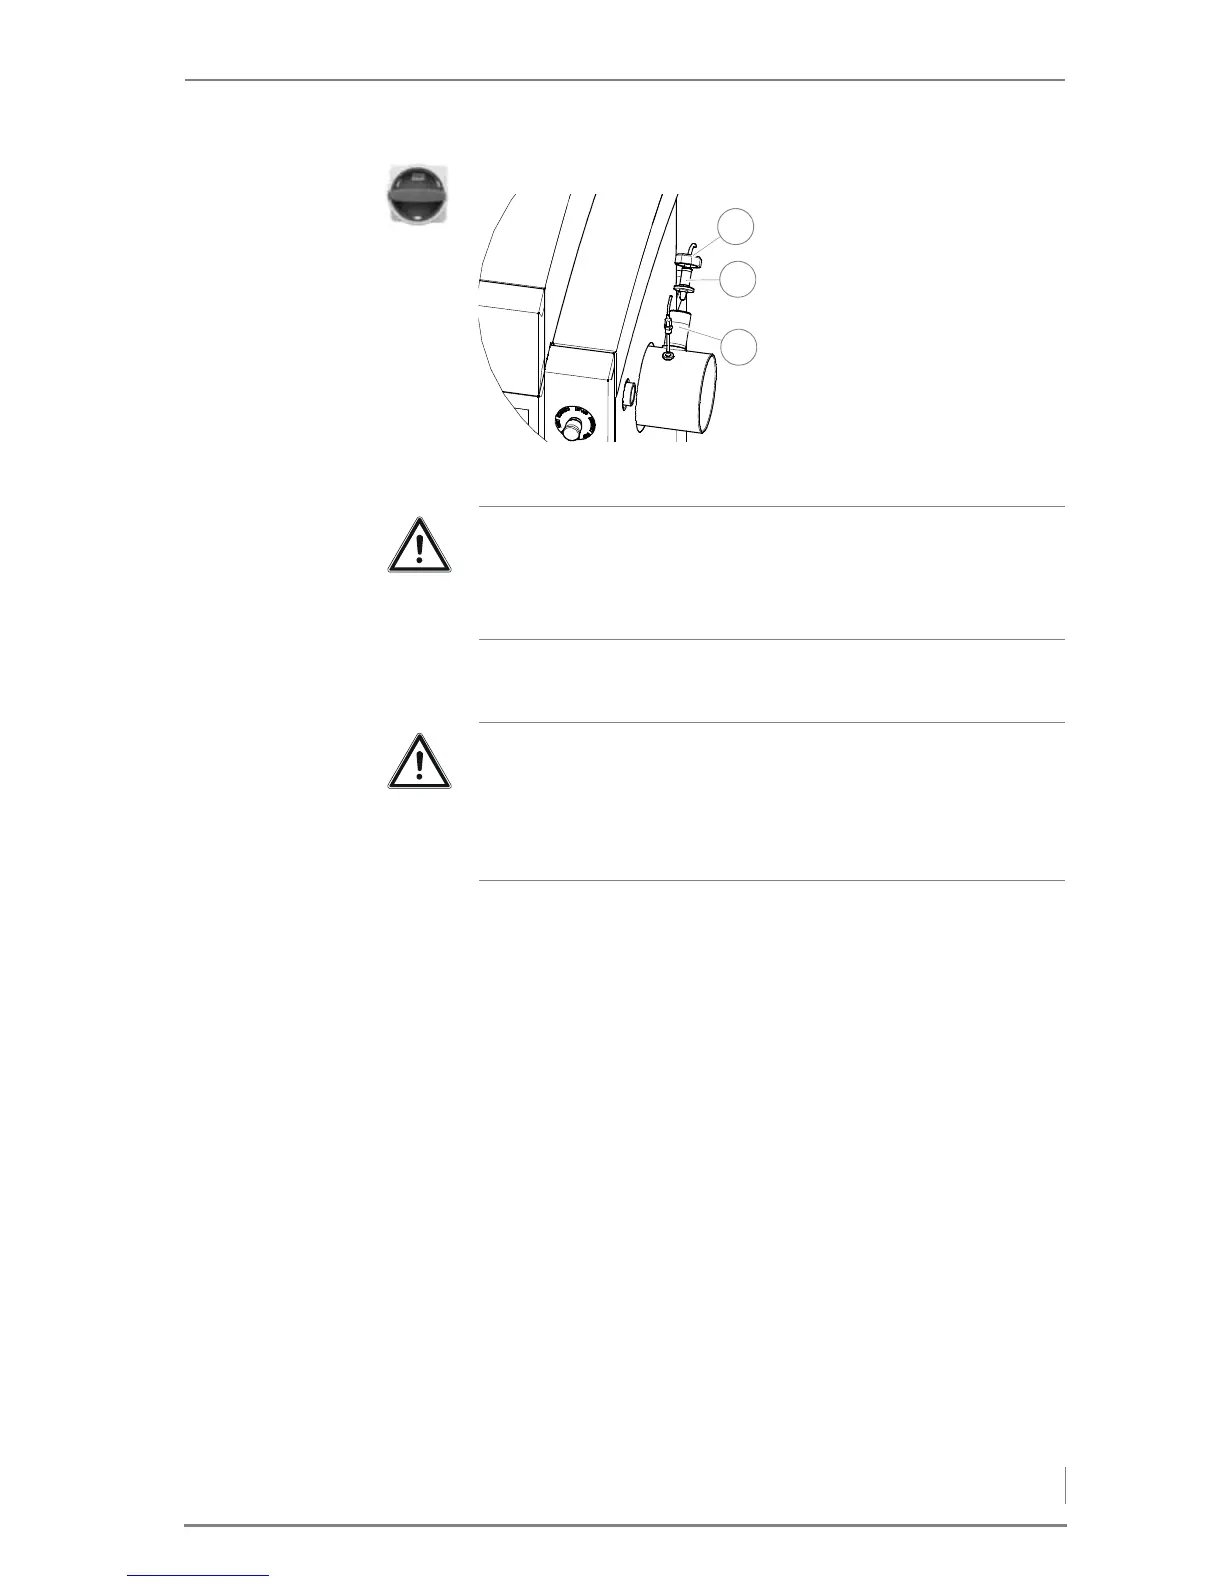
6. Brush off the lambda sensor (2) with a brass brush.
7. Clean out any deposits inside the connection nozzle (3).
8. Reinstall the lambda sensor (2) in the reverse sequence.
9. Check that the lambda sensor (2) for a secure fit.
10.Carefully tighten the lambda sensor (2) with an SW22 spanner.
11.Switch the heating system on again.
✎ See the chapter entitled “6 Using the heating system”, section
“6.2 Switching on the heating system”.
12.Calibrate the lambda sensor.
✎ See chapter “5 Commissioning the system”, section
“5.2 Procedure”, paragraph “Calibrating the lambda sensor”.
✓ The lambda sensor has been checked and cleaned.
4. Using a pipe wrench, unscrew
the DN 40 union nut (1).
5. Remove the lambda sensor
(2) and the insulating washer
underneath it from the con-
nection nozzle (3) of the flue
gas pipe.
Figure 7/16 - Cleaning the lambda sensor
Important!
Steel bristles will damage the lambda sensor.
To clean the lambda sensor, use a fine brass brush instead of a steel
brush.
Important!
When reinstalling the lambda sensor, make sure its seal is intact.
Use a pipe wrench to tighten the union nut. Do not tighten the
lambda sensor excessively. Never tighten the lambda sensor by the
shaft body.