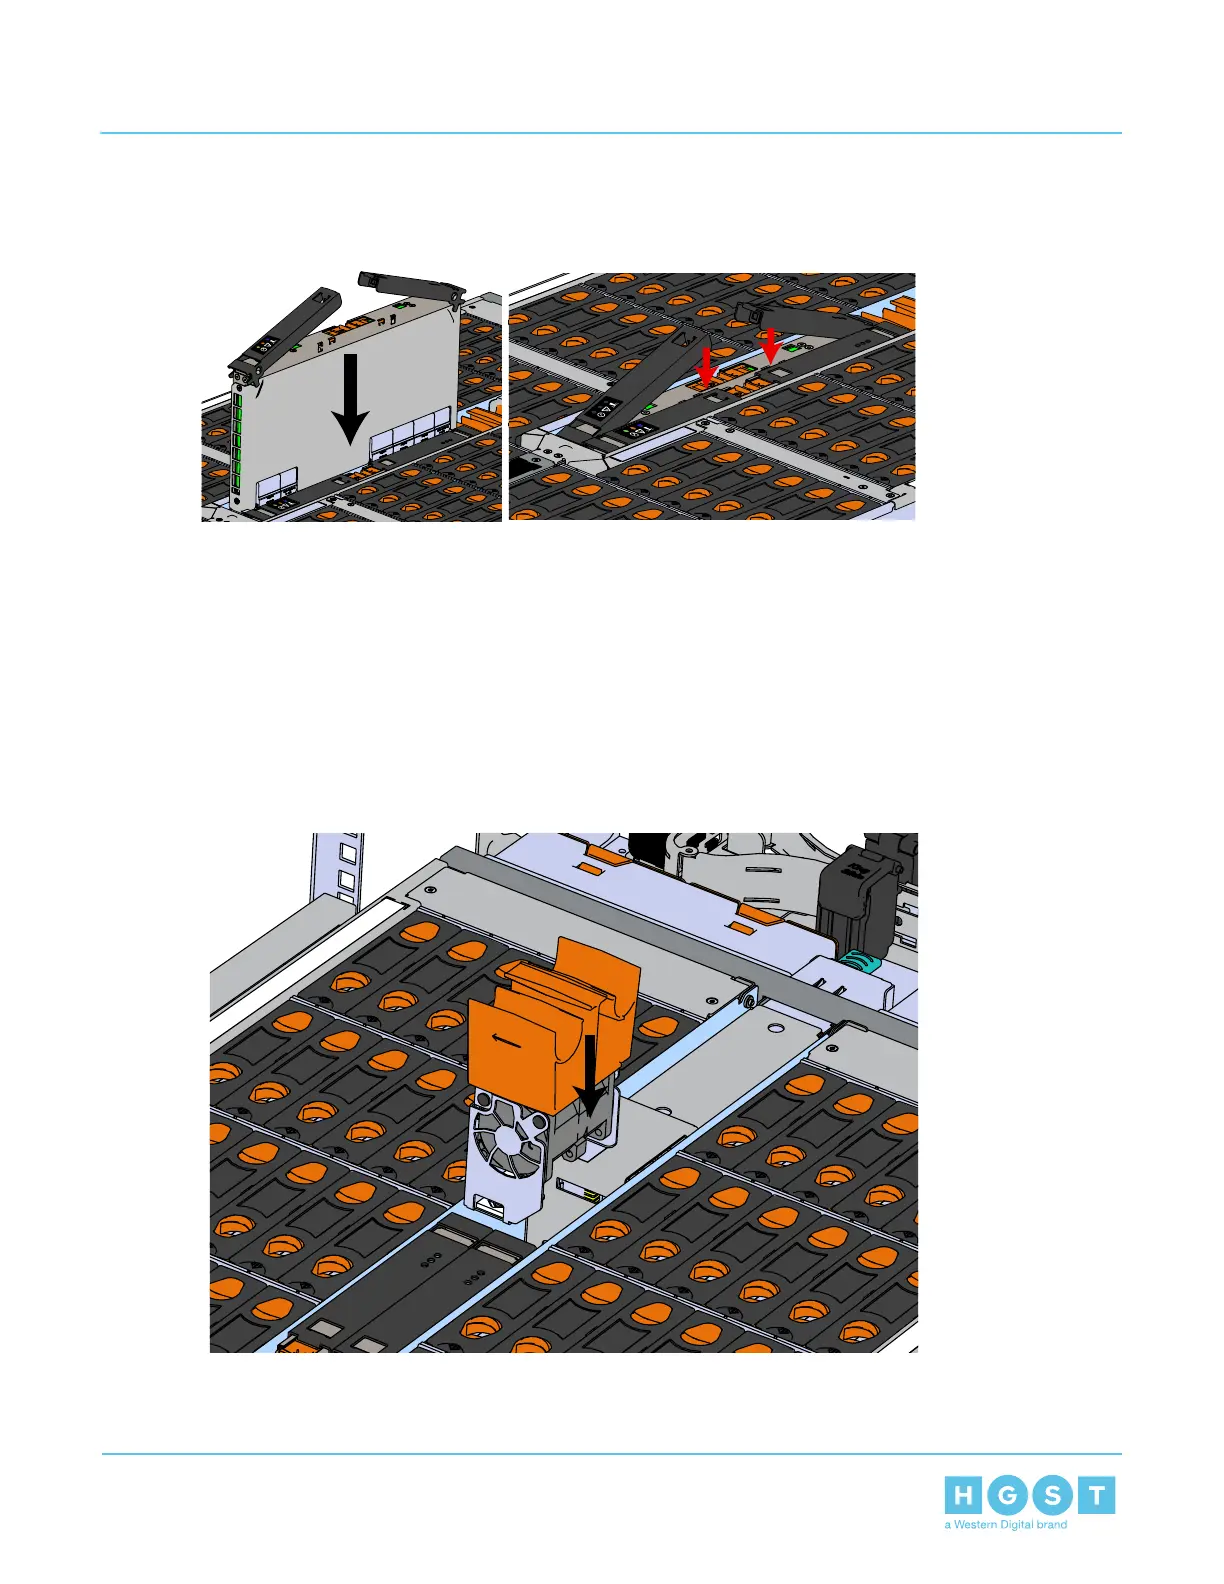
d) Slowly lower the IOM into the empty slot while being careful to keep it level. Do not to force it.
Figure 148: Installing the IOM
e) When the IOM is lowered fully, apply light pressure with both hands evenly on the IOM body, not the
handles, to seat the IOM in the connector. If the IOM won’t seat correctly, DO NOT FORCE IT. Instead,
back the IOM out, check the pins to make sure none are damaged, and try again.
f) Once the IOM is seated properly in the slot, close the handles until they latch closed.
35. Install the second IOM using the same method as the first.
36. Install the IOM Fan.
a) Align the IOM Fan as shown in the following image.
Figure 149: Installing the IOM Fan
b) Pinch the latch release mechanism slightly and carefully lower the IOM Fan into the slot.
130
4 Part Replacement
User Guide 4.9 Chassis Replacement

 Loading...