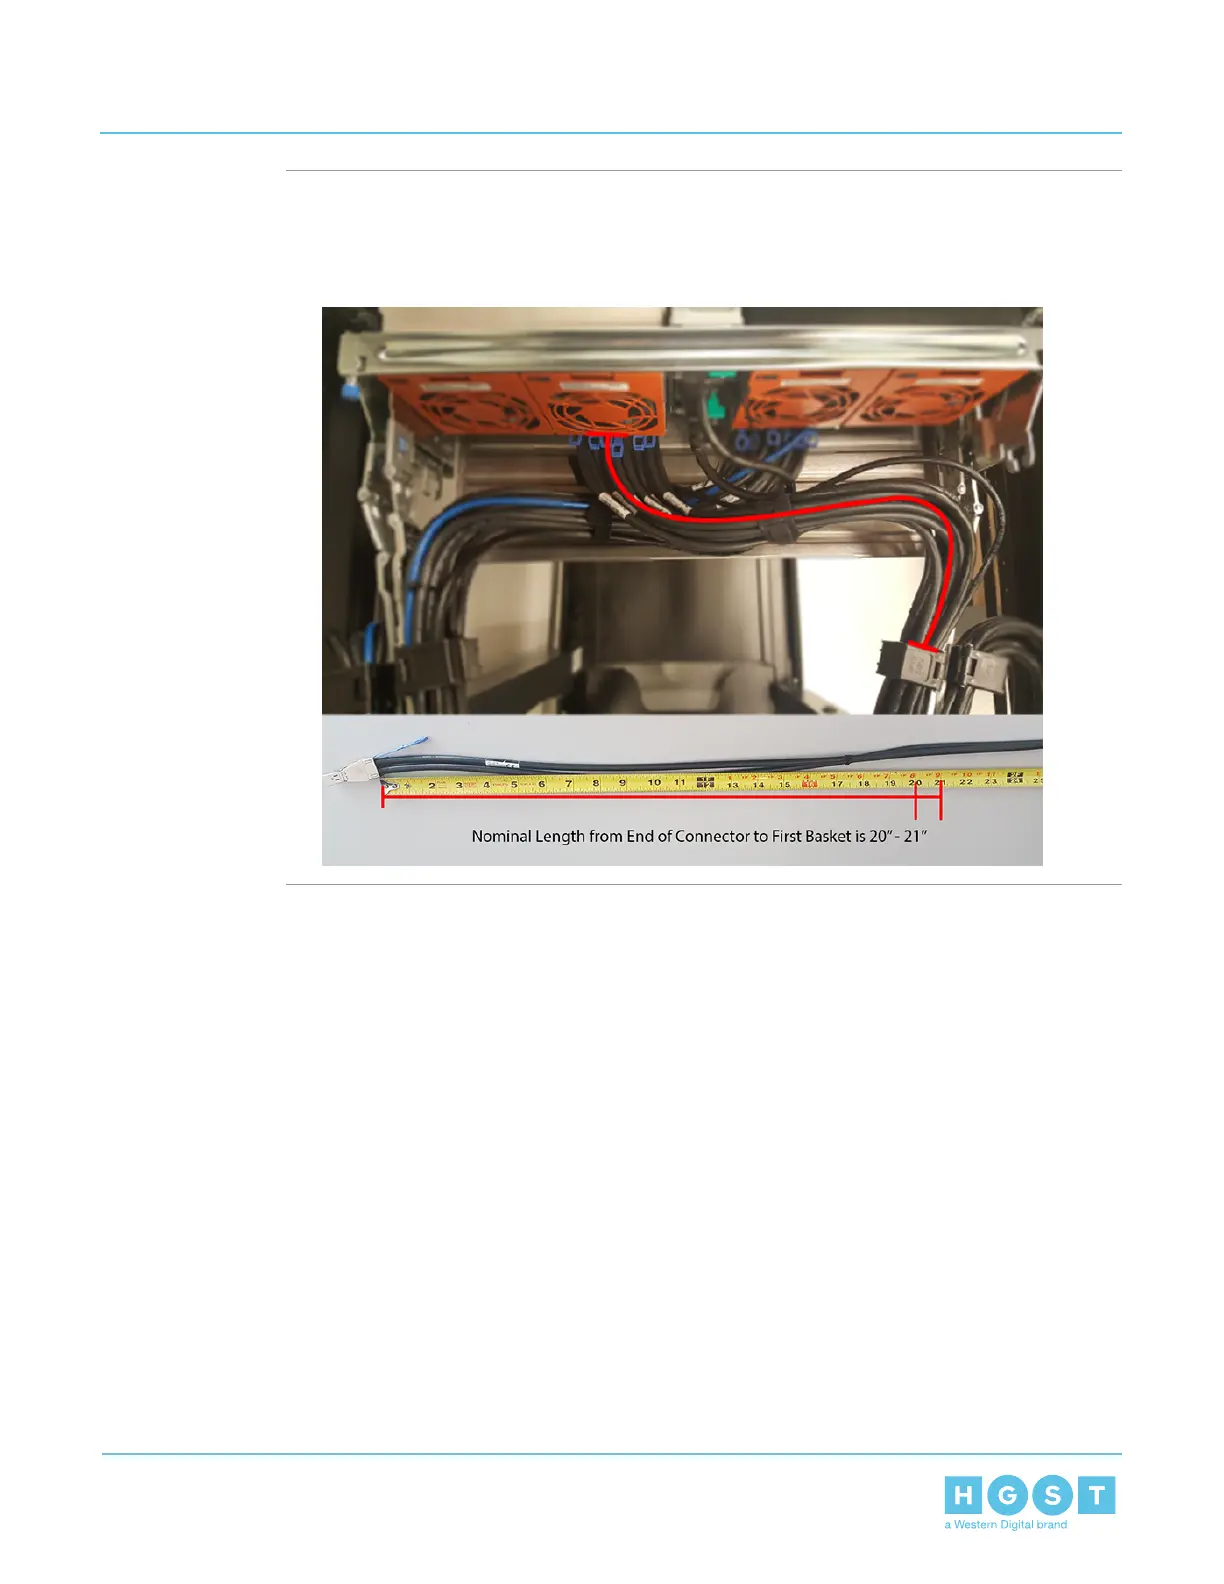
Note: Each cable must be given enough slack at the connector end to operate smoothly. For
the lower CMA allow 20" - 21" (508 – 533.4mm) between the connector and the first basket.
Figure 209: Nominal Cable Length at Connectors
f) Close all of the baskets.
g) Reconnect the CMA at the elbow to the connectors on the rail.
3. Cable the upper CMA.
a) Unlatch the elbow side of the CMA arm and swing it forward by pressing the blue button that says “push”
to unlatch it.
b) Gather the SAS cables, one power cable, and one Ethernet cable to install in the left hand side.
201
5 System Management
User Guide 5.4 Daisy Chaining

 Loading...