216
Servicing
TURN OFF all the power switches.
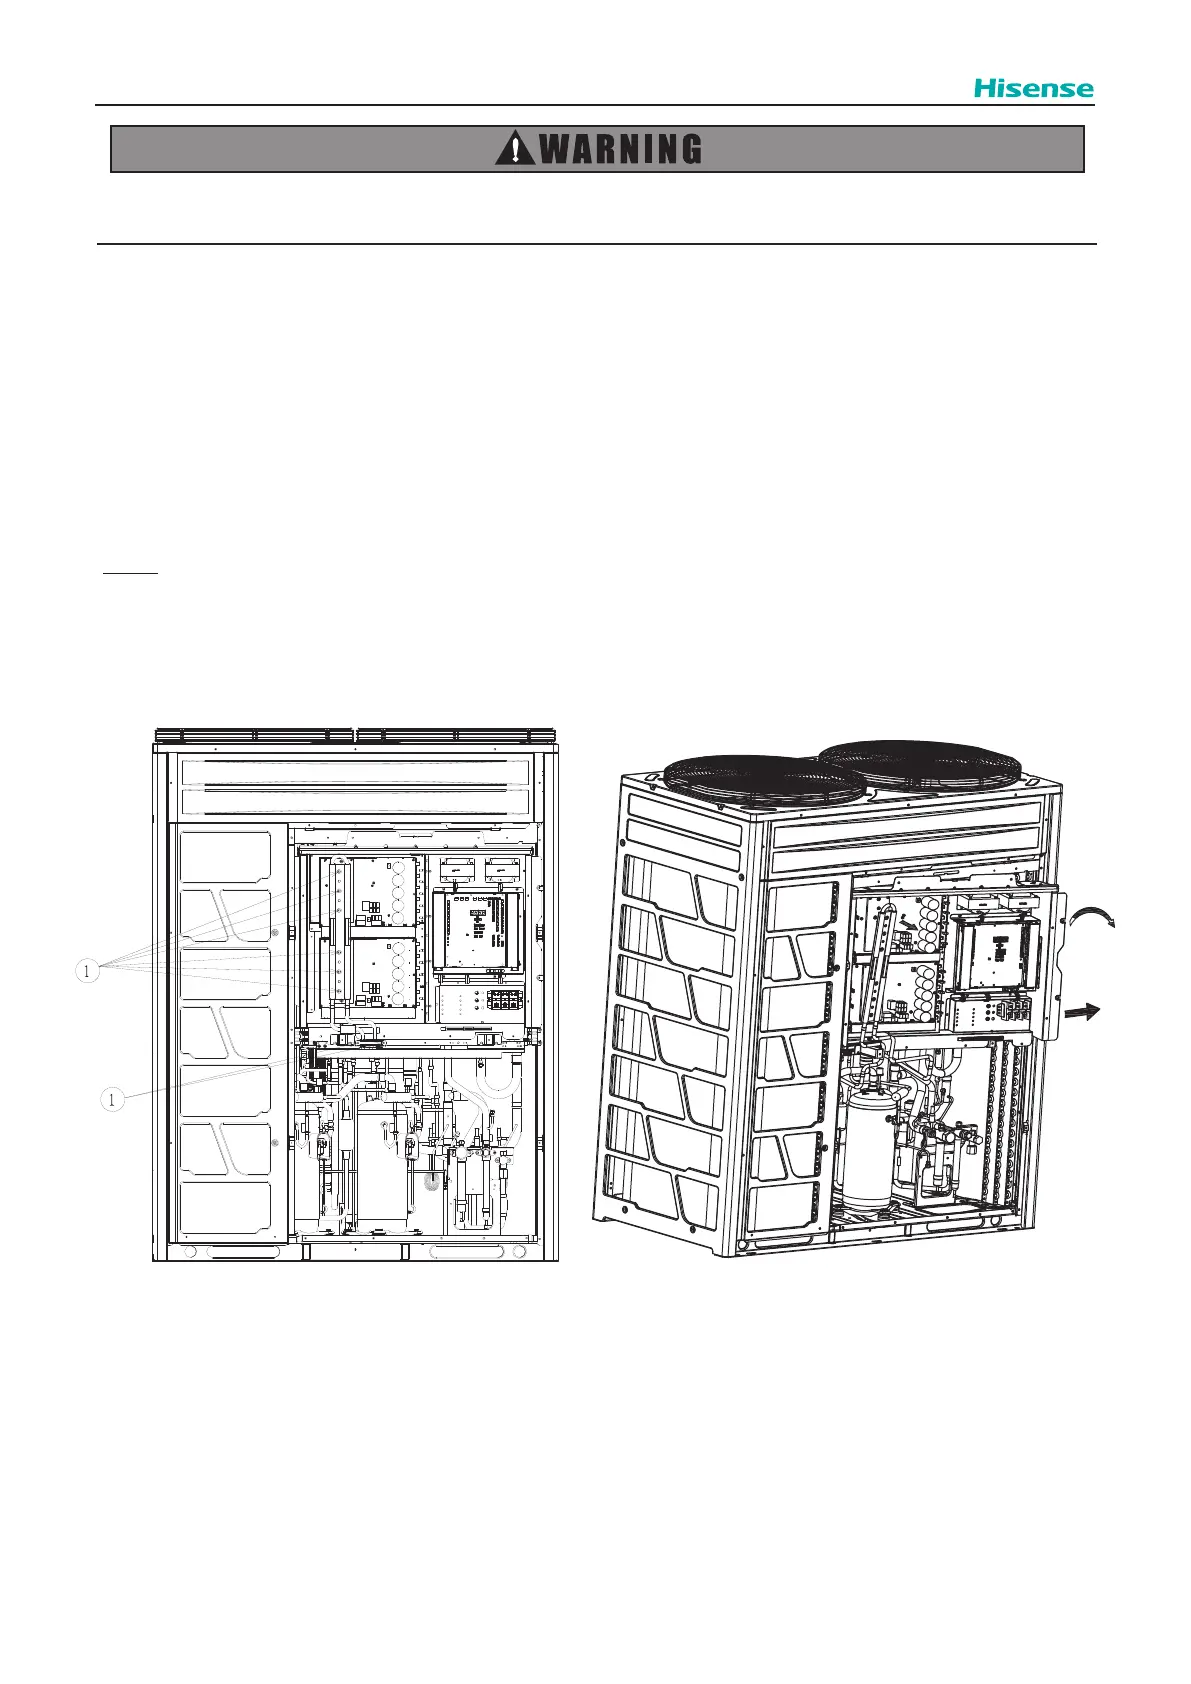
2.6 Removing Electrical Box
(1) Remove the service cover and front cover according to the item 2.1 “Removing Front Service Cover”.
(2) Remove the electrical box cover according to the item 2.5 “Removing Electrical Box Cover”.
(3) Remove the M4 bolts (3 for single fan, 6 for dual fan) in position
①
(Refer to Fig. 1);
(4) Remove the two M5 screws in position
②
(Refer to Fig. 1), and remove the rubber block and xed sheet metal;
(5) Remove the screws around the electrical box.
(6) Pull the PCB cooling module 15~20 degrees forward (Refer to Fig. 2);
(7) Turn the electrical box clockwise until the right side of the box is completely outside the machine (Refer to Fig. 2);
(8) Move the electrical box to the right until the electrical box is completely outside the machine (Refer to Fig. 2);
(9) After repair, reset the machine in reverse order, and the PCB cooling module should be in close contact with inverter to
facilitate heat transfer when reinstalled.
NOTE:
1. Before removing the electrical box, make sure that all connections to the electrical box have been completely removed.
2. As the electrical box is heavy, it requires at least two persons wearing gloves and other protective gear for removal and
installation.
Fig.1
Fig.2
 Loading...