231
Servicing
TURN OFF all the power switches.
Tool Adjustable Wrench or Spanner
2.11 Replacing Refrigerant Oil
2.11.1 Replacing Refrigerant Oil (No Clogging in Return Oil Circuit)
(1) Remove the front service cover according to the item 2.1 “Removing Front Service Cover”.
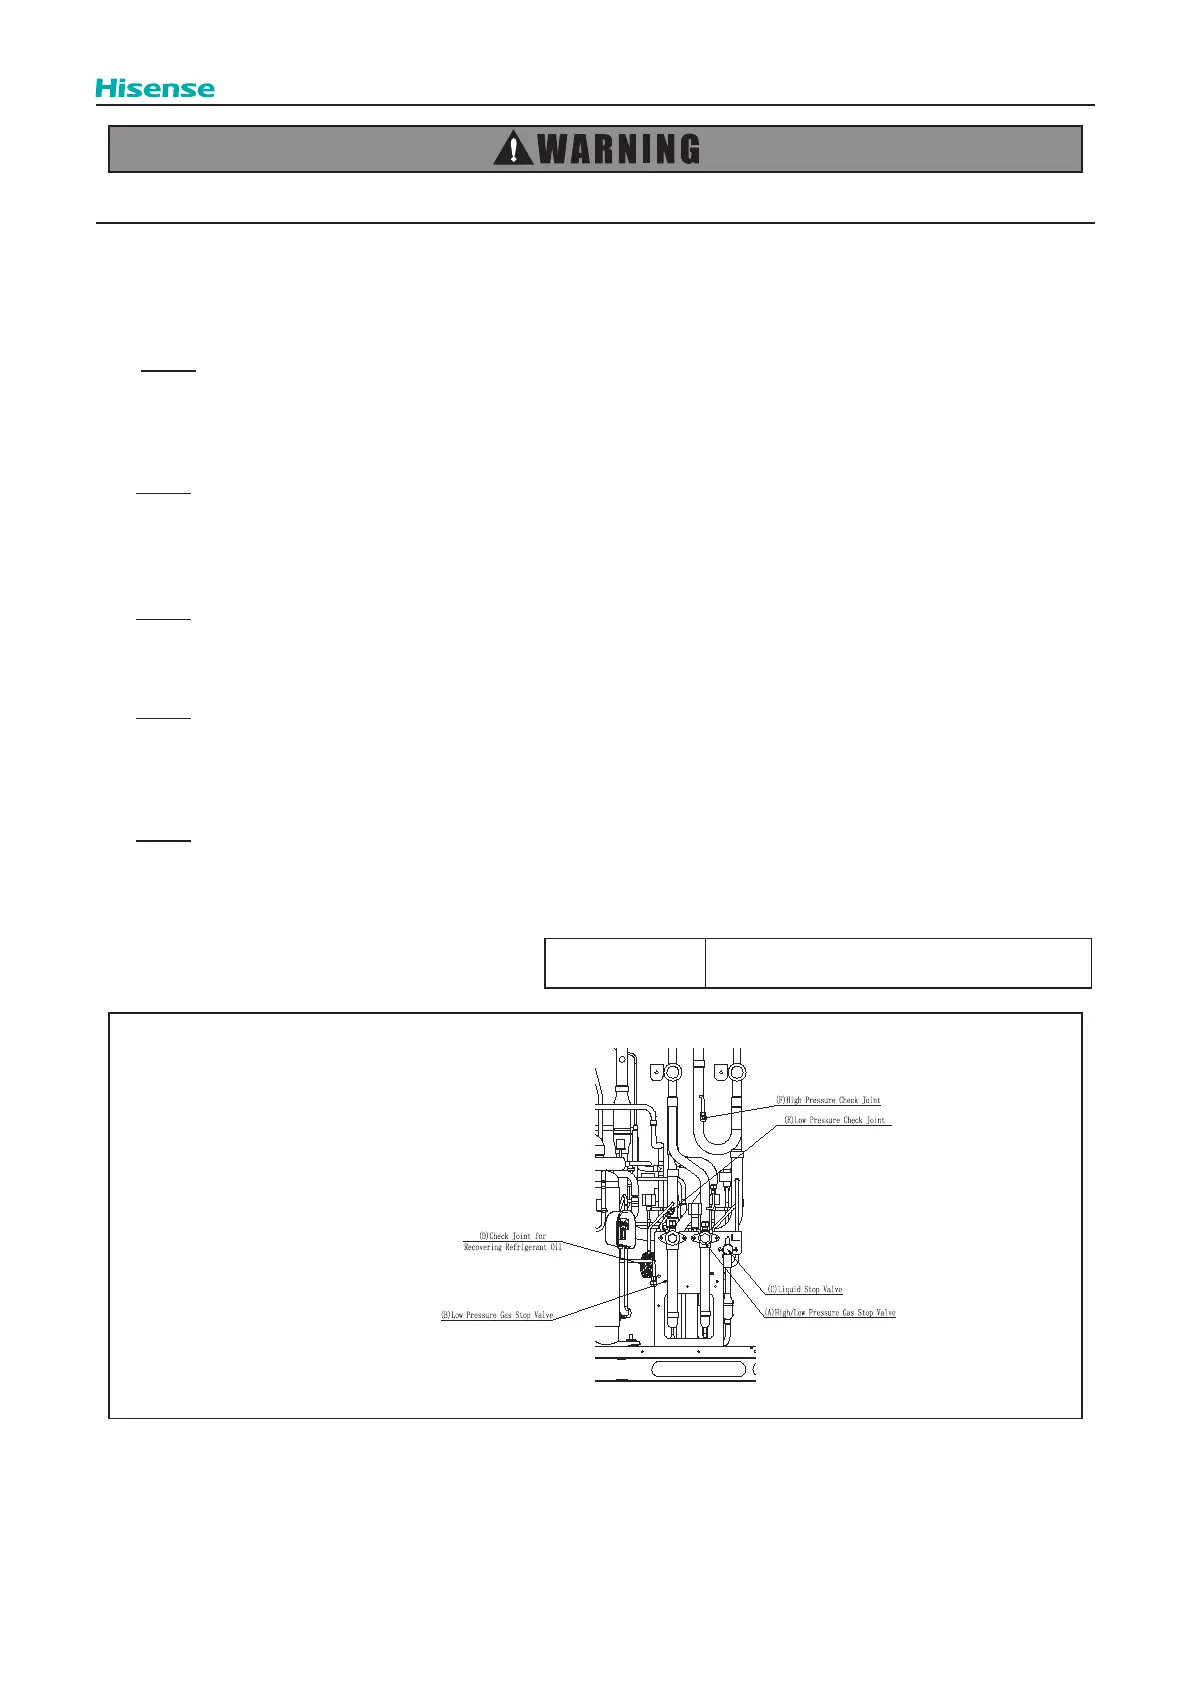
(2) Close (A) high / low pressure gas stop valve and (C) liquid stop valve, then open (B) low pressure gas stop valve.
NOTE:
For heat recovery system, If the refrigerant piping are removed, seal (B) low pressure gas stop valve with a copper cap
at the brazing portion before open it.
(3) Collect the refrigerant in the outdoor unit from (E) low pressure check joint and (F) high pressure check joint. Check that
the pressure will not increase at this time.
NOTE:
If the pressure increases, collect all the refrigerant in the refrigerant cycle.
(4) Connect the charge hose (for R410A) to (D) check joint for collecting refrigerant oil.
(5) Charge nitrogen (0.15MPa) from (E) low pressure check joint and collect the refrigerant oil in the accumulator, applying
pressure. (approx. 20 minutes)
NOTE:
Ensure that the pressure on (F) high pressure check joint is NOT abnormal when nitrogen is charged.
(6) Stop charging nitrogen after the refrigerant oil has been completely collected. Perform vacuuming from (E) low pressure
check joint and add the same quantity of oil as the collected refrigerant oil.
NOTE:
When the collected refrigerant oil is 3L or less, clogging may exist in the return oil circuit. In that case, replace the return
oil circuit according to the item 2.11.2 “Clogging in Return Oil Circuit”.
(7) When the procedures have been completed, perform vacuuming again from (E) low pressure check joint and recharge
the refrigerant. After recharging, open the stop valves.
NOTE:
1. Use a clean charging hose.
2. Charge the refrigerant oil in a short time (within approx. 20 minutes).
Use a container with a small opening so that the refrigerant oil does not absorb the moisture in the atmosphere.
 Loading...