250
Servicing
TURN OFF all the power switches.
2.17.1 Removing Outdoor Unit PCB and Electrical Components for Electrical Box
< Removing Outdoor Unit PCB >
(1) Remove all the connectors for wiring connected to the outdoor unit PCB.
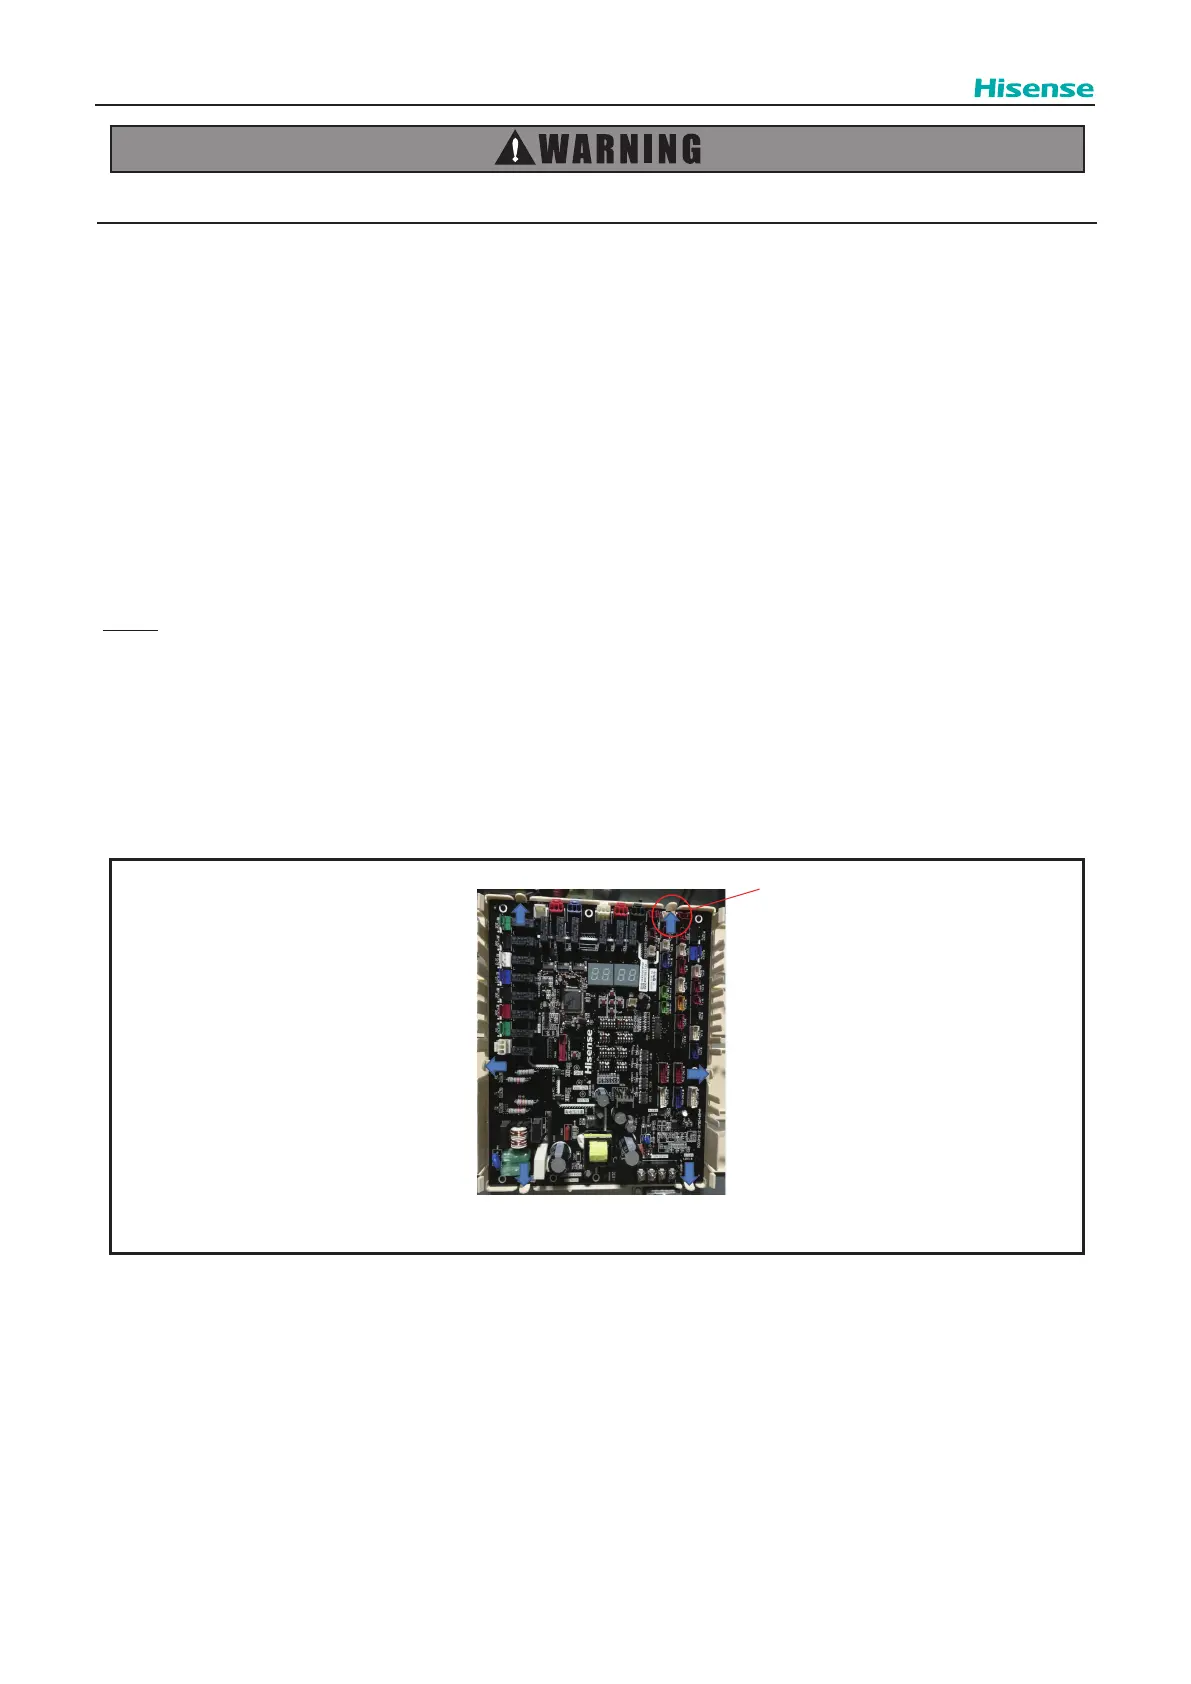
(2) Put you hand on the buckle,then,Push the buckle outward,Remove the outdoor unit PCB.(Refer to g.1)
< Opening Outdoor Unit PCB Fixing Plate >
(1) Remove all the wirings connected with the electrical components.
(2) When checking or replacing the Noise Filter, remove screws (4 places) at Part B in the gure and open the outdoor unit
PCB xing plate.
(3) When removing the xing plate for outdoor unit PCB, all the connectors connected with the outdoor unit PCB should be
removed.
< Removing Electrical Components >
(1) Remove all the wirings connected with the electrical components.
(2) Remove the screws xing the electrical components.
NOTE:
1. Do not touch the electrical components on the outdoor unit PCBs.
2. Do not bend the outdoor unit PCB by applying an excessive force to it. Otherwise, it will cause outdoor unit PCB failure.
3.When reassembling the electrical components, match the terminal Nos. with the mark band Nos. . If they are incorrectly
connected, malfunction may occur or the electrical components may be damaged.
4. When closing the outdoor unit PCB xing plate for reassembly, protect the cables from catching on the plate edges or
electrical components.
5. The capacitor is charged with electricity even when the power supply is turned o.
6. DO NOT touch the terminals, to avoid an electric shock.
Push outward(6 place)
Fig.1
 Loading...