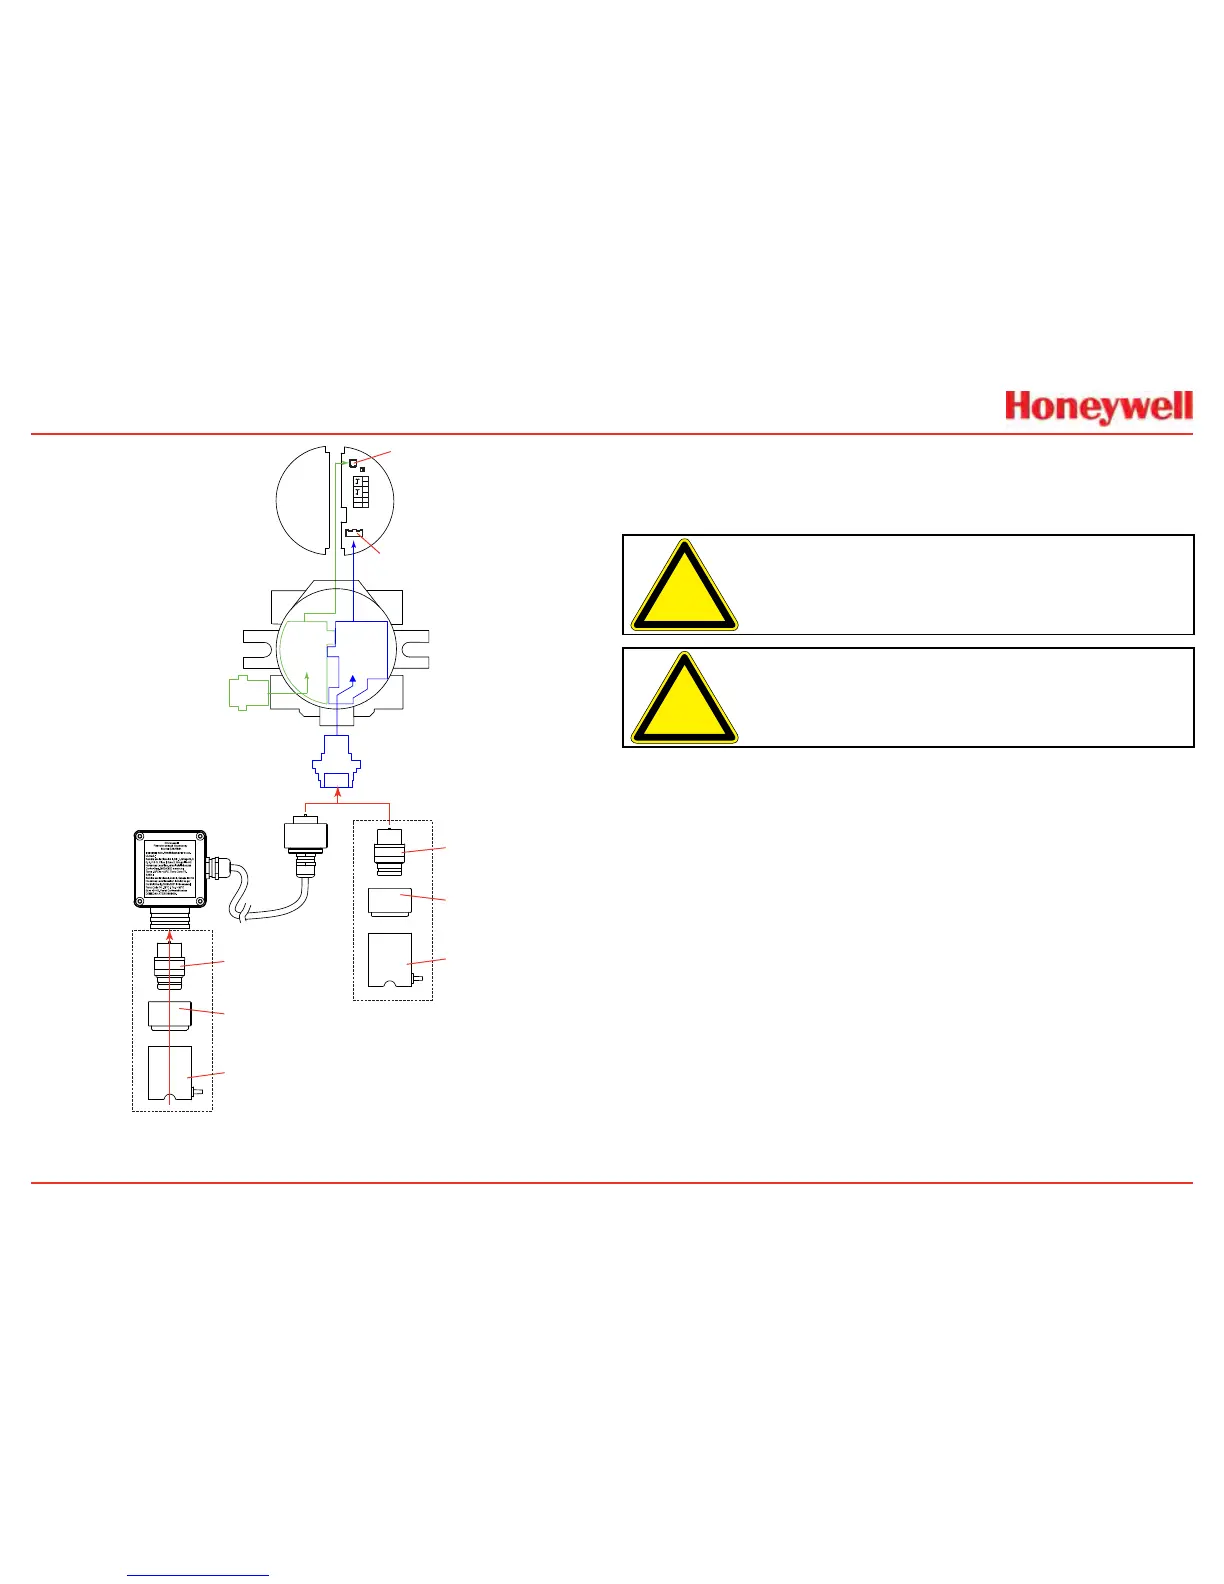
Figure 42. EC Personality Wiring
XNX Electrochemical Sensor Installation
EC Sensor Installation
Caution: Amissingoxygencellwillresultin0%V/VO
2
gas
concentration,thustriggeringalarmevents.Inthissituation,check
theconnectionoftheECcelltothesensorconnectorboard.
Caution: Forbiasedsensors(e.g.,nitrogendioxide)removethe
sensorstabilizerfromthebottomofthesensorpriortoinstallation.
UsingFigure42asaguide,followthisprocedure:
1�Verifythatthelabelonthenewsensoristhecorrectgas
type�
2�Unscrewtheweatherproofcover,loosentheretainer
lockingscrewwiththesuppliedhexkey,andunscrewthe
sensorretainer�
3�Pluginthenewsensor�Takecaretoalignthesensorpins
withtheconnector�
4�Retthesensorretainer,tightenthelockingscrewwiththe
hexkey,andrettheweatherproofcover�Countdowntime
ofupto180seconds(dependingonthesensortype)will
bedisplayed�
5�Acknowledgementofthegastypewillberequiredbefore
proceeding�Formoreinformationonsettinggastype,see
Section2�5�1GasSelection�
 Loading...