Chapter 3
Upgrade Procedures for 1.5 GHz (A9731A) or 1.6 GHz (A9732A, or A9733A) Processors
Introduction
47
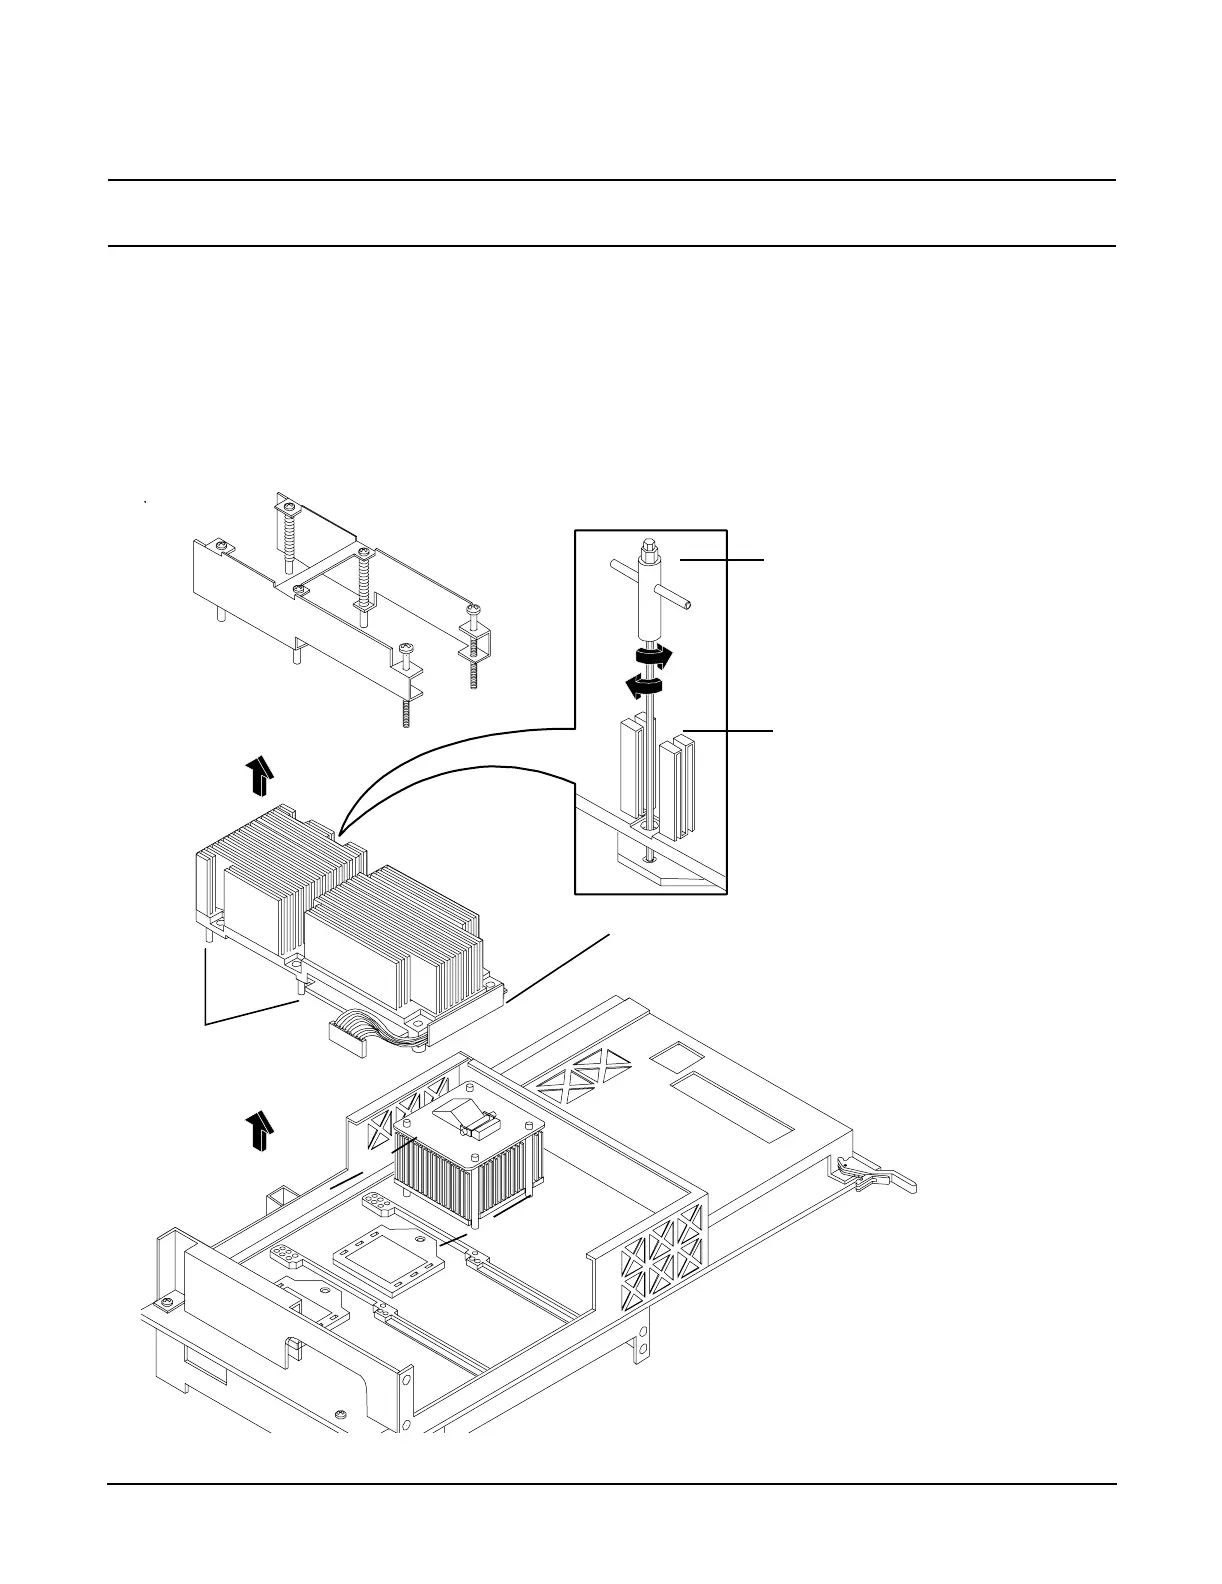
CAUTION Do not overtighten the 4 shoulder screws—they may shear off if overtightened. Stop
tightening the shoulder screws when you feel them just bottom out.
Figure 3-3 Installing Processor on Extender Board
Align pins on
heatsink with
slots in frame
Power cable protected by
plastic sleeve
slots*
slots*
*slots shown are at
CPU socket #1 for
clarity.
Processor shown is
being mounted on
socket #0 per CPU load
order.
1
3
2
4
5
6
Torx-T15
Use supplied
wrench for
tightening
shoulder screws
and thumbscrews
2.5MM Allen
Tightening sequence for 6-shoulder
screws is:
1,2,3,4,5,6
DO NOT OVERTIGHTEN!
 Loading...


