Installation Procedures - for all MSA1000 Deployments
30 MSA1000 Installation Guide
Step 7: Installing your MSA1000 in the Rack
At this point in the process of installing your MSA1000, you have either installed
your new SAN or prepared your existing SAN for the MSA1000 — your server is
ready, and your interconnect device is ready.
Now is the time to:
■ Attach the Mounting Rails to the Rack
■ Install the MSA1000 in the Rack
■ Install the Hard Drives in the MSA1000
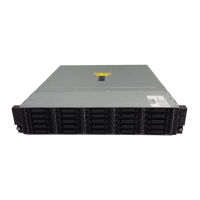
The MSA1000 and its supported storage enclosures can be installed into most
standard server racks. To see if the rack you plan to use is supported for use with
the MSA1000, review the MSA1000 Compatibility Guide, located on the
MSA1000 Technical Documents Web page at
http://www.hp.com/go/msa1000
.
To help you install your MSA1000, each MSA1000 is shipped with a
rack-mounting kit that includes the required components for quick installation in
Compaq-branded, HP-branded, and most square- and round-hole third-party
racks. The adjustable feature of the rack rails enables installation in racks with
depths of 69.90 to 73.81 cm (27.52 to 29.06 in).
WARNING: To reduce the risk of personal injury or damage to the
equipment, be sure that:
■ The leveling jacks on the rack are extended to the floor.
■ The full weight of the rack rests on the leveling jacks.
■ The stabilizing feet are attached to the rack if it is a single-rack installation.
■ The racks are coupled together in multiple-rack installations.
■ Only one component is extended at a time. A rack may become unstable if
more than one component is extended.
Note: Use the instructions in this section for installing both the MSA1000 and any
additional storage enclosures that you may have purchased.