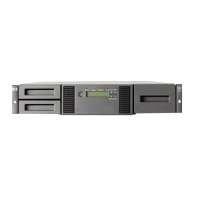
Figure 104 Removing the old power supply
3. Position the new power supply on the alignment rails and slide it into the library until it is
flush with the back panel, as shown in Figure 105 (page 195). Tighten the three blue
thumbscrews to secure the power supply.
Figure 105 Installing the new power supply
4. Attach an AC power cord to the replaced power supply and plug into a power outlet. Power
on the tape library, if necessary.
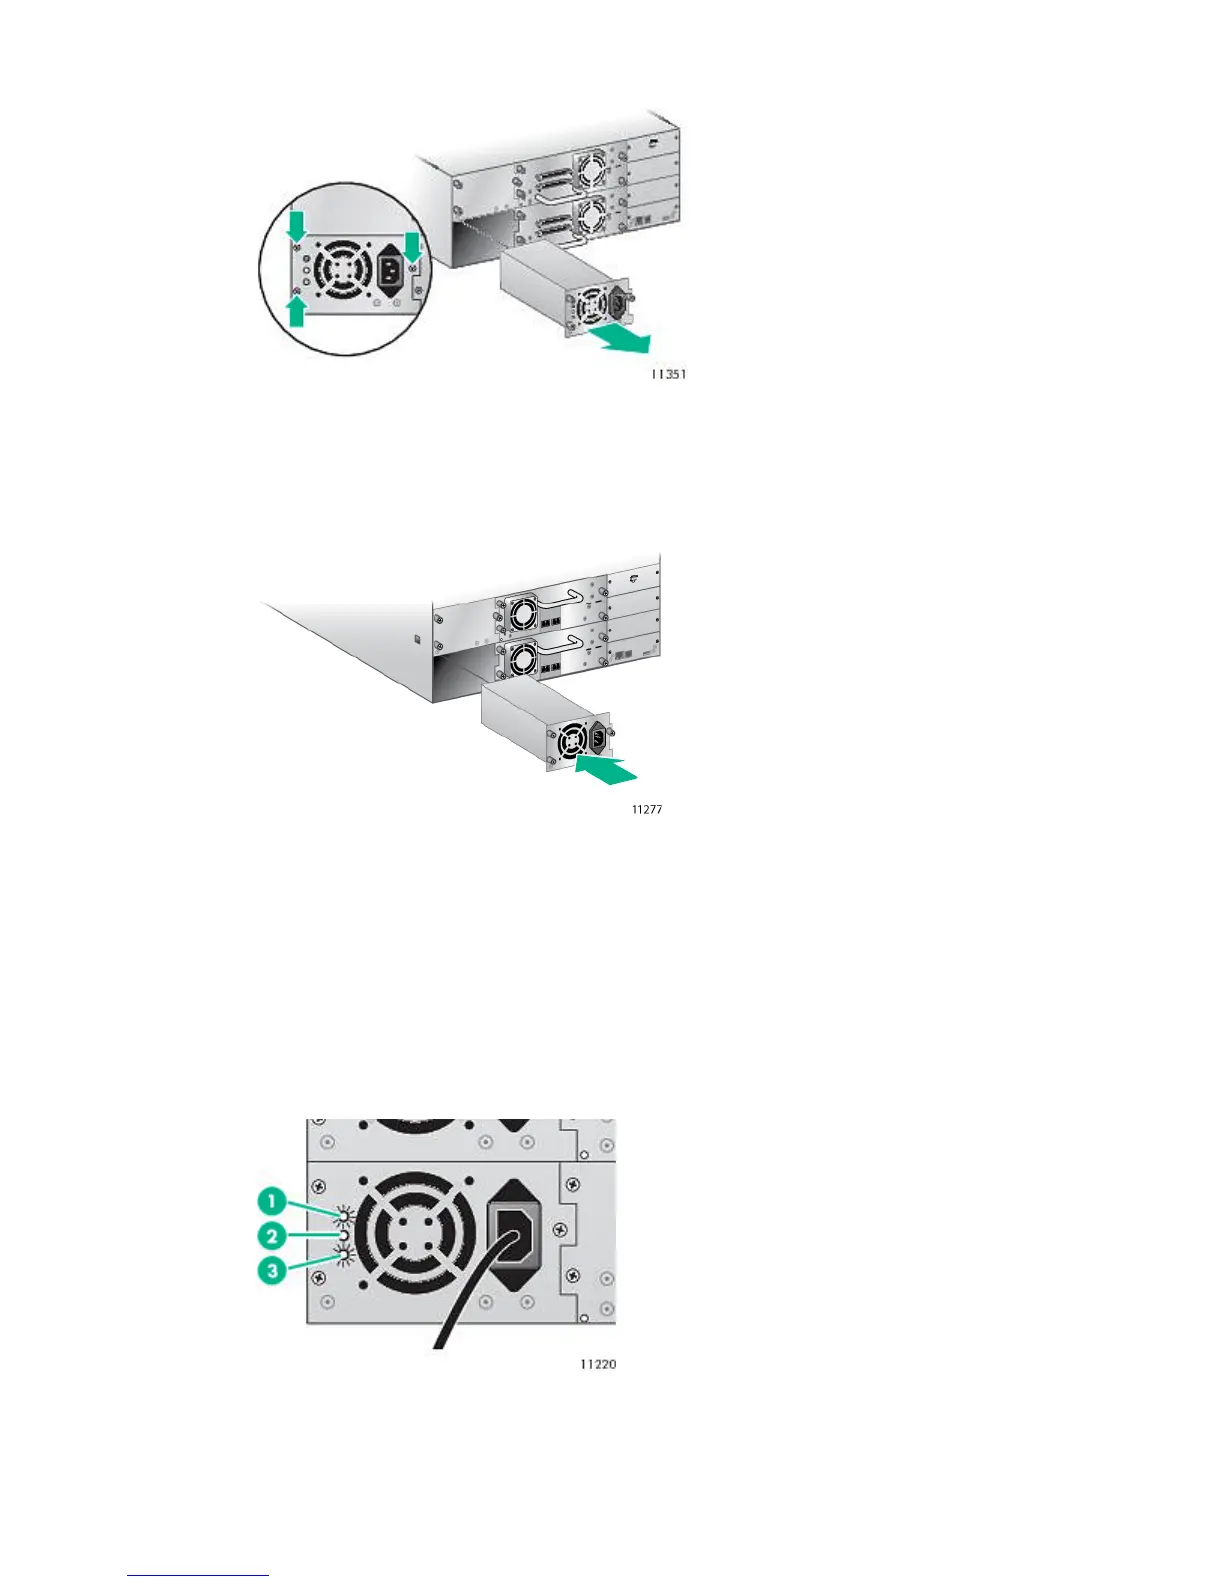
5. Verify that the new power supply is operating properly. On a power supply with LEDs, the
blue and green LEDs on the power supply module should be lit and the yellow LED should
be off. See Figure 106 (page 195). Otherwise, verify that the power supply fan is running and
the OCP does not show a warning message about the power supply.The blue and green
LEDs on the power supply module should be lit and the yellow LED should be off. See
Figure 106 (page 195).
Figure 106 Power supply LEDs
AC power is connected.1. Blue
Fan failure. The fan is running too slow or is defective.2. Yellow
The power supply is producing good power for the library.3. Green
Replacing the power supply (MSL4048, MSL8048, and MSL8096) 195
 Loading...