FusionModule800 Smart Small Data Center
Installation Guide (Six Fans)
Copyright © Huawei Technologies Co., Ltd.
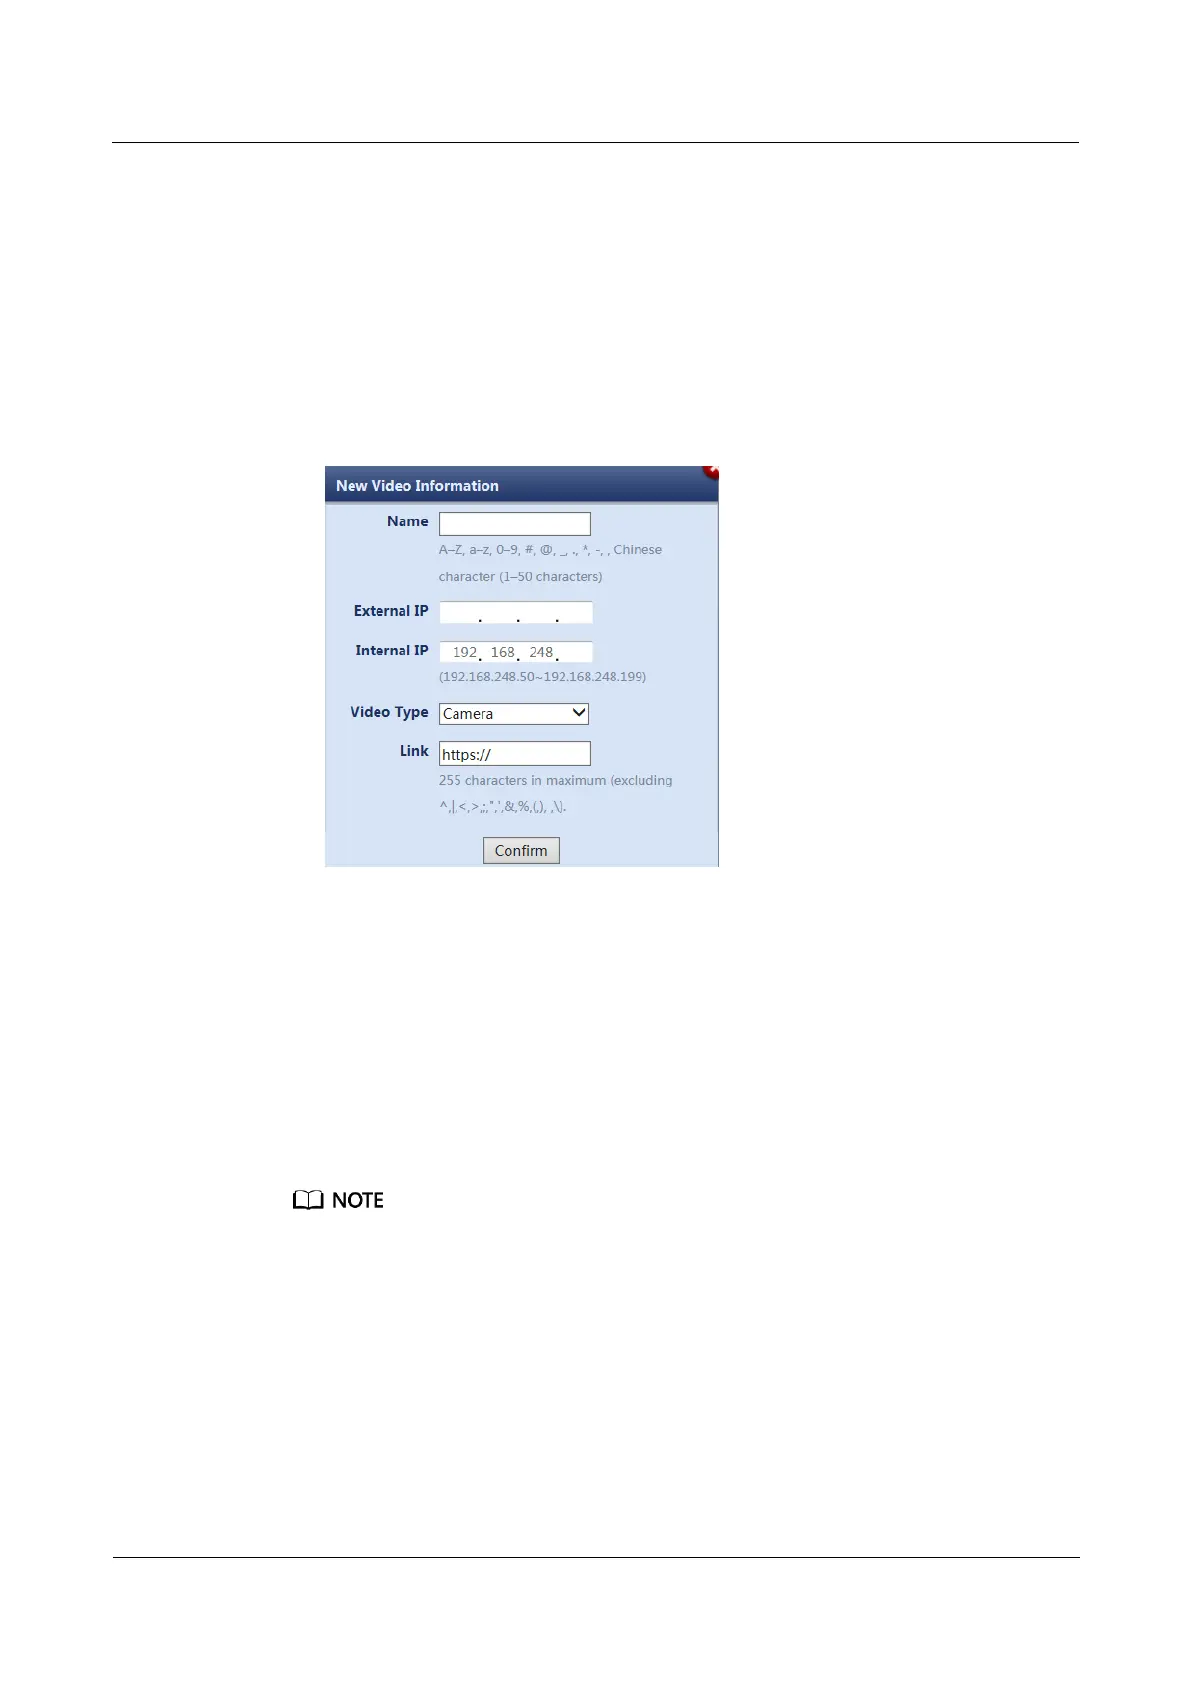
− Name: Enter the camera name (for example, Camera1).
− External IP: Enter the external IP address of the camera (The IP address assigned
by the network administrator prevails).
− Internal IP: Enter the internal IP address, that is, the found camera IP address:
192.168.248.50.
− Video Type: Select the video type based on the customer's device.
− Link: Enter the external IP address of the camera (for example, https://external IP
address of the camera).
Figure 6-12 Adding video information
4. Select the required camera, and click the link under Link (PC IP address and camera
external IP address should be in the same network segment) to access and log in to the
camera WebUI. Enter the preset user name admin and preset password HuaWei123, and
click Login.
5. (Optional) Choose Settings > Basic Configuration > Network Parameters, set Way to
obtain IP to Use the following IP address and set an IP address to the planned IP
address for the camera. The IP address should be in the range of 192.168.248.50 to
192.168.248.199.
Step 2 Click Confirm after video information is entered.
To perform Step 1.5, return to the ECC800 Video Management page. In the Video Information area,
select the camera added in Step 1.3 and click Modify. In the displayed New Video Information dialog
box, set Internal IP to the IP address planned in Step 1.5, and click Confirm.
Step 3 In the Video information list, click a link address under Link to go to the camera WebUI as
instructed.
Step 4 For details about how to commission IP cameras and set parameters for them, see the
documentation delivered with the equipment or obtain the documentation by referring to the
"Preparing Documentation" section.
1. Preview the site situation in real time and check the camera coverage through videos.
Adjust the lens if necessary.