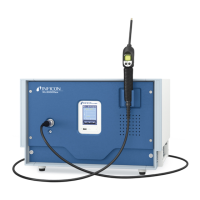
32 First Operation Check
iina74e 03.fm technical handbook(1408)
3.2.2 Internal Calibration
9 Proceed the internal calibration (See Chapter 7.2.1 Internal Calibration). For better
quantitative measurements please allow the unit to warm up (15 … 20 minutes).
• Press Calibration (Soft Key no. 5 Fig. 3-2/8) to get into the calibration menu.
•Select internal (Soft Key no. 4 Fig. 3-2/5) to choose the internal calibration.
•Select automatic (Soft Key no. 8 Fig. 3-2/11). The automatic procedure of the
internal calibration is started and takes about 30 seconds.
10 Press the STOP Button Fig. 3-2/13 until the message STAND-BY / VENTED appears
on the display. The inlet is vented now.
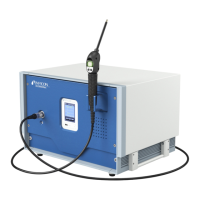
3.2.3 Verification
To verify the accuracy please proceed through the following steps. A test leak is
required. If a test leak is not available please continue with #16.
11 Remove the blind flange from the inlet port and connect the open helium test leak to
the inlet port.
12 Press the START Button Fig. 3-2/6 again. The inlet will be evacuated and the leak
rate of the test leak will be measured and displayed.
13 Press the STOP Button Fig. 3-2/13 to interrupt the measurement. The Stand-by
mode will be displayed.
14 Press the STOP Button Fig. 3-2/13 again until the message STAND-BY vented
appears an the display. The inlet is vented now.
15 Remove the helium test leak from the inlet port and put a blind flange onto the inlet
port again.
16 Switch off the leak detector by using the mains switch Fig. 2-6/8.
The first operation is finished.